background image

174


|


Appendix

General Precautions


Heed service markings


Except as explained elsewhere in the Operating or Service 

documentation, do not service any product yourself. Service 

needed on components inside these compartments should be 

done by an authorized service technician or provider.


Damage requiring service


Unplug the product from the electrical outlet and refer servicing to 

an authorized service technician or provider under the following 

conditions:

  Liquid has been spilled or an object has fallen into the 

product.

  The product has been exposed to rain or water.

  The product has been dropped or damaged.

  There are noticeable signs of overheating.

  The product does not operate normally when you follow the 

operating instructions.


Avoid hot areas


The product should be placed away from heat sources such as 

radiators, heat registers, stoves, or other products (including 

amplifiers) that produce heat.


Avoid wet areas


Never use the product in a wet location.


Avoid pushing objects into product


Never push objects of any kind into cabinet slots or other 

openings in the product. Slots and openings are provided for 

ventilation. These openings must not be blocked or covered.


Mounting Accessories


Do not use the product on an unstable table, cart, stand, 

tripod, or bracket. Any mounting of the product should follow 

the manufacturer’s instructions, and should use a mounting 

accessory recommended by the manufacturer.

Summary of Contents for 838

Page 1: ...Pocket User Manual ...

Page 2: ...n explosion or fire resulting in bodily injury or even death Users are advised not to use the equipment at refueling points such as service or gas stations and are reminded of the need to observe restrictions on the use of radio equipment in fuel depots chemical plants or where blasting operations are in progress Areas with a potentially explosive atmosphere are often but not always clearly marked...

Page 3: ...ing stations The use of this product is also prohibited in fuel storehouses chemical plants and locations containing explosives SAFETY FOR ENVIRONMENTS Do not use this product in gas stations fuel depots chemical plants or where blasting operations are in progress or in potentially explosive atmospheres such as fuelling areas below deck on boats fuel or chemical transfer or storage facilities and ...

Page 4: ...roduct should be operated in the suggested normal condition only to ensure the radiative performance and safety of the interference As with other mobile radio transmitting equipment users are advised that for satisfactory operation of the equipment and for the safety of personnel it is recommended that no part of the human body be allowed to come too close to the antenna during operation of the eq...

Page 5: ...arting Up 18 1 5 The Today Screen 21 1 6 Using the Start Menu 23 Chapter 2 Entering and Searching Information 2 1 Introduction 28 2 2 Using the Keyboard 29 2 3 Using Letter Recognizer 30 2 4 Using Block Recognizer 31 2 5 Using Transcriber 32 2 6 Using Phone Pad 36 2 7 Drawing and Writing on the Screen 39 2 8 Recording a Note 40 2 9 Searching Information 42 ...

Page 6: ...nizing Your Device 4 1 Using ActiveSync 56 4 2 Synchronizing Information 58 4 3 Synchronizing via Infrared and Bluetooth 60 4 4 Synchronizing Music Video and Pictures 62 Chapter 5 Managing Your Pocket PC Phone 5 1 Personalizing Your Pocket PC Phone 64 5 2 Adding and Removing Programs 73 5 3 Managing Memory 74 5 4 Backing Up Files 76 5 5 Protecting Your Device 78 5 6 Resetting Your Pocket PC Phone ...

Page 7: ... 5 Using Terminal Services Client 98 Chapter 7 Exchanging Messages and Using Outlook 7 1 E mail and Text Messages 102 7 2 MMS Messages 109 7 3 Pocket MSN Messenger 115 7 4 Calendar 117 7 5 Contacts 119 7 6 Tasks 121 7 7 Notes 123 Chapter 8 Experiencing Multimedia 8 1 Using Camera 126 8 2 Using Pictures Videos 137 8 3 Using Windows Media Player 142 ...

Page 8: ...ng Slide Shows with PowerPoint Mobile 154 9 4 Using ClearVue PDF 155 9 5 Using MIDlet Manager 156 9 6 Using ZIP 161 9 7 Using Voice Speed Dial 165 Appendix A 1 Regulatory Notices 170 A 2 PC Requirement to Run ActiveSync 4 x 178 A 3 Troubleshooting 179 A 4 Specifications 184 A 5 Index 186 ...

Page 9: ...1 1 Getting to Know your Device and its Accessories 1 2 Installing the SIM Card 1 3 Battery Information 1 4 Starting Up 1 5 The Today Screen 1 6 Using the Start Menu Chapter 1 Getting Started ...

Page 10: ...10 Getting Started 1 1 Getting to Know your Device and its Accessories Front top and left side view 15 2 1 4 7 14 11 9 10 12 13 3 5 6 8 ...

Page 11: ...ation LED 2 Bi color LED on the right side Green and Amber for GSM standby SMS message GSM network status notification battery charging status 6 Internet Explorer Press to launch Internet Explorer 7 Messaging Press to quick start your Messaging 8 Touch Screen Use to write draw or make a selection with the stylus 9 Left SOFT KEY Performs the command shown in the label above the button 10 Right SOFT...

Page 12: ...12 Getting Started Back bottom and right side view 2 4 7 5 6 8 1 3 11 12 13 9 10 ...

Page 13: ...Stylus and Stylus Slot Use the stylus to write draw or select items on the touch screen 7 Microphone Speak into the microphone when receiving or making a phone call or voice recording 8 Sync Connector Use this connector for synchronizing data or recharging the battery 9 Earphone Jack Allows you to listen to audio media or use the phone s hands free kit 10 Voice Command Press to start Voice Speed D...

Page 14: ...pe lowercase letters press the keys using your thumbs or fingers To use all uppercase letters press first then To type a single uppercase letter press and then press the corresponding key To enter a number or symbol labeled in blue color press and then press the corresponding key Press the Left Right SOFT KEY to perform the command shown in the label above the key Press to verify your data entries ...

Page 15: ...nction 1 AC adapter Recharge the device battery 2 USB cable Connect your device to a PC and synchronize data 3 Stereo headset Provide a volume control jog dial and a Send End button You can use the button to pick up and hang up incoming and outgoing calls Plug into Earphone Jack to listen to audio files ...

Page 16: ...tion within this device The customer should consult with their service provider for a replacement SIM card There may be a fees for this service 1 Make sure your device is turned off 2 Slide the cover latch to remove the battery cover 3 Pull the plastic ribbon to remove the battery Then insert the SIM card into the SIM card slot with its gold contacts facing down the cut off corner of the SIM card ...

Page 17: ...o your device s connecting ports and your voice data and other program usage patterns Battery life estimates approximations Standby time 150 200 hours Talk time Screen off 3 5 5 hours Warning To reduce risk of fire or burns Do not attempt to open disassemble or service the battery pack Do not crush puncture short external contacts or dispose of in fire or water Do not expose to temperatures above ...

Page 18: ...attery warning appears do the following Immediately save your current data Synchronize with your PC to charge the battery Turn off your device 1 4 Starting Up Turn the device on and off To turn on the device press the POWER button When you turn on the device for the first time you are asked to complete a calibration process For more information see Calibrate the device on next page To turn off the...

Page 19: ...aps follow these steps to re calibrate it 1 Tap Start Settings System tab Screen 2 On the General tab tap Align Screen and follow the instructions on the screen Buttons Lock It is possible to lock the buttons on the device so that the applications may not be accidentally launched Once you enable this feature only the Power button can turn on your device To configure the Buttons Lock settings Tap St...

Page 20: ...ing longer text files To change the orientation tap Start Settings System tab Screen and select the orientation you want Portrait mode Landscape mode To smooth the edges of screen fonts for many programs on the ClearType tab select the Enable ClearType check box To increase the readability or to see more content on the screen on the Text Size tab adjust the text size by moving the slider Note When...

Page 21: ...ngth Tap to configure the phone settings 4 Tap to control device ringer volume level 5 Displays the current time Tap and hold to change the clock mode Analog or Digital 6 Displays the current date Tap to setup date time alarm and more 7 Tap to set owner information 8 Your day at a glance with reminders Tap to open the related program messages tasks and appointments 9 Tap to open MSN sign in screen...

Page 22: ...ry low Battery charging Sound on Sound off Ringer in vibration mode Connection is active Connection is not active Synchronization in progress Synchronization error Indicates maximum signal strength No signal Phone is turned off No phone service Searching for phone service Voice call in progress Calls are forwarded Call on hold Missed call GPRS General Packet Radio Services available ...

Page 23: ...1 Tap to open the Today screen 2 Tap to start a program The items displayed in Start menu can be customized by tapping Start Settings Personal tab Menus 3 Tap to start a recently used program 4 Tap to view and select more programs that are installed in your device 5 Tap to change device settings 6 Tap to see a Help topic for the current screen Icon Description New e mail or text messages New voice...

Page 24: ...eeps track of your friends and colleagues Download Agent Provides information about the download status and the downloaded content from the Internet Excel Mobile Creates new workbooks or lets you view and edit Excel workbooks File Explorer Enables you to organize and manage files on your device Games Lets you play two pre installed games Bubble Breaker and Solitaire Help Enables you to see Help to...

Page 25: ...presentations Search Enables you to search contacts data and other information on your device SIM Manager Collects organizes and sorts the contact list stored in your SIM card Tasks Keeps track of your tasks Windows Media Enables the multimedia function on your device Voice Speed Dial You can record voice tags so that you can dial a phone number or launch programs simply by speaking a word Word Mo...

Page 26: ...26 Getting Started ...

Page 27: ...eyboard 2 3 Using Letter Recognizer 2 4 Using Block Recognizer 2 5 Using Transcriber 2 6 Using Phone Pad 2 7 Drawing and Writing on the Screen 2 8 Recording a Note 2 9 Searching Information Chapter 2 Entering and Searching Information ...

Page 28: ...r Recognizer Phone Pad and Transcriber By default the Input Panel icon appears on the menu bar to indicate which input method is currently selected The Input Selector arrow shown at the right side of the Input Panel icon opens a list of available input methods To show or hide Input Panel Tap the Input Panel icon on the menu bar Example Input Panel Keyboard Input Selector arrow Input Panel icon Ico...

Page 29: ...screen Keyboard The on screen Keyboard is available when text entry is possible You can enter text by tapping keys on the keyboard that are displayed on the screen To enter text using the on screen Keyboard 1 In a program tap the Input Selector arrow and tap Keyboard 2 Enter text by tapping keys on the on screen Keyboard To enlarge the on screen Keyboard 1 Tap the Input Selector arrow then tap Opt...

Page 30: ...s and symbols in the designated writing area Enter capital letters by writing in the ABC left area of the box Enter lower case letters by writing in the abc middle area of the box Enter numbers by writing in the 123 right area of the box Enter punctuation and symbols by tapping in either area of the box and then writing the desired character Note Letter Recognizer is available when text entry is p...

Page 31: ...tap Block Recognizer 2 Write characters numbers and symbols in the designated writing area Enter letters by writing in the abc left area of the box Enter numbers by writing in the 123 right area of the box Enter symbols and punctuation by tapping in either area of the box and then writing the desired character Note Block Recognizer is available when text entry is possible Tip For help with writing...

Page 32: ... Input Selector arrow and tap Transcriber The Transcriber introductory screen appears To write using Transcriber 1 In a program position the cursor where you want text to appear 2 Use the stylus to write anywhere on the screen The handwriting will be converted to text shortly after you lift the stylus from the screen To enter punctuation and symbols Transcriber comes with an on screen keyboard tha...

Page 33: ...rt returns spaces or tabs Do To Insert a paragraph return at the cursor The horizontal portion of the gesture must be at least two times longer than the vertical portion Insert a space at the cursor The horizontal portion of the gesture must be at least two times longer than the vertical portion Move the cursor one space back and erase any text Do the gesture by drawing a line from right to left O...

Page 34: ...ortion of the gesture must be at least two times longer than the vertical portion Tip You can also use the Enter Space and Backspace buttons on the Transcriber toolbar The Transcriber toolbar The Transcriber toolbar which appears at the bottom of the screen when Transcriber is open provides easy access to several tools Enter Space and Backspace buttons and Left and Right arrow buttons Tap To Open ...

Page 35: ...e calculator is activated A mode All letters are automatically capitalized If you are in A or 123 mode recognition returns automatically to the default mode once you lift the stylus Insert a space at the cursor Insert a paragraph return at the cursor Move the cursor one space to the left Move the cursor one space to the right Move the cursor one space back and erase any text Open Transcriber Help ...

Page 36: ...hen your device is in Camera mode or displaying the Today screen Use T9 input mode By default the device Phone Pad is in T9 mode It is the easiest and most convenient way to enter text in English because it has the capability to enter text in alphanumeric format As you tap alphanumeric keys on the keypad T9 tries to automatically match the letters you have selected with the most likely completed w...

Page 37: ...e is an alphabetic mode that allows you to manually enter individual letters to form words Use Numeric input mode Numeric input mode allows you to enter a number each time you tap a number key You can compile several numbers on the word list then tap to insert the numbers at the current cursor position on the screen Use the Options screen You can customize various behaviors for Phone Pad including...

Page 38: ...ck box to hide the wordlist after you choose a word Turn on screen tap sound Select this check box to play a sound each time you tap a key Automatically add a space after selecting a word Select this check box to add a space automatically at the end of every word Enable pop up menu for deleting user defined words Select this check box to display a pop up shortcut menu whenever you tap a word that i...

Page 39: ...es see Notes in Chapter 7 To set the input mode for Notes 1 Tap Start Programs Notes 2 In the note list tap Menu Options 3 In the Default mode box tap one of the following Writing if you want to draw or enter handwritten text in a note Typing if you want to create a typed note 4 Tap OK To write a note 1 Tap Start Programs Notes 2 In the note list tap New 3 Write your text on the screen 4 When finis...

Page 40: ... recording voice note or you can add a recording to a note For more information about creating changing or saving notes see Notes in Chapter 7 To create a voice note 1 Tap Start Programs Notes 2 Do one of the following To create a stand alone recording record from the note list To add a recording to a note create or open a note 3 If you do not see the Recording toolbar tap Menu View Recording Tool...

Page 41: ...cording press the RECORD button When you hear the beep begin your recording Release the button when you are finished To change recording formats 1 Tap Start Settings Personal tab Input 2 Tap the Options tab and in the Voice recording format list tap the format you want 3 Tap OK Note You can also change recording formats from within Notes In the note list tap Menu Options Global Input Options link ...

Page 42: ...as in online Help To search for a file or an item 1 Tap Start Programs Search 2 In Search for enter the file name word or other information you want to search for 3 If you have looked for this item before tap the Search for arrow and select the item from the list 4 In Type select a data type to help narrow your search 5 Tap Search 6 The My Documents folder and subfolders are searched 7 In the Result...

Page 43: ...3 1 Using the Phone 3 2 Making a Call 3 3 Receiving a Call 3 4 Smart Dialing 3 5 In call Options 3 6 Additional Dialing Information Chapter 3 Using Phone Features ...

Page 44: ...of the following Use the stylus and tap Start Phone Press the TALK button Directly dial the phone number by pressing numeric keys on the QWERTY keyboard Enter your PIN Most SIM cards are preset with a PIN personal identification number that is provided by your wireless service provider You need to enter the PIN whenever you use your device 1 Enter the preset PIN assigned by your wireless service p...

Page 45: ...ng Turn off flight mode Adjust the device volume 1 Tap the Speaker icon 2 Under Volume do the following Adjust the phone volume or device volume by moving the slider to the desired volume level Tap On Vibrate or Off to change both the system and ringer volume settings Notes To adjust the conversation phone volume you must do it during a call Adjusting the volume at another time will affect the ring...

Page 46: ...number tap the Back arrow to erase individual numbers one at a time To delete all the numbers tap and hold the Back arrow Make a call from Contacts Tap Start Contacts Tap the desired contact and press TALK twice once to send the number to the Phone keypad and once to dial the number You can also tap the desired contact in the contacts list and tap the phone number that you want to call Or tap and ...

Page 47: ...istory button 2 Tap Menu Filter and tap a category 3 Scroll to the desired contact or phone number and tap Call Make a call from Speed Dial Use Speed Dial to call frequently used numbers with a single tap For example if you assign a contact to the location 2 in Speed Dial you can simply tap and hold on the Phone screen to dial the contact s number Before you can create a Speed Dial entry the numbe...

Page 48: ... a call from SIM Manager SIM Manager allows you to view the contents of your SIM card transfer SIM phonebook entries to Contacts on your device and make a call from your SIM card 1 Tap Start Programs SIM Manager Wait for your SIM card contents to load 2 Tap and hold the name or phone number of the person you want to call and tap Call 3 3 Receiving a Call When you receive a phone call a message wil...

Page 49: ...ntact from the filtered list to dial Start Smart Dialing Open the Phone screen and tap the first digit of the number you want to dial and the Smart Dialing panel will appear automatically You can size the panel according to your need by tapping the arrow icon Normal Panel Enlarged Panel Smart Dialing starts looking for numbers that match the sequence you have entered Each time you tap an additiona...

Page 50: ...oll one page when you tap the arrows 4 Do one of the following When the correct contact is selected tap Talk To call a different phone number associated with the selected contact tap and hold the selected contact and tap the phone number you want to call Tap and hold the contact to pop up the shortcut menu To send a text message to the selected contact tap and hold the contact and tap Send Text Me...

Page 51: ...u can set up the scrolling options when pressing NAVIGATION up or down 3 5 In call Options To put a call on hold Your device notifies you when you have another incoming call and gives you the choice of rejecting or accepting the call If you are already on a call and accept the new call you can choose to switch between the two callers or set up a conference call between all three parties 1 Tap Answ...

Page 52: ... the conversation During a call tap Speaker On or press and hold TALK until the speakerphone turns on The speakerphone icon appears in the title bar To turn off the speakerphone tap Speaker Off or press and hold TALK again until the speakerphone turns off Warning To avoid damage to your hearing do not hold your device against your ear when the Speakerphone is turned on To mute a call You can turn ...

Page 53: ...ars The replaces the international prefix of the country that you are calling 2 Enter the full phone number you want to dial and tap Talk The full phone number includes country code area code without the leading zero if any and phone number SIM Tool Kit STK A SIM card must be inserted in your device in order to use this feature which allows you to access a range of information services provided by ...

Page 54: ...54 Using Phone Features ...

Page 55: ...4 1 Using ActiveSync 4 2 Synchronizing Information 4 3 Synchronizing via Infrared and Bluetooth 4 4 Synchronizing Music Video and Pictures Chapter 4 Synchronizing Your Device ...

Page 56: ...k E mail Contacts Calendar appointments and Tasks on your device directly with Exchange Server so that you can stay up to date even when your PC is turned off Exchange files between your device and your PC without synchronizing Select which types of information are synchronized and specify how much information is synchronized For example you can choose how many weeks of past Calendar appointments t...

Page 57: ...e Getting Started disc After Setup completes the Sync Setup Wizard automatically starts when you connect your device to the PC 2 Follow the instructions on the screen to complete the wizard In the Sync Setup Wizard do one or both of the following Create a synchronization relationship between your PC and the device Configure an Exchange Server connection to synchronize directly with Exchange Server...

Page 58: ...or a given information type in Settings for the information type You can set up your device to synchronize with more than one PC or with a combination of one or more PCs and Exchange Server When synchronizing with multiple computers the items that you synchronize will appear on all of the computers with which they are synchronized For example if you have set up synchronization with two PCs PC1 and...

Page 59: ...ollowing Select the check box for any items you want to synchronize If you cannot select a check box you might have to clear the check box for the same information type elsewhere in the list Clear the check box for any items you want to stop synchronizing 3 To stop synchronizing with one PC completely tap the PC and tap Delete Notes Outlook e mail can be synchronized with only one computer To chan...

Page 60: ...ilable synchronization settings select the type of information and tap Settings 6 Tap Finish 4 3 Synchronizing via Infrared and Bluetooth You can connect your device to the PC to synchronize using the local wireless technologies such as infrared IR and Bluetooth These technologies have almost similar but slightly differing requirements To synchronize with a PC via infrared 1 Follow the instruction...

Page 61: ... PC and that they are within close range 4 If this is the first time you have connected to this PC via Bluetooth you must first complete the Bluetooth wizard on the device and set up a Bluetooth partnership between your device and the PC For more information about enabling and configuring Bluetooth see Chapter 6 Note You can also use the Sync Setup Wizard to set up the device to synchronize remotely...

Page 62: ... is currently connected using Bluetooth or infrared you must end that connection before media can be synchronized Insert a storage card into your device 32MB or larger is recommended Set up a sync partnership between the storage card and Windows Media Player Change Media synchronization settings Once you select the Media information type in ActiveSync to be synchronized any of your favorite music ...

Page 63: ...rsonalizing Your Pocket PC Phone 5 2 Adding and Removing Programs 5 3 Managing Memory 5 4 Backing Up Files 5 5 Protecting Your Device 5 6 Resetting Your Pocket PC Phone Chapter 5 Managing Your Pocket PC Phone ...

Page 64: ...Today screen 3 On the Items tab select the items you want to appear on the Today screen Tip To change the order of items displayed on the Today screen tap the item and tap Move Up or Move Down To add a custom background image You can use one of your own pictures as the background image on the Today screen Be aware that pictures can affect the readability of text on the Today screen 1 Tap Start Set...

Page 65: ...coming appointments to show multiple appointments Clear the Display all day events check box if you do not want to display all day events To set options for displaying tasks on the Today screen If you have a large number of tasks you may want to specify the kind of tasks that are displayed on the Today screen 1 Tap Start Settings Personal tab Today 2 Tap the Items tab 3 Select Tasks and tap Option...

Page 66: ...cuts that you want You will see the added items after you synchronize Set Date Time Language Regional Options You can set up the correct date time language and regional settings according to your use To set the time and date 1 Tap Start Settings System tab Clock Alarms 2 Select the correct time zone and change the date or time Note During synchronization the time on your device is updated with the...

Page 67: ...e and regional settings The style in which numbers currency dates and times are displayed is specified in regional settings 1 Tap Start Settings System tab Regional Settings 2 On the Region tab select your region and language 3 The region you select determines which options will be available on the other tabs 4 To customize settings further tap the appropriate tabs and select the desired options P...

Page 68: ...ation are best practices they allow someone to return the device to you in case it is lost 1 Tap Start Settings Personal tab Owner Information 2 On the Identification tab enter your personal information Tip If owner information is displayed on the Today screen you can open and edit the information directly from the Today screen Just tap that section of the screen To choose how to be notified about e...

Page 69: ...xt under Repeat rate move the slider to adjust the speed To find the operating system version number The version of the operating system on your device will be listed near the top of the screen Tap Start Settings System tab About To get detailed device information Tap Start Settings System tab About The Version tab displays important device information including the type of processor and the amount...

Page 70: ...ry power For optimum conservation specify 3 minutes or less Use the AC adapter to plug your device into external power whenever possible especially when using a miniSD card or when using a modem or other peripherals Adjust the backlight settings To adjust the brightness of the backlight 1 Tap Start Settings System tab Backlight Brightness tab 2 Move the sliders right to increase the brightness or ...

Page 71: ...e the ring type You can change the way that you are notified of incoming calls For example you can choose to be notified by a ring a vibration or a combination of both 1 From the Phone keypad tap Menu Options Phone tab 2 In the Ring type list tap the desired option To change the keypad tone You can change the tone you hear when entering a phone number on the keypad If set to Long tones the tone is...

Page 72: ... change networks manually or automatically For more information about network settings see Help on your device To change phone network settings 1 Tap Start Settings Phone Network tab 2 By default your device displays the current network as offered by your service provider You can customize to set your preferred network To set preferred networks 1 Tap Start Settings Phone Network tab By default Net...

Page 73: ...e program into your PC You may see a single exe file a zip file a Setup exe file or several versions of files for different device types and processors Be sure to select a program designed for your device and processor type 2 Read any installation instructions or documentation that comes with the program Many programs provide special installation instructions 3 Connect your device and PC 4 Double clic...

Page 74: ...es unstable or the program memory is low To see how much memory is available Tap Start Settings System tab Memory On the Main tab the amount of memory allocated to file and data storage versus program storage is displayed as well as the amount of memory in use versus the available memory To see available storage card memory You can see how much memory is available on a storage card that is inserte...

Page 75: ... files tap Start Programs Search In the Type list tap Larger than 64 KB and tap Search In Internet Explorer Mobile delete temporary Internet files and clear history information For more information see Internet Explorer Mobile in Chapter 6 Remove programs you no longer use Reset your device To close a program In most cases programs automatically close to free needed memory however you can close prog...

Page 76: ...ee ActiveSync Help on your PC To copy files to a storage card 1 Push the storage card into the storage card slot until it clicks into place The card is secure when it does not protrude from the base 2 Tap Start Programs File Explorer and navigate to the appropriate folder 3 Tap and hold the file you want to copy and tap Copy 4 Tap the folder list labeled My Documents by default and tap Storage Card ...

Page 77: ...te To automatically save files on a storage card In the Word Mobile Excel Mobile and Notes programs you may find it helpful to save all new documents notes and workbooks directly on a storage card 1 From the program file list tap Menu Options 2 With a storage card inserted in the device in the Save to box tap the appropriate storage card to automatically save new items on the storage card 3 Tap OK N...

Page 78: ...p Change PIN Tip Emergency calls can be placed at any time without requiring a PIN To protect your device with a password You can help keep your data more secure by requiring a password every time the device is turned on 1 Tap Start Settings Personal tab Password 2 Select the Prompt if device unused for check box and in the box to the right select how long your device must be turned off before a p...

Page 79: ...b enter a phrase that will help you remember your new password but doesn t allow others to guess your password The hint will be displayed after the wrong password is entered four times 4 Tap OK To display owner information on the Today screen Having your contact information displayed on the Today screen on startup allows for easy identification of the device in case it is lost 1 Tap Start Settings...

Page 80: ...d reset also known as a full reset A hard reset should be performed only if a normal reset does not solve a system problem After a hard reset the device is restored to its default settings the way it was when you first purchased it and turned it on Any programs you installed data you entered and settings you customized on the device will be lost Only Windows Mobile software and other pre installed...

Page 81: ... 1 Turn off your device 2 Press and hold Comm Manager and Voice Command buttons at the same time then press RESET button 3 When the screen displays the message Press Send to restore then press Send button RESET button Voice Command button Comm Manager button ...

Page 82: ...82 Managing Your Pocket PC Phone ...

Page 83: ...6 1 Connecting to the Internet 6 2 Internet Explorer Mobile 6 3 Using Bluetooth 6 4 Using Comm Manager 6 5 Using Terminal Services Client Chapter 6 Getting Connected ...

Page 84: ...s of connection settings My ISP Internet Service Provider and My Work Network The My ISP settings are used to connect to the Internet while My Work Network settings can be used to connect to any private corporate network To connect to the Internet via ISP 1 Obtain the following information from your ISP ISP server phone number User name Password Access point name required for GPRS connection 2 Tap...

Page 85: ... My Work Network follow the instructions for each type of connection 4 Complete the connection wizard then tap Finish Note To start browsing the Internet or private network tap Start Internet Explorer To reset or modify the network card settings on your device 1 Tap Start Settings Connections tab Network Cards 2 Select the Network Adapters tab 3 In the My network card connects to list select the a...

Page 86: ...nd WINS settings Servers that require an assigned IP address may also require a way to map computer names to IP addresses DNS and WINS are the resolution options supported on your device 6 2 Internet Explorer Mobile Internet Explorer Mobile is a full featured Internet browser optimized for use on your mobile device To start Internet Explorer Mobile Tap Start Internet Explorer To choose a Home page...

Page 87: ...t start automatically click Sync To add a favorite 1 In Internet Explorer Mobile go to the page you want to add 2 Tap and hold the page and tap Add to Favorites 3 Confirm or change the name and select a folder for storing the favorite To delete a favorite or folder 1 In Internet Explorer Mobile tap Menu Favorites Add Delete tab 2 Select the item you want to delete and tap Delete To change the size ...

Page 88: ...e same layout and size as on a desktop computer which will require both horizontal and vertical scrolling To clear the History list 1 In Internet Explorer Mobile tap Menu Tools Options Memory tab 2 Tap Clear History To save a picture from a Web page 1 In Internet Explorer Mobile tap and hold the picture and tap Save Image 2 Do one of the following To save the picture in My Pictures on your device ...

Page 89: ...for the options you want and tap OK Tip To prevent Internet Explorer Mobile from accepting any cookies clear the Allow cookies check box To delete temporary Internet files Some Web content is stored as you view it to speed up the display of pages you frequently visit or have already seen You may want to delete these files to free storage space 1 In Internet Explorer Mobile tap Menu Tools Options Me...

Page 90: ...ties Create a dial up modem connection between your device and a Bluetooth enabled phone then transfer data using the Bluetooth phone as a modem To turn on or off Bluetooth on your device 1 On your device tap Start Settings Connections tab Bluetooth 2 Select the Turn on Bluetooth and Make this device discoverable to other devices check boxes 3 Tap OK Bluetooth modes Bluetooth on your device operat...

Page 91: ...lecting the Make this device discoverable to other devices check box also turns on Bluetooth Bluetooth partnerships A Bluetooth partnership is a relationship that you create between your device and another Bluetooth enabled device in order to exchange information in a secure manner Creating a partnership between two devices involves entering the same personal identification number PIN or Passkey o...

Page 92: ... You can however edit and enter a new name for the other device 8 Tap Finish To accept a Bluetooth partnership 1 Ensure that Bluetooth is turned on and in discoverable mode 2 Tap Yes when prompted to establish a partnership with the other device 3 Enter a passkey the same passkey that is entered on the device requesting the partnership to establish a secure connection The passkey must be between 1...

Page 93: ... to does not appear in the box make sure that it is turned on discoverable and within close range 10 meters of your device Use a Bluetooth device as a modem You can use a phone that has Bluetooth capabilities as a modem for your device To do so create a Bluetooth modem connection on your device and then send information to another device by using Bluetooth The device relays the information over th...

Page 94: ...nections list tap New and follow the remaining steps 8 Select the device name from the list and tap Next 9 Enter a passkey and tap Next 10 Enter the same passkey on the device and tap Finish 11 In the My Connections list tap the device and tap Next 12 Enter the phone number to dial for this connection and tap Next 13 Enter the required logon information for this connection and tap Finish You can s...

Page 95: ... Wi Fi function of Comm Manager on your device you need access to broadband Internet and the necessary access point or router that emits WLAN signals If you do not have access to broadband Internet consult your ISP before you try to enable Wi Fi Connect to a Wi Fi network 1 Tap Start Programs Comm Manager or tap the Comm Manger icon on the Today screen to open Comm Manager panel 2 Tap the Wi Fi bu...

Page 96: ...r to a position that optimizes performance with the least power consumption For example move the slider to left Best Performance to have the optimal WLAN performance move to right Best Battery to obtain the maximum battery usage To check the Wireless LAN status You can check the current wireless connection status from the following three screens of your device Today screen When you enable Wi Fi on...

Page 97: ...reless Networks screen Tap Start Settings Connections tab Network Cards This screen displays the wireless networks currently available and allows you to add new ones if available Note Wi Fi networks are self discoverable meaning that no additional steps are required for the phone to connect to a Wi Fi network It may be necessary to provide a username and password for certain closed wireless networ...

Page 98: ...p to fit on this screen check box if you want to use programs that have been specifically sized for use with your device 5 Tap Connect Navigate within Terminal Services Client When connected to a remote server you may notice that your device screen is displaying more than one horizontal and vertical scroll bar Use these scroll bars to either scroll the contents on the PC or to scroll the PC display ...

Page 99: ...r device If a network administrator has configured Terminal Services Client on your device to reconnect to disconnected sessions and you previously disconnected from a Terminal Server without ending the session the Terminal Services Client reconnects to that session Disconnect after ending a session 1 From the Terminal Services Client screen on your device tap Start Shutdown 2 Tap Log Off ...

Page 100: ...100 Getting Connected ...

Page 101: ...7 1 E mail and Text Messages 7 2 MMS Messages 7 3 Pocket MSN Messenger 7 4 Calendar 7 5 Contacts 7 6 Tasks 7 7 Notes Chapter 7 Exchanging Messages and Using Outlook ...

Page 102: ... Messaging 2 Tap Menu Tools New Account 3 Enter your e mail address then tap Next Auto configuration attempts to download necessary e mail server settings so that you do not need to enter them manually 4 Once Auto configuration has finished tap Next 5 Enter your name the name you want displayed when you send e mail user name and password tap Next Select the Save Password check box if you want to sav...

Page 103: ...t type Select POP3 or IMAP4 Account name Enter a unique name for the account such as Work or Home This name cannot be changed later Incoming mail server Enter the name of your e mail server POP3 or IMAP4 Outgoing mail server Enter the name of your outgoing e mail server SMTP Require SSL connection Select this to ensure that you always send e mail from this account using an SSL connection This enab...

Page 104: ...ose and send a message 1 In the message list tap Menu Switch Accounts and select an account 2 Tap New 3 Enter the e mail address or text message address of one or more recipients separating them with a semicolon To access addresses and phone numbers from Contacts tap To 4 Enter your message To quickly add common messages tap Menu My Text and tap a desired message 5 To check the spelling tap Menu S...

Page 105: ... reduce data transfer costs based on your rate plan To add an attachment to a message 1 In an open message tap Menu Insert and tap the item you want to attach Picture Voice Note or File 2 Select the file you want to attach or record a voice note To receive attachments An attachment sent with an e mail message or downloaded from the server appears below the subject of the message Tapping the attachm...

Page 106: ...rage card check box Downloading messages The manner in which you download messages depends the type of account you have To send and receive e mail for an Outlook E mail account begin synchronization through ActiveSync For more information see Synchronizing Outlook information in Chapter 4 To send and receive e mail messages for an e mail account that you have with an Internet Service Provider ISP ...

Page 107: ...from the device Inbox folder Tips If you want to read the entire message tap Menu Download Message while in the message window If you are in the message list tap and hold the message and tap Menu Download Message The message will download the next time you send and receive e mail This will also download message attachments if you selected those options when you set up the e mail account Managing f...

Page 108: ...ccount and you move e mail messages to a folder you created the link is broken between the messages on the device and their copies on the e mail server The next time you connect the e mail server will detect that the messages are missing from the Inbox folder on the device and will delete them from the e mail server This prevents having duplicate copies of a message but it also means that you will...

Page 109: ...can use MMS you have to configure the required settings on your device To access MMS Tap Start Messaging Note You can also send an MMS message directly from the Pictures Videos or Camera programs Do one of the following Select a picture from My Pictures and tap Menu Send In Select an account tap MMS Capture a photo or an MMS video clip using the camera and tap Send In Select an account tap MMS To ...

Page 110: ...choose a phone number or an e mail address from Contacts 4 Enter a subject for your message 5 Tap the Insert icon to select and send a photo or video clip By default it will open My Picture folder To navigate to any other folder containing pictures or videos tap the Down arrow corresponding to My Pictures folder 6 Select a photo or video clip When selected you can Tap to view it Tap to insert it i...

Page 111: ...mpose a message using a predefined template Note To save a message as a template open the message and tap Edit Save as Template To add predefined text strings to an MMS message You can instantly add text to any slide from a list of predefined words or phrases called Canned Text Tap to add a text string from the Canned Text list To edit or delete a phrase on the Canned Text list tap and hold a string...

Page 112: ...e Tap to discard it To record a new audio clip and add it to your MMS message tap This activates the recording control mode for a new audio clip Tap to start recording and to stop recording The new audio clip is automatically inserted into your MMS message To reply to an MMS message Tap Menu Reply to reply to the sender of the message or tap Menu Reply All to reply to all persons listed in To Cc a...

Page 113: ...pt or reject messages and request a delivery or read receipt You can also specify a resolution for images you send message delivery attempts and set up a server to access messages To configure MMS settings 1 Tap Start Messaging 2 Tap Menu MMS Configuration 3 Select any of the following Retrieve messages immediately Select this check box to download new messages automatically without being notified T...

Page 114: ... Signature field Attempts before giving up Select a value from this list to limit the number of times the program attempts to send your message Photo resolution Select a value from this list to choose the resolution for images that you send Decreasing the original resolution helps speed up the sending and receiving of messages Servers On this tab you can create a new server or select an existing o...

Page 115: ...tting up an Internet connection see Connecting to the Internet in Chapter 6 Note You must have either a Microsoft NET Passport or Hotmail account to use MSN Messenger If you have a Hotmail com or MSN com e mail address you already have a Passport To get a Passport account go to http www passport com To get a Hotmail account go to http www hotmail com To start MSN Messenger 1 Tap Start Programs Poc...

Page 116: ...lect a phrase in the list To block or unblock contacts To block a contact from seeing your status and sending you messages tap and hold the contact then tap Block from the shortcut menu To unblock a contact tap and hold the name of the blocked contact then tap Unblock from the shortcut menu To check your own Messenger status Tap and hold your own name at the top of the page Your current status is ...

Page 117: ...ear and Agenda To see detailed appointment information in any view tap the appointment To schedule an appointment 1 Tap Start Calendar 2 Tap Menu New Appointment 3 Enter a name for the appointment and enter information such as start and end times 4 To schedule an all day event in the All Day box tap Yes 5 When finished tap OK to return to the calendar Notes All day events do not occupy blocks of ti...

Page 118: ...equest will be sent to the attendees the next time you synchronize your device with your PC Note When attendees accept your meeting request the meeting is automatically added to their schedules When their response is sent back to you your calendar is updated as well To set a default reminder for all new appointments You can have a reminder automatically turned on for all new appointments you sched...

Page 119: ... contact information From there you can call or send a message If you use Outlook on your PC you can synchronize contacts between your device and PC To create a contact 1 Tap Start Contacts 2 Tap New and enter the contact information 3 When finished tap OK Tips If someone who is not in your list of contacts calls you or sends you a message you can create a contact from Call History or from the mess...

Page 120: ... and hold the contact To see a list of contacts employed by a specific company tap Menu View By Company Then tap the company name To copy SIM contact to Contacts If you have saved contacts on your SIM card you can copy them into Contacts on your device 1 Tap Start Programs SIM Manager 2 Select the desired item then tap Tools Save To Contacts To find a contact There are several ways to find a contac...

Page 121: ...e displayed in red To create a task 1 Tap Start Programs Tasks 2 Tap New enter a subject for the task and fill in information such as start and due dates priority and so on 3 When finished tap OK Tip You can easily create a short to do type task Simply tap the Tap here to add a new task box enter a subject and press ENTER If the task entry box is not available tap Menu Options and select the Show Ta...

Page 122: ...der for the reminder to take effect To show start and due dates in the task list 1 Tap Start Programs Tasks 2 Tap Menu Options 3 Select the Show start and due dates check box 4 Tap OK To locate a task When your list of tasks is long you can display a subset of the tasks or sort the list to quickly find a specific task 1 Tap Start Programs Tasks 2 In the task list do one of the following Sort the l...

Page 123: ...tand alone recording or embed a recording in a note To set the default input mode for Notes If you frequently add drawings to your notes you may find it helpful to set Writing as the default input mode If you prefer typed text select Typing 1 Tap Start Programs Notes 2 In the note list tap Menu Options 3 In the Default mode box tap one of the following Writing if you want to draw or enter handwrit...

Page 124: ...124 Exchanging Messages and Using Outlook ...

Page 125: ...8 1 Using Camera 8 2 Using Pictures Videos 8 3 Using Windows Media Player Chapter 8 Experiencing Multimedia ...

Page 126: ...MERA on your device The CAMERA button To exit the Camera Tap the exit icon Use the camera The camera on your device allows you to capture pictures and video clips by using various built in modes with flexibility The Camera mode is set to the Photo capture mode by default The lower right corner of the screen displays the active capture mode To switch to other capture modes do any of the following T...

Page 127: ...ntact Picture Theme Captures still images and places them within frames Sport Captures a sequence of still images 5 30 automatically for a short duration at a defined frequency Burst Captures a sequence of still images maximum 30 as long as CAMERA on the device or ENTER on the NAVIGATION is kept pressed File formats supported Using the above capture modes the camera in your device captures files i...

Page 128: ...o stop recording The NAVIGATION control Press NAVIGATION up or down to increase or decrease the zoom level Press NAVIGATION left or right to go to the previous or next sequential capture mode The CAMERA button Press the CAMERA button on the device to switch to Camera mode If already in Camera mode press once to take a still image or to start recording a video clip Camera mode icons Photo mode Vide...

Page 129: ...abled the timer icon will appear on the camera screen When you press the Enter button or CAMERA button to capture a still image it start to count down and then capture a still image after the assigned time 5 seconds or 10 seconds Previous Next Template button In Picture Theme mode tap the template selector icon to display the previous next sequential template Camera Settings Tap the tool icon to o...

Page 130: ... audio if desired To stop recording press CAMERA or ENTER again Your device displays the first frame of the captured video clip by default on the Review screen Before you capture a video clip you can specify the recording limit in terms of time and file size on the Camera Settings screen so that the recording stops automatically when the clip size reaches that limit You can set the capture format ...

Page 131: ...g a video clip you can view the image or video clip in the Review screen In addition you can send the image or video clip through e mail or delete it immediately Review mode icons Review screen of still image Review of video Back to Preview Tap to go back to Camera mode to capture an image Send Tap to send the captured image to someone via e mail Delete Tap to remove the captured image View in Pic...

Page 132: ...tor to zoom in a still image or an incoming video stream When the zooming limit is reached you will hear a beep To zoom out press NAVIGATION down or tap the Down arrow The main camera zoom range for a picture or a video clip depends on the capture mode and capture size Following is a summary Capture mode Capture size setting Zoom range Photo Scaled 1600 x 1280 No zooming available 1 3M 1280 x 1024...

Page 133: ...sizes available for certain capture formats also vary from one capture mode to another The zoom range has been calculated based on the following ratio 1 0x normal size no zooming 2 0x double enlargement 4 0x quadruple enlargement 8 0x octuple enlargement Use the Camera Settings screen While capturing a still image or video clip using any capture modes tap the tool icon to access the Camera Setting...

Page 134: ...tion Specify the maximum time or file size for recording Template Select a template Browse Navigate to a folder containing templates Burst count Select a count of automatic capturing Ambience Select an ambience type After you configure settins tap OK or Start Camera on the Camera Settings screen to go back to the Camera screen Use the Tools menu The Tools menu on the Camera Settings screen provide...

Page 135: ...ecording a video clip Keep backlight on while in viewfinder Select this check box to ensure that the backlight remains turned on while you view the incoming video stream overriding your device backlight settings Review after capture Select this check box to display the captured image immediately after you take a picture The Review screen provides options for performing various operations on the ne...

Page 136: ...n for capturing images Off 5 seconds or 10 seconds Selecting 5 seconds or 10 seconds delays the capturing by the specified time after you press CAMERA or ENTER Video Tab The options in this field are for configuring the advanced settings of the captured video files Prefix type and Prefix string By default the file name of each new captured video file is set to VIDEO followed by a sequential number fo...

Page 137: ...ce Copy the pictures from your PC or a storage card to the My Pictures folder on your device For more information about copying files from your PC to your device see ActiveSync Help on your PC Note You can also copy pictures from your PC to your device using a memory card Insert the memory card into the memory card slot on your device then copy the pictures from your PC to the folder you created o...

Page 138: ... slide show on your device Pictures are shown in fullscreen view with 5 second intervals between slides 1 Tap Start Programs Pictures Videos 2 Tap Menu Play Slide Show Note You can specify how pictures are scaled to optimize their display in a slide show Tap Menu Options then tap Portrait Pictures or Landscape Pictures on the Slide Show tab Tap anywhere on the screen to display the Slide Show tool...

Page 139: ...een and tap Menu Delete Tap Yes to confirm the deletion Tap and hold the thumbnail of the picture you want to delete then tap Delete To edit a picture or video clip You can rotate crop and adjust the brightness and color contrast of your pictures 1 Tap Start Programs Pictures Videos 2 Tap the picture you want to edit 3 Tap Menu Edit and do any of the following To rotate a picture 90 degrees counter...

Page 140: ... devices via e mail 1 First set up Messaging to send and receive messages 2 From the program select the item you want to send 3 Tap Menu Send and select one account such as Outlook E mail or MMS to send the attached item 4 A new message is created with the item attached 5 Enter the recipient name and subject and tap Send The message will be sent the next time you synchronize your device Note Pictu...

Page 141: ... the contact or navigate and tap Select to choose the contact from your Contacts list To use advance options 1 Tap Start Programs Pictures Videos 2 Select the picture for which you want to configure further settings 3 Tap Menu Options The Options screen appears allowing you to Resize a picture so that you can send it faster to someone using your e mails Configure the view settings during slide show...

Page 142: ...ile formats that are supported by this version of Windows Media Player File Formats Supported File Extensions Video Windows Media Video MPEG4 Simple Profile H 263 Motion JPEG 3GPP2 wmv asf mp4 3gp avi 3g2 Audio Windows Media Audio MP3 MIDI AMR Narrow Band AMR Wide Band AAC 3GPP2 wma mp3 mid midi rmi amr awb m4a gcp About the controls The following are available controls on the Windows Media Player...

Page 143: ...ayer has three primary screens Playback screen The default screen that displays the playback controls such as Play Pause Next Previous and Volume the album art window and the video window You can change the appearance of this screen by choosing a different skin Now Playing screen The screen that displays the Now Playing playlist This special playlist indicates the currently playing file and any fi...

Page 144: ...the currently playing file About Displays information about Windows Media Player such as the version number Now Playing screen menu When you are viewing the Now Playing screen the following commands appear on Menu This control Does this Library Displays the Library screen so you can choose a file to play Move Up Down Moves the selected item up down in the playlist order Remove from Playlist Delete...

Page 145: ...le About licenses and protected files Some content such as digital media files downloaded from the Internet CD tracks and videos have associated licenses that protect them from being unlawfully distributed or shared Licenses are created and managed by using digital rights management DRM which is the technology for securing content and managing its access rights Some licenses may prevent you from p...

Page 146: ... or artist name then tap Play Note To play a file that is stored on your device but is not in a library on the Library screen tap Menu Open File Tap and hold the item that you want to play such as a file or a folder then tap Play To play an item on a network Use the Open URL command to play a song or video that is stored on the Internet or on a network server 1 If you are not on the Playback scree...

Page 147: ... copy faster if the desktop Player is configured to automatically set the quality level for audio files copied to your device For more information see desktop Player Help on the PC Accessibility for people with disabilities Microsoft is committed to making its products and services easier for everyone to use Many accessibility features have been built into Microsoft products including features for...

Page 148: ...d that you can use to contact your subsidiary about the products and services available in your area Troubleshooting If you encounter a problem while using the Windows Media Player a number of resources are available to help you troubleshoot the issue For more information see the Troubleshooting Windows Media Player Mobile page at the Microsoft Web site http www microsoft com windows windowsmedia ...

Page 149: ... 1 Word Mobile 9 2 Excel Mobile 9 3 Viewing Slide Shows with PowerPoint Mobile 9 4 Using ClearVue PDF 9 5 Using MIDlet Manager 9 6 Using ZIP 9 7 Using Voice Speed Dial Chapter 9 Using Other Applications ...

Page 150: ...and placed in the Word Mobile document list You can easily rename the document with a more meaningful name and move it to another folder or a storage card To create a file 1 In Word Mobile tap New 2 You ll see either a blank document or template depending on what you ve selected as the default template 3 Enter text as desired 4 When finished tap OK to save the file Unsupported features in Word Mobile...

Page 151: ...e bullets Revision marks Table styles Underline styles Underline styles not supported by Word Mobile are mapped to one of the four supported styles regular dotted wavy or thick bold wide Legacy Pocket Word files You can open psw files in Word Mobile however if you edit a file you will need to save it in doc rtf txt or dot format The following features are not supported on the device however they are ...

Page 152: ...ars horizontal Borders Appear as a single line Cell patterns Patterns applied to cells are removed Fonts and font sizes Fonts not supported by your device are mapped to the closest font available The original font is listed on your device When the workbook is opened in Excel on your PC again the data is displayed in the original font Number formats Numbers formatted using the Microsoft Excel 97 co...

Page 153: ...se formulas to be resolved as NAME All hidden names are not hidden AutoFilter settings Are removed However you can use the AutoFilter command in Excel Mobile to perform similar functions If you have an AutoFilter applied to a worksheet that causes rows to be hidden the rows remain hidden when the file is opened in Excel Mobile Use the Unhide command to display the hidden rows Chart formatting All c...

Page 154: ...le is a viewer only File formats Files created in ppt format earlier than PowerPoint 97 and HTML files in htm and mht formats are not supported To start a slide show presentation 1 Tap Start Programs PowerPoint Mobile 2 In the presentation list tap the slide show you want to view 3 Tap the current slide to advance to the next slide If the presentation is set up as a timed slide show slides will adv...

Page 155: ...en a PDF file on your device 1 Tap Start Programs ClearVue PDF 2 Tap File Open to view a list of PDF files on your device 3 Tap the file you want to view To navigate through a PDF document You can do any of the following Tap the Up Down Right and Left arrow keys on the horizontal and vertical scrollbars to move to the desired direction of the page Press NAVIGATION up down right and left to move aroun...

Page 156: ...supports Java 2 Micro Edition J2ME The MIDlet Manager allows you to download Java applications such as games and tools that are specifically designed for mobile devices Although some Java applications and games have already been installed on your device the Java MIDlet Manager gives you the flexibility of installing and managing additional J2ME applications from the Internet To install MIDlets fro...

Page 157: ... Storage card My device Storage Card Note If the My MIDlets folder does not exist in My Documents you can create one with the same folder name However a folder named Storage Card automatically appears after you insert an storage card into your device To install a MIDlet MIDlet suite 1 Tap Start Programs MIDlet Manager Menu Install 2 Select the MIDlet MIDlet suite from the list 3 Tap Install from t...

Page 158: ... define custom groups You can also change the default settings for a MIDlet To customize the display settings 1 Tap Sort By at the top of the MIDlet Manager screen 2 Choose to sort by Name or by Size To change the display name of a MIDlet 1 Tap and hold a MIDlet and tap Rename 2 Enter a new name for the MIDlet 3 Tap OK Note You cannot change the name of a MIDlet suite To uninstall a MIDlet MIDlet ...

Page 159: ...uite 1 Tap and hold a MIDlet 2 Tap Security from the shortcut menu Note that some features may not be available for all MIDlets MIDlet suites Following are the security options that you can set for a running MIDlet MIDlet suite Security Option Description Net Access Determines whether a MIDlet MIDlet suite can access the Internet Local Connectivity Enables a MIDlet MIDlet suite to access services ...

Page 160: ...hat specified in the jad The installation information provided by the MIDlet manufacturer is inaccurate The jar manifest does not match the jad The installation information provided by the MIDlet manufacturer is inaccurate Invalid Java application descriptor jad There is a problem with the installation file provided by the MIDlet manufacturer Invalid Java archive jar There is a problem with the in...

Page 161: ...es for files that have the zip file extension and displays these files on the Archive List screen To start ZIP on your device 1 Tap Start Programs ZIP 2 Open a file using any of the following Select a file and tap File Open Archive Tap and hold a file and tap Open Archive Double tap a file View Archive List screen The Archive List screen displays the zip files on your device in the order they are f...

Page 162: ... Options Lets you set various view mode and compression level options for an archive file About ZIP Displays version and copyright information View menu Large Icons Displays all files as large icons Small Icons Displays all files as small icons List Displays all files in a list Details Displays all files in detail Note You cannot select multiple ZIP files Manage a ZIP file After you open a ZIP fil...

Page 163: ...nt archive file Recent Displays a list of recently opened archive files including the current file Action menu Add Lets you add files to the archive Extract Lets you extract files from the archive to the folder of your choice Delete Removes files from the archive Send via E mail Lets you send the archive file via e mail Send via Infrared Lets you send the archive file via infrared View Lets you vi...

Page 164: ...st Displays all files in a list Details Displays all files in detail Extended Displays all files in detail Sort by Sorts all files by the sort order you select Properties Displays information about the current file Status Pane Displays the status of the current file Toolbar Shows or hides the toolbar Tools menu Options Lets you set various view mode and compression level options for an archive fil...

Page 165: ... screen to open the Contacts list 2 Do one of the following Tap and hold the desired contact then tap Add Voice Tag Select the desired contact then tap Menu Add Voice Tag Tap the desired contact to open the contact s detailed screen then select a phone number and tap Menu Add Voice Tag 3 Select the phone number that you want to create a voice tag then tap the record button Select the desired phone...

Page 166: ...ete button to delete the voice tag The voice tag icon The control buttons Tip To improve the accuracy please record your voice in a quiet place Create a voice tag for a program 1 Tap Start Settings Personal tab Voice Speed Dial 2 On the Application tab it displays a list of all installed programs on your device 3 Create a voice tag for the desired program as described above 4 Now you can launch th...

Page 167: ...e program automatically Note If the system can not recognize your voice tag please speak clearly and reduce the surrounding noise Then try again To view and test the voice tags you have created 1 Tap Start Settings Personal tab Voice Speed Dail 2 On the Voice Tag tab it displays a list that contains all the voice tags you have created 3 Select an item in the list and you can do one of the followin...

Page 168: ...168 Using Other Applications ...

Page 169: ...A 1 Regulatory Notices A 2 PC Requirement to Run ActiveSync 4 x A 3 Troubleshooting A 4 Specifications A 5 Index Appendix ...

Page 170: ... 99 5 EC the EMC Directive 89 336 EEC and the Low Voltage Directive 73 23 EEC issued by the Commission of the European Community Compliance with these directives implies conformity to the following European Norms in parentheses are the equivalent international standards EN 60950 1 IEC 60950 1 Safety of InformationTechnology Equipment ETSI EN 301 511 Global system for mobile communications GSM Harm...

Page 171: ...eband transmission systems and 5 GHz high performance RLAN equipment AccessoriesModel NumberCradlePH15x ETSI EN 300 328 Electromagnetic compatibility and Radio spectrum Matters ERM Wideband Transmission systems data transmission equipment operating in the 2 4 GHz ISM band and using spread spectrum modulation techniques EN 50360 2001 Product standard to demonstrate the compliance of mobile phones w...

Page 172: ... harmful interference in a residential installation This equipment generates uses and can radiate radio frequency energy and if not installed and used in accordance with the instructions may cause harmful interference to radio communications However there is no guarantee that interference will not occur in a particular installation If this equipment does cause harm ful interference to radio or TV ...

Page 173: ...SAR level of the phone while operation can be well below the maximum value This is because the phone is designed to operate at multiple power levels so as to use only the power required to reach the network In general the closer you are to a wireless base station antenna the lower the power output Before a phone model is available for sale to the public it must be tested and certified to the FCC t...

Page 174: ...amaged There are noticeable signs of overheating The product does not operate normally when you follow the operating instructions Avoid hot areas The product should be placed away from heat sources such as radiators heat registers stoves or other products including amplifiers that produce heat Avoid wet areas Never use the product in a wet location Avoid pushing objects into product Never push obje...

Page 175: ...he correct external power source A product should be operated only from the type of power source indicated on the electrical ratings label If you are not sure of the type of power source required consult your authorized service provider or local power company For a product that operates from battery power or other sources refer to the operating instructions that are included with the product Handl...

Page 176: ...onal Commission on Non Ionizing Radiation Protection ICNIRP 1996 Ministry of Health Canada Safety Code 6 The standards include a substantial safety margin designed to assure the safety of all persons regardless of age and health In the U S and Canada the SAR limit for mobile phones used by the public is 1 6 Watts kg W kg averaged over one gram of tissue The standard incorporates a substantial marg...

Page 177: ...INCORRECTLY REPLACED TO REDUCE RISK OF FIRE OR BURNS DO NOT DISASSEMBLE CRUSH PUNCTURE SHORT EXTERNAL CONTACTS EXPOSE TO TEMPERATURE ABOVE 60 C 140 F OR DISPOSE OF IN FIRE OR WATER REPLACE ONLY WITH SPECIFIED BATTERIES RECYCLE OR DISPOSE OF USED BATTERIES ACCORDING TO THE LOCAL REGULATIONS OR REFERENCE GUIDE SUPPLIED WITH YOUR PRODUCT ...

Page 178: ...rosoft Windows Server 2003 x64 Edition Service Pack 1 Microsoft Windows XP Professional Service Packs 1 and 2 Microsoft Windows XP Home Service Packs 1 and 2 Microsoft Windows XP Tablet PC Edition 2005 Microsoft Windows XP Media Center Edition 2005 Microsoft Windows XP Professional x64 Edition Microsoft Outlook 98 Microsoft Outlook 2000 and Microsoft Outlook XP and Microsoft Outlook 2003 messaging...

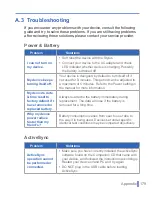
Page 179: ... minutes Refer to the Power setting in the manual for more information My device s date time reset to factory default if I have removed or replaced battery Always re attache the battery immediately during replacement The data will lose if the battery is removed for a long time Why my device power reduce faster than my friend s Battery consumption varies from user to user due to the way it is being...

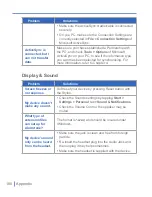
Page 180: ...tion refer to Chapter 4 Display Sound Problem Solutions Screen freezes or no response Soft reset your device by pressing Reset button with the Stylus My device doesn t make any sound Check the Sounds settings by tapping Start Settings Personal tab Sound Notifications Check the Volume Control the speaker may be muted What type of extension files can set up for Alarm tone The format is wav and shoul...

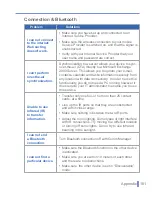
Page 181: ...rder to use this functionality you do not need a PC running however it does require your IT administrator to enable you to use this service Unable to use Infrared IR to transfer information Transfer only one file or no more than 25 contact cards at a time Line up the IR ports so that they are unobstructed and within close range Make sure nothing is between the two IR ports Adjust the room lighting...

Page 182: ...essage about Running out of memory pops up on the screen Reset your device by pressing Reset button with the Stylus Some ways to create space on your phone are Delete any unnecessary files such as old e mail image files or large video files Remove unneeded programs by selecting Settings from the Start menu and then Remove Programs Install the programs or store files onto the miniSD card Media Play...

Page 183: ...system will automatically search and sort the contact entries on the SIM card in Contacts and the phone numbers in Call History including incoming outgoing and missed calls Then you can select the desired number or contact from the filtered list to dial How do I enable the Speakerphone function During a call tap Speaker On or press and hold TALK until the speakerphone turns on The speakerphone ico...

Page 184: ...uch sensitive screen Resolution 240 x 320 with 65 536 colors Alignment Support Portrait and Landscape GSM EDGE Module Functionality GSM EDGE 850 900 1800 and 1900 Mode Dual GSM Internal Antenna Yes Camera Module Type CMOS 1 3Mega pixel with fixed lens Resolution 1600x1280 1280x1024 SXGA 640x480 VGA 320x240 QVGA 160x120 QQVGA 352x288 CIF 176x144 QCIF Physical Dimensions 109mm L x 58mm W x 23 7mm T ...

Page 185: ...ange for GSM standby SMS message GSM network status notification battery charging status Bi color LED on the left side Blue and green for Bluetooth system notification of powered up and ready to transmit radio frequency signal and Wi Fi status Audio Audio Controller AGC Microphone Speaker Built in Dual Hands free Headphone AMR AAC WAV WMA MP3 codec Connection Infrared IrDA SIR I O port USB miniSD ...

Page 186: ...ring MIDlet Security 159 Configuring MMS message settings 113 Connection 185 Connect to Internet 84 Connect to private network 85 Connect to Terminal Server 98 Contacts 119 Contacts search 42 Controls Lights 185 Cookies Security Settings Internet Explorer 88 Copy media files 147 copy pictures from a PC 137 Customizing the Start menu 66 D Deleting pictures videos 139 Desktop player 142 Digital Rights...

Page 187: ...troduction 28 K Keypad tone 71 L Letter Recognizer 30 Library screen 143 Licensed media 145 M Mail search 42 Managing Memory 74 Managing MIDlets MIDlet suites 158 Managing ZIP files 162 Media synchronization settings 62 MSN Messenger 115 N Navigating through PDF Documents 155 Network settings 72 Notes 123 Notes search 42 Now Playing screen 143 O On Screen Keyboard 29 Opening ZIP files 161 Opening a ...

Page 188: ...Starting ZIP 161 Synchronizing Information 58 Synchronizing music video and pictures 62 Synchronizing via Infrared and Blue tooth 60 Synchronizing with Exchange Server 59 Sync Setup Wizard 57 System Information 184 T Tasks 121 Tasks search 42 Temporary Internet files deleting Internet Explorer 89 Text size Web pages 87 Today Screen 21 Today screen settings 64 Transcriber 32 Troubleshooting Windows ...

Page 189: ...een 133 Using Wireless LAN Manager 95 Using ZIP 149 161 V Viewing Archive List Screen 161 Viewing MMS messages 112 Viewing pictures 137 Viewing slideshows 138 W Web browsing Internet Explorer 86 Web pages layout 88 Web pages showing pictures on 87 Web pages text size 87 Windows Media Player 142 Windows Media Player accessibil ity 147 Windows Media Player menus 143 Windows Media Player troubleshoot...

Page 190: ...r other household waste You are liable to dispose of all your electronic or electrical waste equipment by relocating over to the specified collection point for recycling of such hazardous waste Isolated collection and proper recovery of your electronic and electrical waste equipment at the time of disposal will allow us to help conserving natural resources Moreover proper recycling of the electroni...

Reviews: