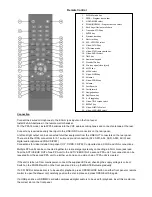
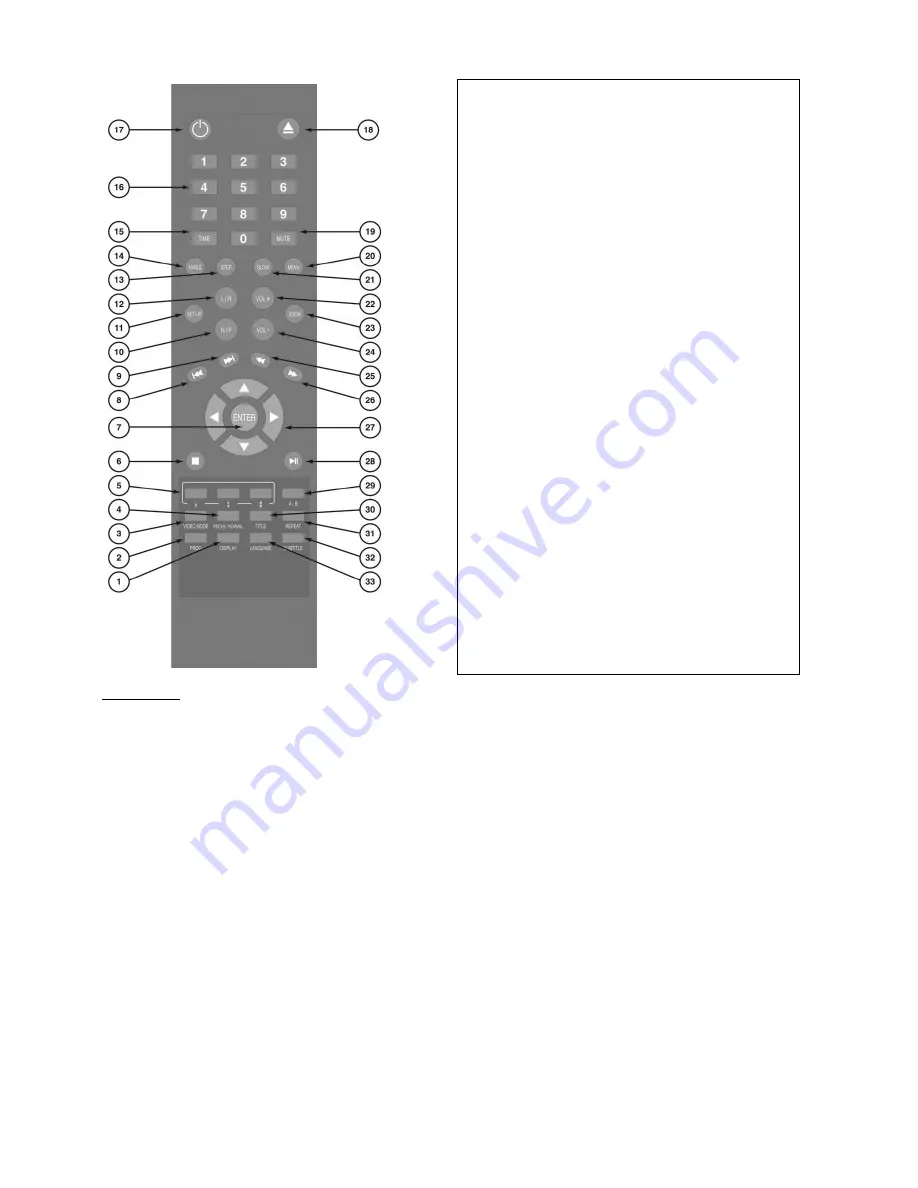
Remote Control
Connection
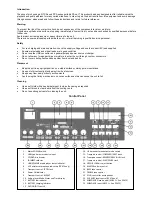
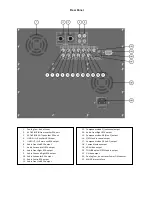
Connect the 2 wired microphones to the 6.3mm jack inputs on the front panel
Install 2 x AAA batteries in the remote control handset.
For the PPA74 model, install PP3 batteries into the VHF wireless microphones and connect antennae at the rear.
Connect any required auxiliary line input to the LINE IN RCA connectors on the rear panel.
A left and right output can be connected to further equipment from the LINE OUT connectors on the rear panel.
There are further RCA connectors for 5.1 surround sound connection (AFL, AFR, ASL, ASR, ASW, AC/C) and
digital audio (optical and COAX S/PDIF)
Connections for video include Component (Y/Y, CP/PB, CR/PR), Composite video, SVHS and VGA connections.
Multiple PPA units can be connected together to create a larger system by connecting a 6.3mm mono jack lead
from the ACTIVE BUS OUT of one PPA unit to the ACTIVE BUS IN of a second PPA unit. This connection can be
repeated from the second PPA unit to a further unit and so on until a chain of PPA units is created.
If the unit is to be run from mains power, connect the supplied IEC lead, checking the supply voltage is correct.
Switch on the POWER switch on the front panel and turn up the MASTER volume gradually.
If a CD, DVD or karaoke disc is to be used for playback, press OPEN/CLOSE button on either front panel or remote
control to open the drawer unit, carefully position the disc in place and press OPEN/CLOSE again.
If a USB pen drive or SD/MMC card with compressed digital audio is to be used for playback, insert this media into
the correct slot on the front panel.
1.
DISPLAY mode key
2.
PROG – Program track order
3.
VIDEO MODE select
4.
PSCAN/NORMAL – Progressive scan select
5.
Pitch keys – flat/natural/sharp
6.
Transport: STOP key
7.
ENTER key
8.
Previous track key
9.
Next track key
10.
N/P - NTSC/PAL select
11.
Video: SET-UP key
12.
L/R stereo mode
13.
Video: STEP frame search key
14.
Video: ANGLE select
15.
TIME key
16.
Numerical keypad
17.
Standby/On key
18.
Disc tray open/close (eject)
19.
MUTE key
20.
MENU select
21.
Video: SLOW key
22.
23.
Video: ZOOM key
24.
Volume -
25.
Fast Reverse
26.
Fast forward
27.
Navigation keys
28.
Play/Pause key
29.
A – B toggle key
30.
Video: TITLE screen select
31.
REPEAT key
32.
Video: SUBTITLE select
33.
Video: LANGUAGE select


