
ASSEMBLY INSTRUCTIONS IMPORTANT:
Always read these instructions before assembly,
We have assembled as much of the Quadrabyke as possible, and by following the
instructions for assembly and choosing the wheel configuration that will suit your childʼs
ability, your Quadrabyke with proper care and maintenance will give years of fun.
General Care and Maintenance:
Ensure that all nuts are secure and the brakes are
functioning correctly before use. Wash and lubricate as part of the regular care, Only use
genuine replacements parts - contact selling agent/dealer.
WARNING:
This Quadrabyke must be properly assembled and adjusted before use.
We cannot be held responsible for any damage caused by improper assembly, adjustment
and maintenance.
Important note:
This product is not suitable for children under the
age of 36 months, contains small parts. Age range 3 years and above.
1. Read the instructions first before assembling. Adult assembly is required.
See instructions over.
2. Please keep this instruction manual for future reference.
3. Quadrabyke is for home and garden use must not be ridden in traffic surroundings.
3. The Quadrabyke does not comply with the UK road regulations
5. Warning! A protective helmet should be worn when using this product!
6. Parents, Carers should ensure that children are properly supervised and instructed in
the use of the Quadrabyke, particularly safe use of the braking systems.
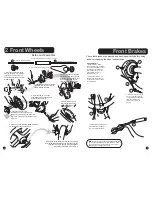
Right Hand Brake Lever operates the Front Brake and the Left Hand Lever
operates the Rear Brake. Extra distance will be required in wet weather.
7. Regular checks should be carried out on the Quadrabyke ensuring that
brakes, tyres, steering and wheels are in safe a condition.
8. Ensure the minimum saddle and handlebar height insertion marks are correct
- refer to ‘Seat’ & ‘Handlebar’ information over.
9. Ensure all fasteners are tightened correctly including the stem to steering locknut,
seat post to frame locknut at a 20Nm torque and wheels nuts secured firmly by hand.
10. Quadrabyke is suitable for a age range of 3yrs and above with a maximum
load capacity of 35kgs, including rider, luggage and Quadrabyke
11. Contains small parts not suitable for children under 36 months.
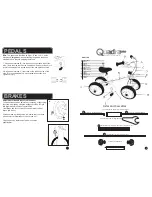
12. The chain requires no maintenance and is not adjustable, however the chain cover can
be opened by levering with a screwdriver, to allow access to clean and lubricate.
Remove all parts from the carton before assembly and refer to drawings contained within
the Owners Manual before assembling your Quadrabyke.
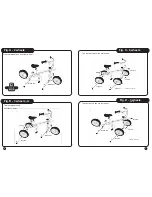
Handi Hint: After assembling the Handlebars and Saddle turn the bike over to
assemble the wheels.
2
11
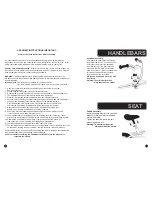
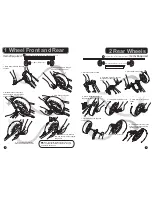
Handlebar Assembly
First, place the handlebar stem through
the plastic clamp cover. Then loosen the
front fork nut and insert the handlebar
stem into the top of the front fork tube,
make sure that the minimum insertion
mark is not visible. Tighten the clamp with
bolt, washer and nut. Slide the clamp
cover down over the fork clamp.
NB. Ensure handlebars are in line with
front forks.
Warning: The minimum insertion
mark should not be visible.
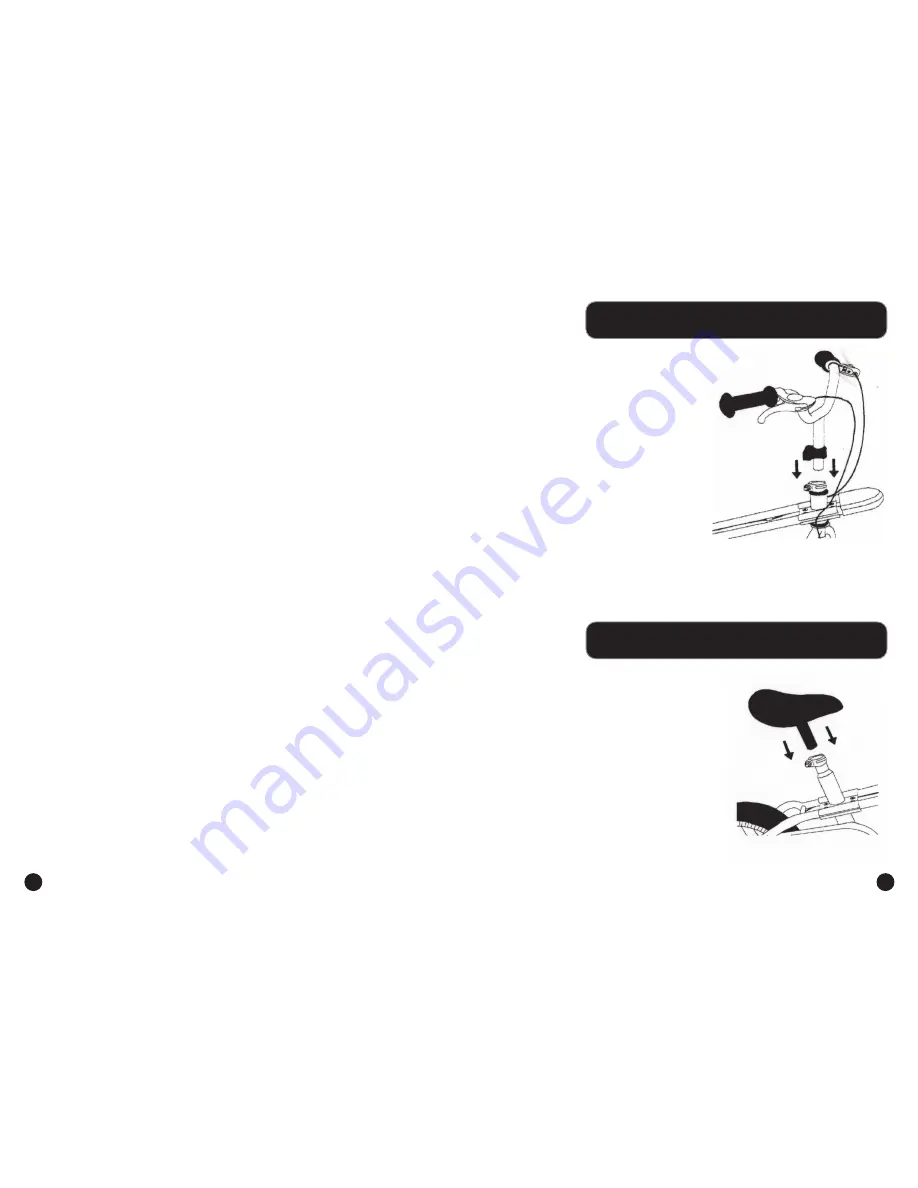
Saddle Assembly
Insert the saddle stem into the seat tube.
Make sure that the minimum insertion
mark is not visible.
Tighten the seat clamp with the bolt,
washer and dome nut.
Warning: The minimum insertion
mark should not be visible.
SEAT
HANDLEBARS


