background image

Summary of Contents for 1800 FreeStanding

Page 1: ...3 During operation ff any panof the stove starts to glow tne stove isin an overhid condition Close the air controls Comoletelv untl the alowna has stoooed OVERFIRING VOIDS WARRANTY 4 o o i ashe hould...

Page 2: ...Page 2 NOTES...

Page 3: ...ntenance Instructions 17 Creosote Formation Inspection Removal 17 Door Handle Glass Replacement Optional Blower lnstruction Baffle Removal Installation INSTALLATION MATERIALS NEEDED FOR YOUR SAFETY CH...

Page 4: ...idential Mobile Hm Reduced Note 2 12 305mm 24 610mm Zl 533mm lO 254mm lY 381mm lY 305mm Alcove Standard Note2 3 lY 305mm 24 610mm 21 533mm lO 254mm 15 38imm lY 305mm Minimumclearances to combustible m...

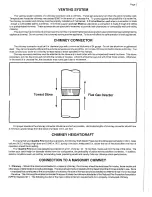
Page 5: ...h three metalscrews Otherwise in the event of a creosotefire the connector may come apart due to movement Toward Stove Flue Gas Directior Forproper operationthe chimney connectorshould beas short as p...

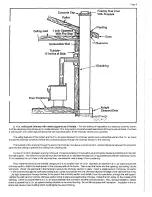
Page 6: ...fractory mortar There must be at least 112 in air space between the flue liner and the chimnev wail A eauivalent liner must be a listed chimney liner system or other approved meterial 518 Fireclay Flu...

Page 7: ...y must be at least3 feet higher than the highest pointwhere it passesthrough the roof and at least 2 feet higher than the highest part of the roof or structure that is within 10feet of the chimney mea...

Page 8: ...installa header andsill frame to maintainthe proper dimensions andto holdthe weight of the brick Wood Stud2 lnches Clearance FromChimney Wall Header 1 11 1 6 Thimble ASS 12 Inches of Brick Separation...

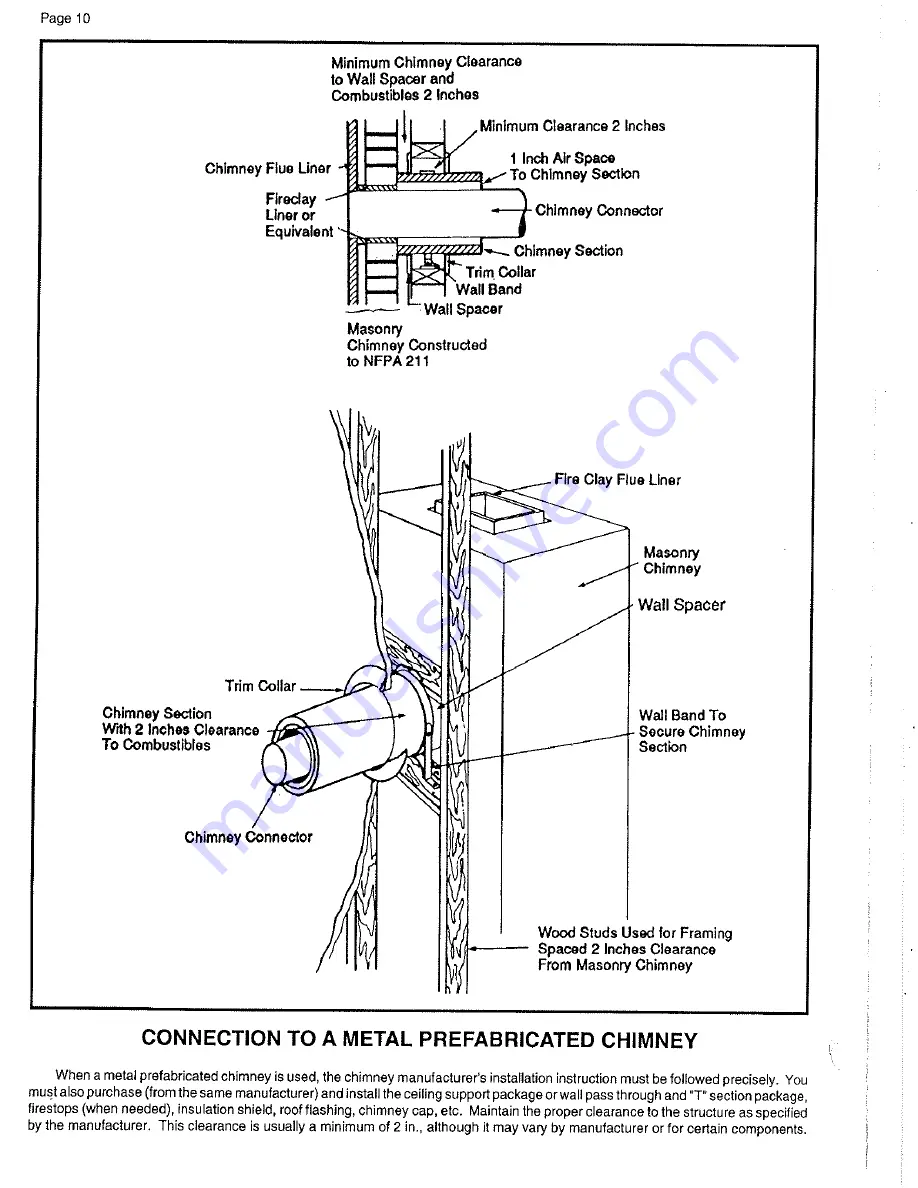
Page 9: ...valentsecuredwith refractorymoriar If it is necessaryto cut a hole in the chimney liner use extreme care to keep it from shattering First make the frame for the thimble beingsure it is nosmaller than...

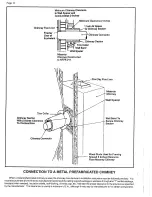
Page 10: ...METAL PREFABRICATED CHIMNEY When a metalprefabricatedchimney is used the chimney manufacturer sinstallationinstructionmust befollowedprecisely You mustalsopurchase fromthesamemanufacturer andinstallt...

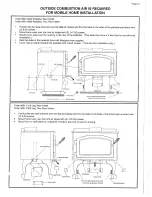
Page 11: ...te 3 Alcove maximumdepthof nomorethan 48 andan alcoveceiling heightof 84 withtop shield Part 831 1260 anddouble wall chimney connector alcove ceiling height is 72 This method of installationrequiresa...

Page 12: ...n 10feet of the chimney measured horizontally REMEMBER Followthe manufacturer sinstallation instructionand maintainthe manufacturer s specified clearance distances Listed LisledChimney Maintain 2 Inch...

Page 13: ...rear of the pedestal This plate may have a 3 feet tube for thru the wall installation I Seal the sides of the pedestal base with fiberglass rope suppled Cover hole in hearth beneath the pedestal with...

Page 14: ...emain inorderto providethe amount of heat neededto dry and rekindlethe next load of wood It is best to open the control for a short while before reloading This livens up the coalbed You should also br...

Page 15: ...W BURN RATE After a wood load has been burning on high for at least 15 minutes longer for very large pieces or wet wood close pull out the control gradually makingsure to Maintain Flames inthe stove I...

Page 16: ...way from combustible material pending final disposal FIREBRICK The firebox of the Quadra Fire stove is lined with high quality firebrick which has exceptional insulating properties There is no need fo...

Page 17: ...ney should be inspected at least twice monthly during the heating season to determine if a creosote build up has occurred If creosote has accumulates it should be removedto reducethe risk of a chimney...

Page 18: ...P HEAT SHIELD Parts Included 1 Top Shield 1 Trim Ring 2 S Clips Tools Needed No 2 Phillipsscrewdriver 1 Remove the four screws in the rear heat deflector 2 Attach the two S clips in rear heat shield o...

Page 19: ...rewdriver Turn screws counterclockwise 3 Lift glass frame pieces and glass out of the door frame 4 Lay new glass with fiberglass tape around it into door frame making sure the Quadra Fire outside logo...

Page 20: ...CHINESCREWS 6 PLACES FAN SPEED CONTROL ll WlTH COVER REMOVED HOLD THE BLOWERASSEMBLY UP SO THE OUTER SKIN CONTACTSTHE MOUNTINGBOLTS WERE 1 IM HEX HEAD BOLTS J PLACES Blower Switch Adjustments The blow...

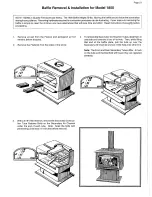
Page 21: ...tinguish all hot embers before disposal 2 Remove the Firebrick from the sides of the stove 4 To removethe Secondary CombustionTubes slide them to one side until one end is out of its hole Then while l...

Page 22: ...the shelf 7 Keep the Baffle tilted as you lift it out the door 6 With one end of the Baffle resting on the bottom firebricks and the other end against the side of the Firebox remove the Kaowool blanke...

Page 23: ...n ten 10 days of the purchase to Aladdin Steel Products Inc 401 North Wynne Colville WA 99114 The manufacturer is responsible only for repair or replacement of the defective part and may request that...

Page 24: ...ALAODIN STEEL PRODUCTS INC 401 N WYNNE COLVILLE WASHINGTON 99114...

Reviews: