
22
7027-802C
June 4, 2019
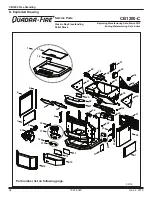
CB1200 Free Standing
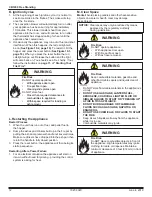
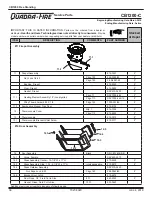
Exposed Heat Exchanger Tubes
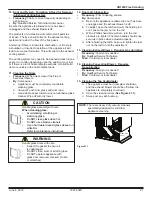
Drop Tube
Figure 22.1
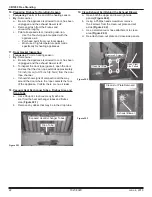
Clean-Out Plate Removed
Exhaust Blower
Clean-Out Plate
Remove 4 Screws
Open Right
Side Panels
Figure 22.2
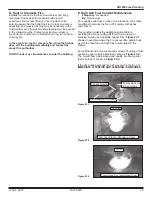
Figure 22.3
16. Preparing Firebox for Non-Burn Season
• Frequency:
Yearly at the end of the heating season
• By:
Homeowner
a.
Be sure the appliance is allowed to cool, has been
unplugged and the exhaust blower is off.
b. Remove all ash from the firebox and
vacuum thoroughly.
c. Paint all exposed steel, including cast-iron.
– Use the Touch-Up paint supplied with the
appliance;
or;
– Purchase paint from your local dealer.
– Must use a high-temperature paint made
specifically for heating appliances.
17. Door Gasket Inspection
• Frequency:
Prior to heating season
• By:
Homeowner
a.
Be sure the appliance is allowed to cool, has been
unplugged and the exhaust blower is off.
b.
To inspect the door rope (gasket), open the door
and see that the door rope extends approximately
1/8 inch (3mm) to 3/16 inch (9.5mm) from the door
rope channel.
c. It should show signs of compaction all the way
around the door where the rope contacts the face
of the appliance. Confirm there are no air leaks.
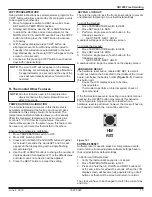
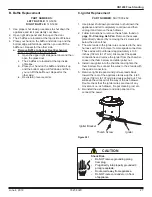
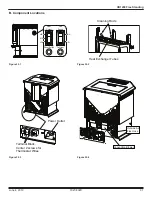
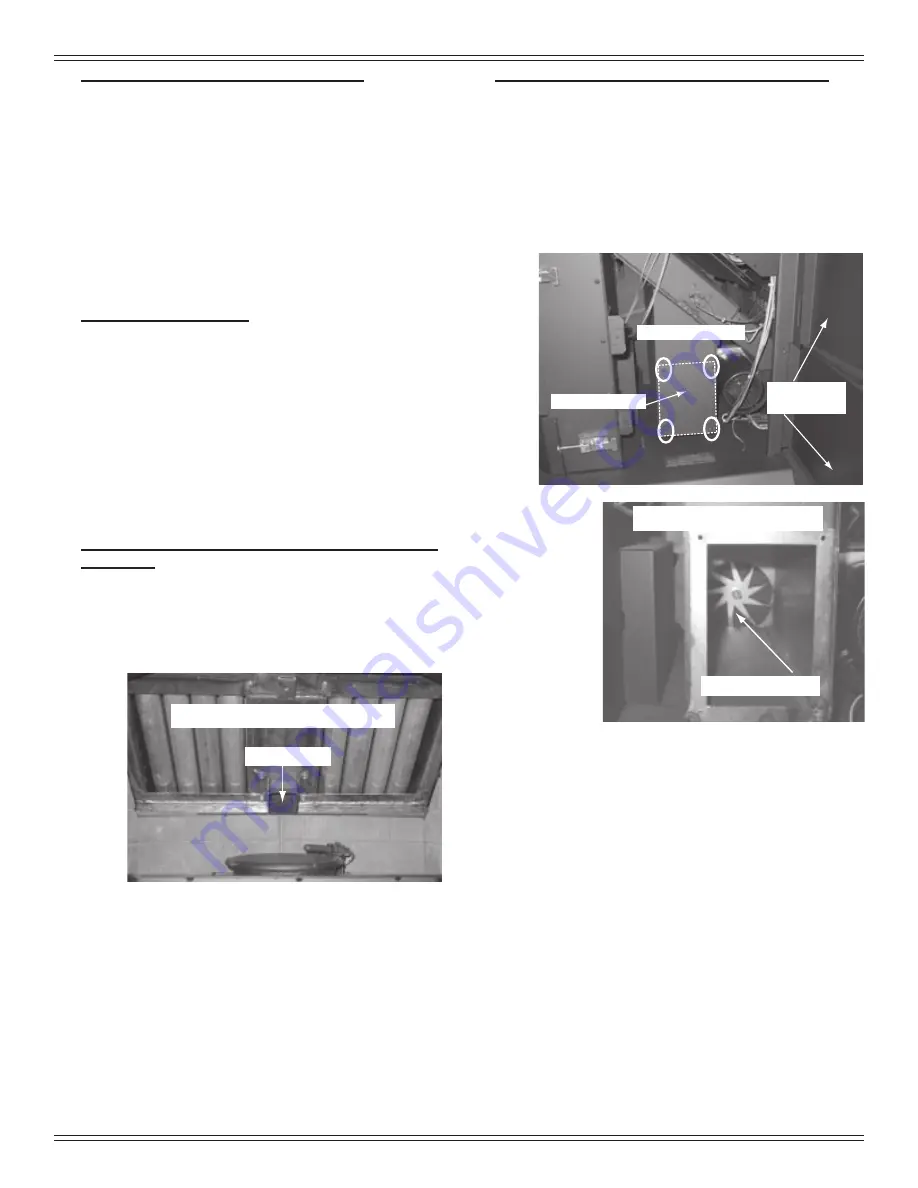
18. Vacuum Heat Exchanger Tubes, Firebox Area and
Drop Tube
a.
Use a Shop Vac to vacuum any fly ash and
soot from the heat exchanger tubes and firebox
area (
Figure 22.1)
.
b. Remove any debris that may be in the drop tube.
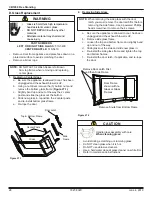
19. Clean Exhaust Exit Behind the Exhaust Blower
a.
Open both the upper and lower right side
panels
(Figure 22.2)
.
b.
Using a Phillips head screwdriver remove
the 4 screws from the clean-out plate and set
aside
(Figure 22.2)
.
c. Use a small vacuum hose attachment to clean
area
(Figure 22.3)
.
d. Re-attach clean-out plate and close side panels.