background image

September 1, 2008

Page  49

Quadra-Fire · Castile Gas Stove · 7023-111E

IMPORTANT:  

THIS IS DATED INFORMATION. The most current information is located on your dealer's VIP site. When 

ordering, supply serial and model numbers to ensure correct service parts. 

D.  

Service Parts List


(cont’d.

)


CASTILE GAS

Beginning Manufacturing Date: 5-19-05
Ending Manufacturing Date: 

Item 

#

Part Description

Alphabetical Order

SKU

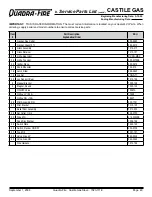
Gasket, Flue Collar

455-0660

Gasket, Glass 10 ft.

844-3010

8

Glass Assembly

7010-017

9

Glass Retainer

7010-121

35

Grille, Rear Vent

RV-CG-MBK

36

Grille, Top Vent

455-0370BK

33

Igniter, Piezo

230-0612

30

Knob, Rheostat

100-512

18

Latch, Draw

229-0640

15

Log Set

LOGS-T1

46

Log Support, Rear

7010-134

6

Magnet Bracket

7023-108

3

Magnet, Round

7000-140

ON/OFF Valve

15697A

Orifice, LP (.063)

17236

Orifice, NG (.106)

19837

48

Pilot Assembly, NG

230-1781

47

Pilot Bracket

7010-135

Relief Door Assembly

7010-003

26

Set Collar, 1/4 in.

229-0750

22

Side, Mill

413-0040BK

Snap Disc Bracket

7009-108

28

Switch Plate

7023-105

32

Switch, Rocker, ON/OFF

230-0730

37

Top, Mill

7021-101

24

Valve, Gas, LP

842-0230

24

Valve, Gas, NG

842-0240

Wire Harness

7010-156

Summary of Contents for Direct Room CASTILE-GAS-CSB

Page 1: ...esult causing property damage personal injury or death This appliance may be installed as an OEM installation in manufactured home USA only or mobile home and must be installed in accordance with the...

Page 2: ...er the floor beneath the stove must be stable level and strong enough to support the stove without a tipping hazard CHEMIN E Un coussinet non combustible de chemin e n est pas exig Cependant le planch...

Page 3: ...formation A Fuel Conversions 23 B Gas Pressures 25 C Gas Connection 25 Section 7 Electrical Information A Recommendation for Wire 27 B Connecting to the Appliance 27 C Standing Pilot Ignition System W...

Page 4: ...o NOT use this appliance if any part has been under water Immediately call a quali ed service technician to inspect the unit and to replace any part of the control system and any gas control which has...

Page 5: ...aust vent terminal for the horizontally vented gas fueled heating appliance or equipment The sign shall read in print size no less than one half 1 2 inch in size GAS VENT DIRECTLY BELOW KEEP CLEAR OF...

Page 6: ...on pro tective surface Remove log set and component pack from rebox Report to your dealer any parts damaged in shipment particularly the condition of the glass Read all of the instructions before sta...

Page 7: ...to all clearance speci cations in manual WARNING B Clearances Model A B C D E F Castile Gas Stove Inches 8 1 2 1 4 1 54 36 40 Millimeters 216 6 24 1372 914 1016 NOTE For actual appliance dimensions r...

Page 8: ...See Figure 4 4 for speci c clearances Opening HORIZONTAL OVERHANG VERTICAL WALL GAS DIRECT VENT TERMINATION CAP 12 X ROOF PITCH IS X 12 LOWEST DISCHARGE OPENING 2 FT MIN 20 INCHES MIN H MIN MINIMUM H...

Page 9: ...MIN RMAX 1 cap 3 feet 2 x Q ACTUAL 2 caps 6 feet 1 x Q ACTUAL 3 caps 9 feet 2 3 x Q ACTUAL 4 caps 12 feet 1 2 x Q ACTUAL QMIN termination caps x 3 RMA X 2 termination caps xQACTUAL N 6 inches non viny...

Page 10: ...ted to the ue WARNING Diagonal runs have both vertical and horizontal vent aspects when calculating the effects Use the rise for the vertical aspect and the run for the horizontal aspect See Figure 5...

Page 11: ...HIN A SHADED AREA ON THE GRAPH THE DAMPER MUST BE USED SEE INFORMATION ON DAMPER ADJUSTMENT ON PAGE 34 NOTES The maximum horizontal vent run is 20 ft 6m when the vertical vent rise is 10 ft 3m The min...

Page 12: ...ance flue outlet a twist lock adapter is built into the appliance at the factory Wall thickness may vary Remember to include wall thickness in minimum clearances when figuring venting lengths for your...

Page 13: ...14mm tall snorkel termination cap Follow the same installation procedures as used for standard horizontal terminations If the snorkel termination must be installed below grade i e basement application...

Page 14: ...mination caps may cause the vent pipe to be off center on flashing Ensure that proper clearances to combustible materials are maintained If you are not using an approved termination cap with a built i...

Page 15: ...2 Set the gas appliance in its desired location Drop a plumb bob down from the ceiling to the position of the appliance flue exit and mark the location where the vent will penetrate the ceiling Drill...

Page 16: ...r local codes Note that for steep roof pitches the vent height must be increased See Roof Pitch Table Figure 4 3 on page 8 In high wind conditions nearby trees adjoining rooflines steep pitched roofs...

Page 17: ...ING Any occupied areas above the first floor including closets and storage spaces which the vertical vent passed through must be enclosed The enclosure may be framed and sheetrocked with standard cons...

Page 18: ...he roof sheathing Step 5 Using tin snips cut the support box from the top corners down to the roofline and fold the resulting flaps over the roof sheathing Figure 5 18 Before nailing it to the roof ru...

Page 19: ...ly 3 in 76mm Connect the flex pipe to the retro connector and attach with sheet metal screws Step 6 Push the flex pipe back up into the ceiling support box center the retro connector and attach it to...

Page 20: ...0 ft 9m Sections of Flex Liner 4 Existing Masonry Chimney Type A Type B Type C Up Out Installation Type D Hearth Mount Figure 5 24 Type A B Co Axial to Co Linear Termination Cap Flashing 4 in 102mm Fl...

Page 21: ...e distance from the center of the chimney out through the wall Cut a piece of 4 in 102mm flex to this length extended to its nominal length Be sure to leave 2 3 in 51 76mm of flex above the existing c...

Page 22: ...Step 8 Secure the top adapter to the flashing Use three sheet metal screws through the side of the top adapter into the flange on the flashing Figure 5 28 Twist lock the high wind termination cap on t...

Page 23: ...crews one on each side of burner Retain fasteners for rein stallation Lift burner up and out of the rebox Figure 6 2 Pull off the pilot hood and set it aside Figure 6 3 Use a 5 32 in Allen wrench to r...

Page 24: ...ewdriver remove the three pressure reg ulator mounting screws A pressure regulator tower B and diaphragm C Figure 6 6 Ensure that the rubber gasket D is properly posi tioned and install the new HI LO...

Page 25: ...sachusetts installation must be performed by a licensed plumber or gas tter Leak test all gas line joints and the gas control valve prior to and after starting the replace Before making the gas connec...

Page 26: ...ngs and connections Do not use open ame After the gas line installation is complete all connections must be tightened and checked for leaks with a commercially available non corrosive leak check solut...

Page 27: ...ing thermostat see individ ual thermostat instructions to ensure proper operation of appliance 4 Use low resistance thermostat wire for wiring from igni tion system to the wall switch and thermostat 5...

Page 28: ...ervicing controls Wiring errors can cause improper and dangerous operation Verify proper operation after servicing Shock hazard Replace damaged wire with type 105O C rated wire Wire must have high tem...

Page 29: ...Figure 8 3 Remove the rear valve cover shield Remove the rear access plate and gasket by removing four screws Save the screws Place the cover shield and gasket over the top vent and attach with the f...

Page 30: ...nt the baf e from sliding out Figure 8 5 Install the vent pipe adapter with gasket or high temp silicone to the rear vent opening Figure 8 6 Place the grille gently into the opening on top of the appl...

Page 31: ...ront log 2 into place on burner Lean log back towards rear log until it ts into notch in rear log 1 2 3 Figure 8 13 Place left front log 3 into place on burner G Mineral Wool Improperly placed embers...

Page 32: ...glass door assembly NOTE The glass gasketing and frame must be replaced as a complete unit as supplied by the manufacturer Do NOT use substitute material J Blower Installation TOOLS REQUIRED 2 Phillip...

Page 33: ...blower to the power supply and turn on the gas supply NOTE This blower utilizes a snap disc to control ON and OFF operation When the correct temperature is reached the blower will automatically turn O...

Page 34: ...in the firebox and or on the outside of a house with a horizontal termination After adjustment tighten wingnut to lock in place K Damper Adjustment Let appliance warm up before adjusting Loosen screws...

Page 35: ...Check the baf e adjustment Ensure that there are no gas leaks Ensure that the glass is sealed and in the proper posi tion Ensure that the ow of combustion and ventilation air is not obstructed front...

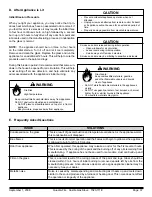
Page 36: ...he door of the appliance May need to remove face front first 5 Push in gas control knob slightly and turn clockwise to the OFF position Do not force 6 Wait five 5 minutes to clear out any gas Smell fo...

Page 37: ...f smoke detectors Smoke and odors may be irritating to sensitive individuals CAUTION Prevent accidental appliance operation when not attended Unplug or remove batteries from remote control if absent o...

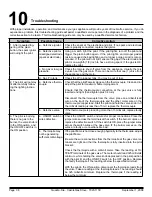
Page 38: ...hat the thermocouple connection at the gas valve is fully inserted and tight hand tighten plus 1 4 turn Disconnect the thermocouple from the valve place one millivolt lead wire on the tip of the therm...

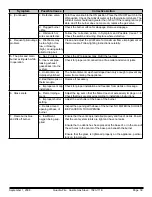
Page 39: ...leaking exhaust gases back into the system Check for proper vent connection at ue collar and all vent joints c Horizontal vent improperly pitched The horizontal vent cap should slope down only enough...

Page 40: ...ing scratching or slamming glass Do NOT use abrasive cleaners Use a hard water deposit glass cleaner on white lm Do NOT clean glass when hot Turn off appliance after 3 4 hours of operation and ALLOW T...

Page 41: ...nd repaint as neces sary 2 Replace appliance if rebox has been perforated Burner Ignition and Operation 1 Verify burner is properly secured and aligned with pilot or igniter 2 Clean off burner top ins...

Page 42: ...mensions are actual appliance dimensions Use for reference only For clearances refer to Section 3 Figure 12 1 Appliance Dimensions G A B C H I D E F Location Inches Millimeters Location Inches Millime...

Page 43: ...r pipe 9 1 4 in 235mm 6 1 2 in 165mm 6 5 8 in 168mm 17 24 in 432 610mm 11 3 4 in 298mm 5 3 4 in 146mm 6 5 8 in 168mm 6 3 8 in 162mm 6 1 2 in 165mm 9 5 8 in 244mm 6 5 8 in 168mm 6 1 2 in 165mm 6 3 8 in...

Page 44: ...th Galvanized SLP48M 46 DVA 48 4DT 48 4D4 SV4L48 48 Pipe Length Black SLP48 BK 46 DVA 48B 4DT 48B 4D4B SV4LB48 Adjustable Length 3 6 Black SLP6A BK Adjustable Length 3 6 Galvanized SLP6AM Adjustable L...

Page 45: ...ilicone Roof Flashing 4 to 8 pipes 6 RF4 8M Storm Collar SLP SCM 46DVA SC 4DT SC 4DSC SV4FC Trim Plate Black 4DT TP 4DFPB SV4LA Wall Support Band SLP HVSM 46 DVA WS 4DT WS B 4DWS SV4BM Wall Thimble Su...

Page 46: ...R CASTILE GAS NG LP Exploded Parts Diagram Beginning Manufacturing Date 5 19 05 Ending Manufacturing Date Part number list on following page 1 2 3 8 41 9 34 49 42 12 45 24 5 20 44 31 13 27 21 4 11 23...

Page 47: ...hield 30 Knob Rheostat 6 Magnet Bracket 31 Back Shield Upper 7 Door Assembly 32 Switch Rocker ON OFF 8 Glass Assembly 33 Igniter Piezo 9 Glass Retainer 34 Cover Plate 10 Air Shutter Assembly 35 Grille...

Page 48: ...upport Left 7010 141 12 Burner Support Right 7010 140 49 Burner with Neck Assembly 7010 006 21 Cast Mounting Bracket Top 7023 100 20 Cast Mounting Bracket Bottom 7023 101 19 Cast Mounting Hook 7023 10...

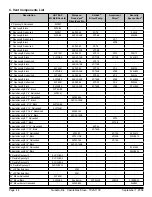
Page 49: ...ss Assembly 7010 017 9 Glass Retainer 7010 121 35 Grille Rear Vent RV CG MBK 36 Grille Top Vent 455 0370BK 33 Igniter Piezo 230 0612 30 Knob Rheostat 100 512 18 Latch Draw 229 0640 15 Log Set LOGS T1...

Page 50: ...Assembly BRICK T1 Rear Vent Conversion Kit Matte Black RV CG MBK Rear Vent Conversion Kit Porcelain Mahogany RV CG PMH Rear Vent Conversion Kit Powder Coat Sienna Bronze RV CG CSB Rear Vent Conversion...

Page 51: ...September 1 2008 Page 51 Quadra Fire Castile Gas Stove 7023 111E F Service and Maintenance Log Date of Service Performed By Description of Service...

Page 52: ...Page 52 September 1 2008 Quadra Fire Castile Gas Stove 7023 111E G Homeowner s Notes...

Page 53: ...September 1 2008 Page 53 Quadra Fire Castile Gas Stove 7023 111E G Homeowner s Notes...

Page 54: ...See Conditions Exclusions and limitations 9 01 08 CONDITIONS EXCLUSIONS LIMITATION OF LIABILITY This warranty applies to the original owner and is transferable up to two years from date of purchase t...

Page 55: ...chlorine uorine or other damaging chemicals the appliance is subject to prolonged periods of dampness or condensation or there is any damage to the appliance or other components due to water or weath...

Page 56: ...ration R This product may be covered by one or more of the following patents United States 4593510 4686807 4766876 4793322 4811534 5000162 5016609 5076254 5113843 5191877 5218953 5263471 5328356 53417...

Reviews: