


13
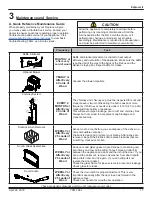
7061-196J
April 24, 2019
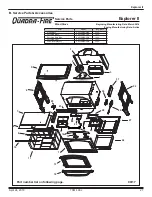
Explorer II
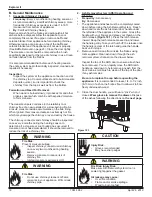
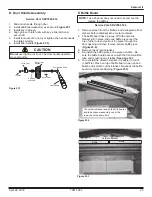
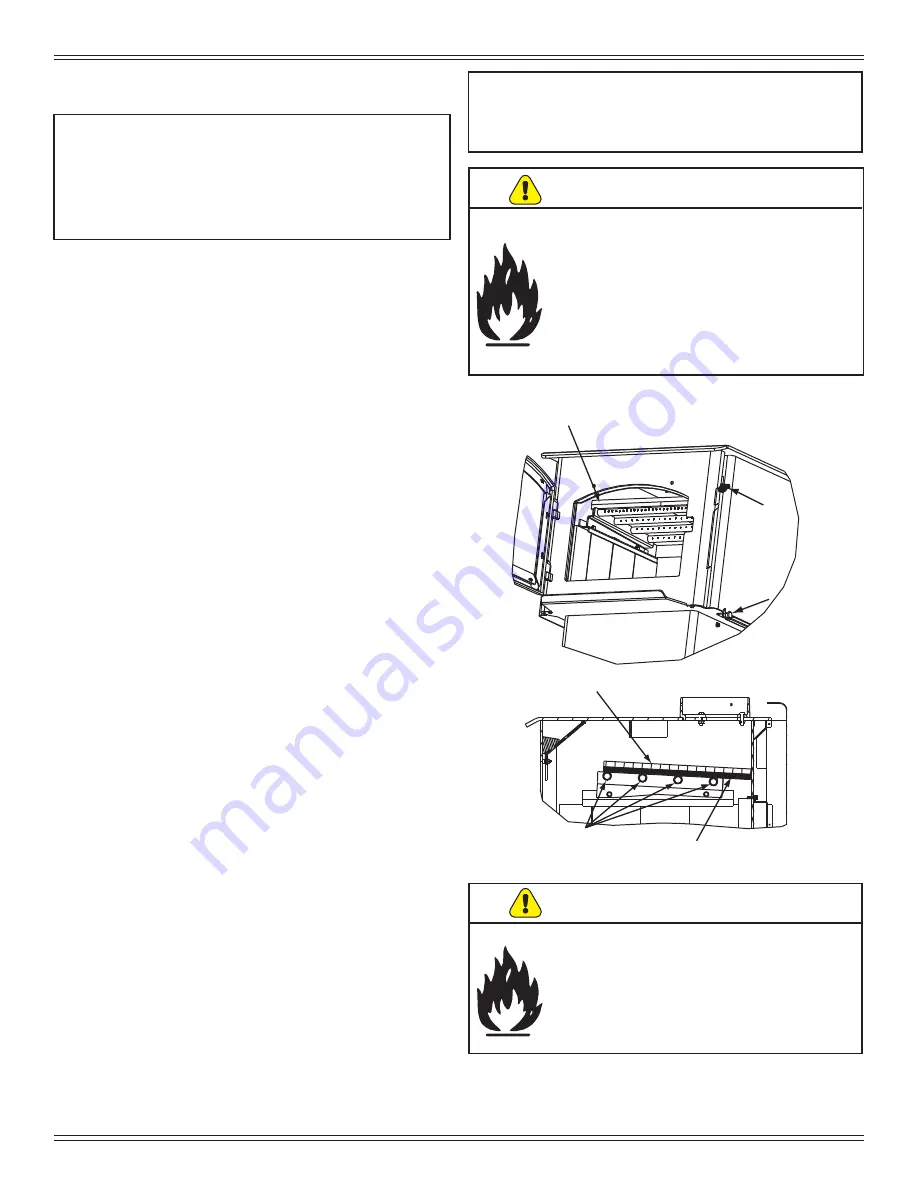
2 pc Baffle Board
Ceramic Blanket on Top
Tube Channels
Baffle Board even with front
tube & resting on all tubes
Burn Rate
Air Control
Start-Up
Air
Control
Figure 13.1
G. Building A Fire
Before lighting your first fire in the appliance:
NOTE:
The special high temperature paint that your
appliance is finished with will cure as your
appliance heats. You will notice an odor and
perhaps see some vapor rise from the appliance
surface; this is normal. We recommend that you
open a window until the odor dissipates and
paint is cured.
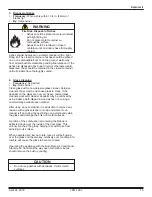
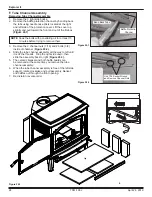
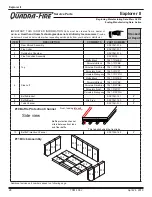
Figure 13.2
1.
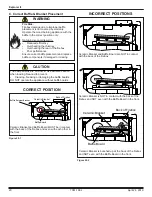
Confirm the baffle is correctly positioned. It should
be even with the front tube and resting on all tubes
(Figure 13.1 and 13.2).
2.
Remove all labels from glass and inside of appliance.
There are many ways to build a fire. The basic principle is
to light easily-ignitable tinder or paper, which ignites the
fast burning kindling, which in turn ignites the slow-burning
firewood. Here is one method that works well:
1.
Open the Burn Rate Air and ACC Controls fully (Refer to
page 7 Start-Up Guide).
2.
Place several wads of crushed paper on the firebox
floor. Heating the flue with slightly crumpled newspaper
before adding kindling keeps smoke to a minimum.
3.
Lay small dry sticks of kindling on top of the paper.
4.
Make sure that no matches or other combustibles
are in the immediate area of the appliance. Be
sure the room is adequately ventilated and the flue
unobstructed.
5.
Light the paper in the appliance. NEVER light or
rekindle fire with kerosene, gasoline, or charcoal lighter
fluid; the results can be fatal.
6.
Once the kindling is burning quickly, add several full-
length logs 3 inches (76mm) or 4 inches (102mm) in
diameter. Be careful not to smother the fire. Stack the
pieces of wood carefully; near enough to keep each
other hot, but far enough away from each other to allow
adequate air flow between them.
7.
Set the Burn Rate Air Control and activate the ACC
timer system.
8.
When ready to reload, It is best to fully open both
the Burn Rate Air and Start-up Air Controls
before
reloading
. This livens up the coal bed and reduces
excessive emissions (opacity/smoke). Open door
slowly so that ash or smoke does not exit appliance
through opening. Large logs burn slowly, holding a fire
longer. Small logs burn fast and hot, giving quick heat.
9.
As long as there are hot coals, repeating steps 6
through 8 will maintain a continuous fire.
NOTE:
•
Build fire on brick firebox floor.
•
Do NOT use grates, andirons or other methods to
support fuel. It will adversely affect emissions.
WARNING
Fire Risk.
Do NOT store wood:
•
Closer than required clearances to
combustibles to appliance
•
Within space required for loading or
ash removal.
Do NOT operate appliance:
•
With appliance door open.
• With ash removal system door open.
Fire Risk.
•
Do NOT burn wet or green wood.
•
Store wood in dry location.
•
Stack wood so both ends are exposed to
air.
Wet, unseasoned wood can cause
accumulation of creosote.
WARNING


