


22
7061-196J
April 24, 2019
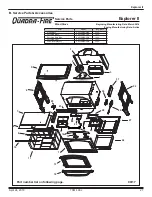
Explorer II
5
Service Part Replacement
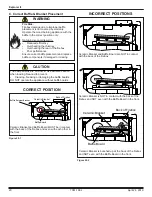
A. Glass
B. Firebrick
Service Part: SRV7061-004
Replace the firebrick if they become crumbly and/or if there
is a 1/4 inch (6.35mm) gap between the bricks.
Inspect the firebrick after each ash removal.
The firebox is lined with high quality firebrick, which has
exceptional insulating properties. There is no need to use a
grate; simply build a fire on the firebox floor. Do not operate
appliance without firebrick.
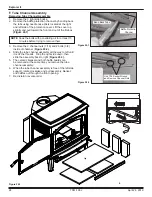
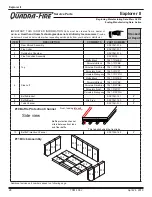
1.
After the coals have completely cooled, remove all old
brick and ash from appliance and vacuum firebox.
2.
Remove new brick set from box and lay out to
diagram shown.
3.
Lay bottom bricks in appliance.
4.
Install rear bricks on the top of the bottom bricks. Slide
top of bricks under clip on back of firebox wall and push
bottom of brick back.
5.
Install side bricks. Slide top of brick under clips on side
of firebox and push the bottom of the brick until it is
flush with the side of the appliance.
WARNING
Injury Risk.
•
Use only glass specified in manual.
• DO NOT REPLACE with any
other material.
Handle glass assembly with care.
When cleaning glass:
Glass
Assembly
CAUTION!
•
Avoid striking, scratching or slamming glass.
•
Do NOT clean glass when hot.
•
Do NOT use abrasive cleaners.
•
Use a hard water deposit glass cleaner on white film.
•
Use commercial oven cleaner on heavier deposits.
•
Remove all residue of oven cleaner or will
permanently stain glass on next firing.
Refer to maintenance instructions.
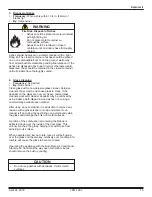
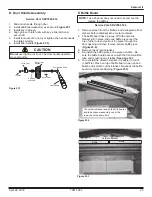
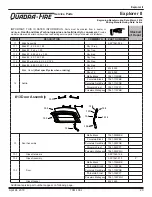
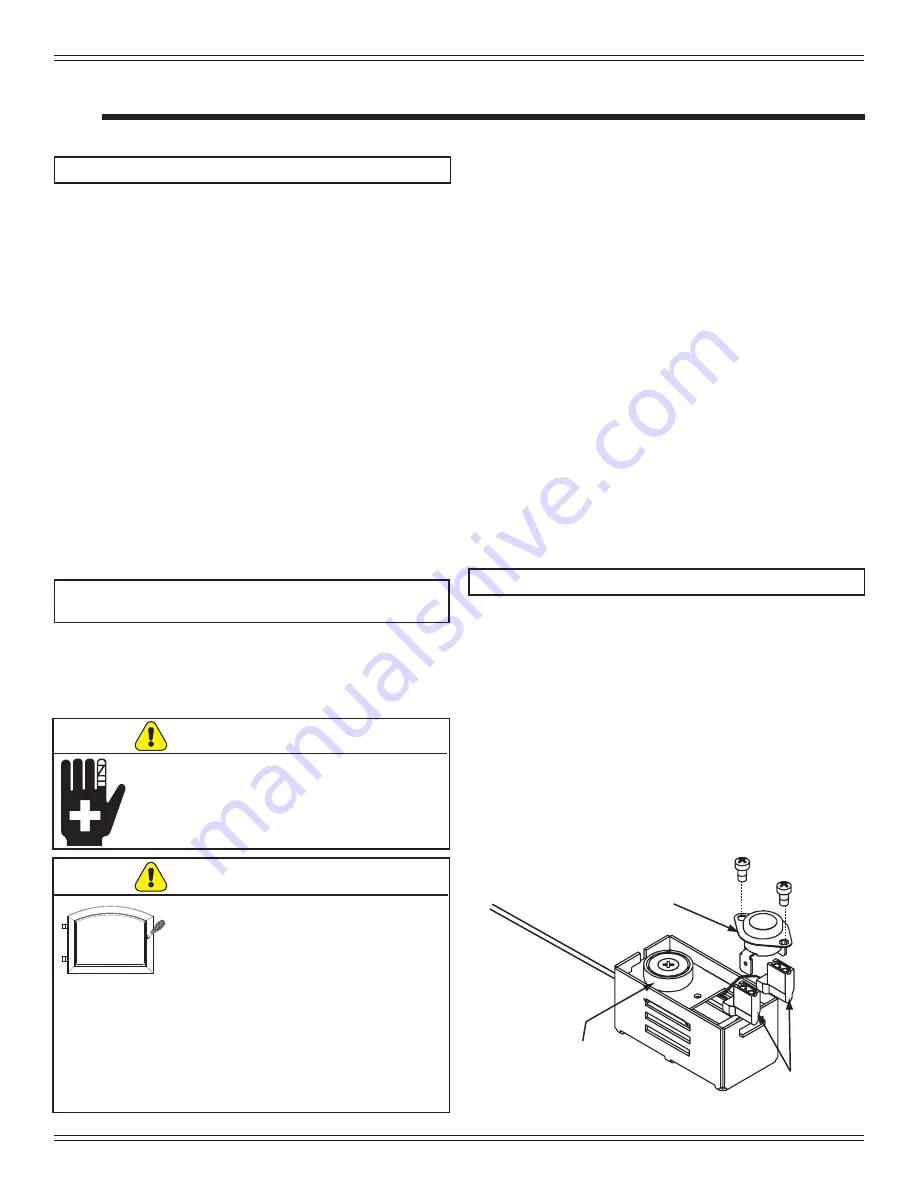
Magnet
Spade
Connectors
Snap Disc
Figure 22.1
C. Snap Disc
Service Part: SRV7061-013
1.
Ensure that the fire is out and the appliance is cool to
the touch.
2.
Protect a table or counter top with padding or towels.
Protect your hands and wear gloves to prevent injury.
3.
Remove the door with the broken glass by lifting the
door up and off of the hinges.
4.
Lay door face down on a table or counter making sure
the handle hangs over the edge so the door lays flat, on
a soft surface.
5.
Remove the screws from each glass retainer and
remove the glass. (If screws are difficult to remove,
soak with penetrating oil first).
6.
Center the glass with edges evenly overlapping the
opening in the door, (i.e. same space top and bottom,
left and right sides).
7.
Replace the glass retainers. Be careful not to cross
thread the screws.
8.
Tighten each retainer just a few turns until each is
secured. Check again for centering of glass in door
frame. Continue to tighten each retainer alternately, a
few turns at a time, until the glass is secure.
NOTE: Replace with 5mm ceramic glass only.
NOTE:
DO NOT OVER TIGHTEN RETAINERS - can
cause glass to break.
9.
Replace the door on the appliance.
Quadra-Fire appliances are equipped with ceramic super
heat-resistant glass, which can only be broken by impact
or misuse.
NOTE: Included with optional blower
Service Part: SRV230-0470
1.
Locate the snap disc bracket assembly at the bottom
left rear corner of the appliance.
2.
A magnet holds the bracket to the appliance. Pull the
bracket down away from the appliance to expose the
snap disc.
3.
Pull the snap disc and spade connectors up and out of
bracket as shown in
Figure 22.1
4.
Using a Phillips head screw driver, remove the 2
screws from the snap disc and then remove the snap
disc from the spade connectors. Replace with new
snap disc and re-connect to spade connectors.
5.
Push the snap disc and spade connectors back inside
bracket and re-attach the bracket to the appliance.


