Page 0
7034-106F
August 13, 2009
R
Mt. Vernon Pellet Stove (AE)
R
R
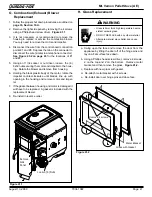
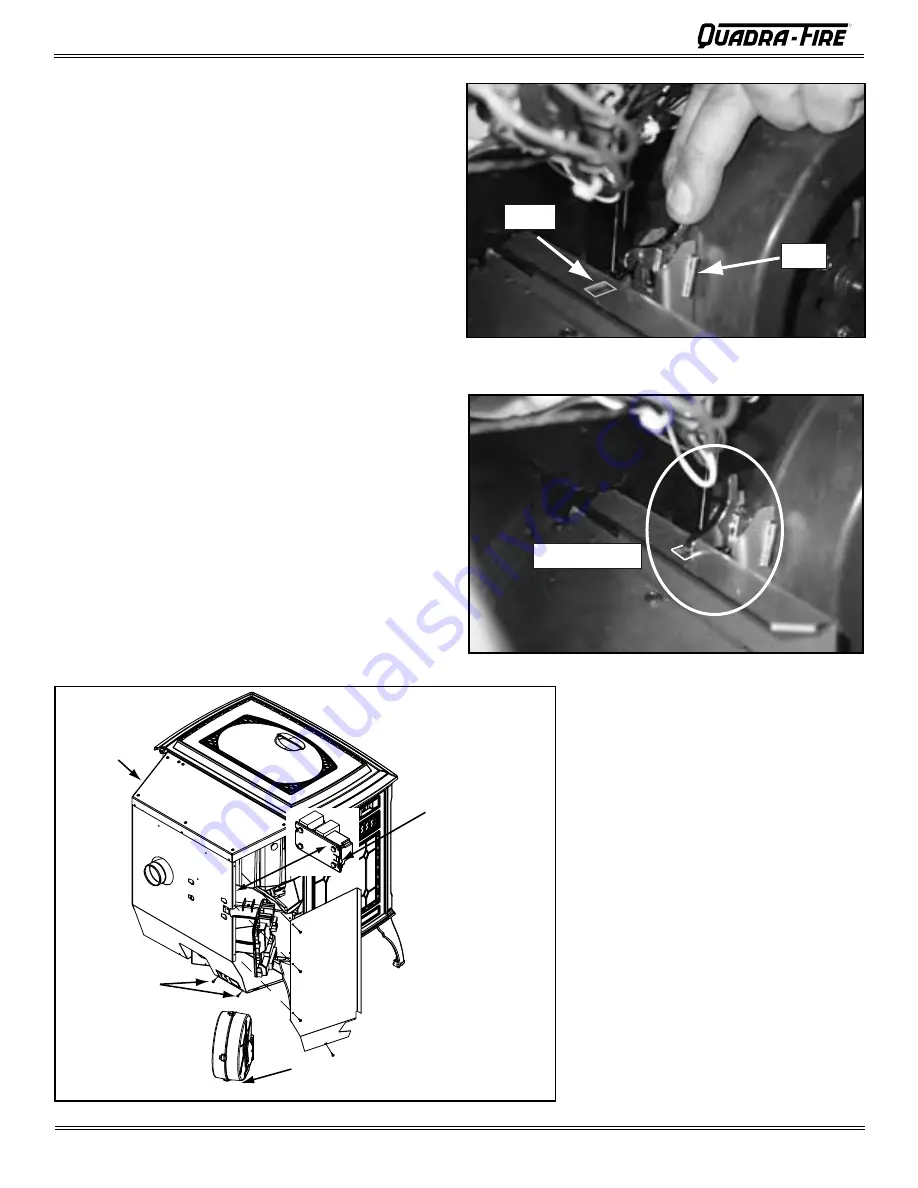
F. Convection Blower Replacement
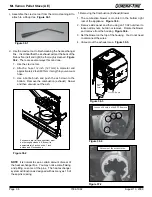
Figure 40.1
Figure 40.3
Depress Tab and
Snap Out Power
Supply
Remove
Left Side
Panel
Disconnect Wire Harness
from Bottom of Blower
Remove 2
Screws
Remove
Right Side
Panel
Figure 40.2
1. Follow the proper shut down procedures as outlined on
page 33, Section 10.A.
2.
Remove the left and right side panels by removing the
screws using a Phillips head screw driver.
Figure 40.1
.
. Depress the tab on the left side and snap out the power
supply. You do not need to disconnect any wires.
Figure 40.1.
4.
Remove the screws at the bottom of the back panel so
there will be room to remove the blower.
Figure 40.1
5.
Reach behind the blower and release the latch by push
-
ing the top of the latch towards the blower.
Figure 40.2.
6. Rock the top of the blower slightly and lift up. The
blower will pass around the control board and out the
left side of the appliance.
7. Disconnect the wire harness from the bottom of the
blower by depressing the tabs on the sides of the con
-
nector and then pulling to remove.
Figure 40.1.
8. Re-connect wire harness to the new blower.
9. Install replacement blower by placing the bottom flange
into the opening first then rotate blower up into posi
-
tion.
10.
When the blower is properly positioned the latch will engage
the notch to hold the blower in place.
Figure 36.3
.
11. Re-secure the back panel, snap the power supply back
in and re-secure the side panel(s).
Notch
Latch
Latch Engaged


