background image

Page  28

7001-142C

November 2, 2005

Santa Fe Pellet Stove 

R

R

R

10

Maintaining & Servicing Your Appliance

Shock hazard

.

•  Unplug appliiance before servicing 

or maintaining appliance

CAUTION

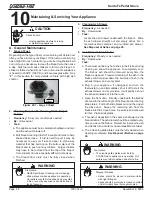
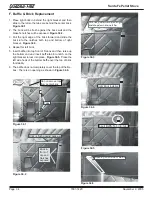
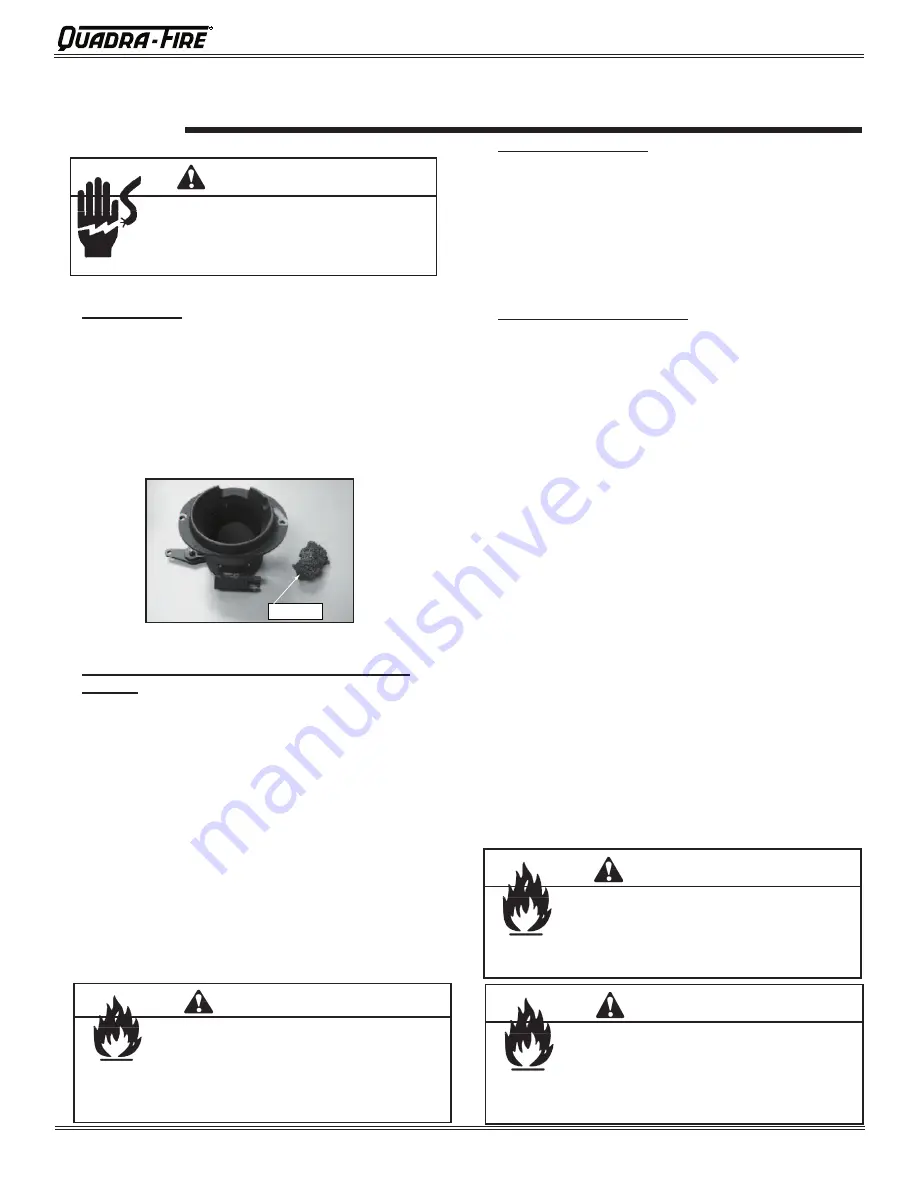
Figure 26.1 - Large Clinker

3.  Cleaning Ash Drawer
•  Frequency:

  As needed

•  By:

  Homeowner

•  Task:

  Locate the ash drawer underneath the firepot.  Slide 

the  ash  drawer  straight  out  and  empty  ashes  into  a 

noncombustible  container  and  re-install  ash  drawer. 

See Disposal of Ashes on page 29.

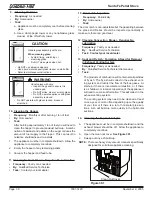
4.  Ash Removal from Firebox
•  Frequency:

  Weekly or as needed

•  By:

  Homeowner

•  Task:

  a. There must not be any hot ashes in the firebox during 

cleaning  so  allow  the  appliance  to  completely  cool.   

The  firebox  ash  should  be  removed  every  time  the 

firepot is cleaned.  Frequent cleaning of the ash in the 

firebox will help slow down the build-up of ash in the 

exhaust blower and vent system.

  b. Plug  in  your  appliance,  if  unplugged,  and  turn  the 

thermostat on and immediatley shut it off to start the 

exhaust blower on its cycle time.  It will pull fly ash out 

the exhaust instead of into the room.

  c. Open the front door.  Directly underneath the firebox 

door and to the left and right of the firepot are 2 cleaning 

slide plates.  Pull both slide plates out and then open 

the  glass  door.    Sweep  the  remaining  ash  from  the 

firebox into the 2 open holes.  A paint brush works well 

for this.  Close slide plates.

  d.  This ash is deposited in the same ash drawer as the 

firepot debris. The ash drawer should be emptied every 

time you clean the firebox.  Remember to place the ash 

and debris into a metal or noncombustible container.

  e. The 2 cleaning slide plates must be fully closed when 

cleaning is complete.  

See Disposal of Ashes on page 

29.


WARNING

•  NEVER pull firepot cleaning rod or cleaning 

slide plates out when appliance is operating.  

Hot pellets may fall into ashpan and may start 

a fire or you may experience mis-starts due to 

lack of vacuum.

Fire Hazard.


WARNING

•  The cleaning slide plates must be fully 

CLOSED when appliance is operating.  Hot 

pellets may fall into ashpan and start a fire.

Fire Hazard.

Disposal of Ashes

WARNING

•  Ashes  should  be  placed  in  metal  container 

with tight fitting lid.

•  Ashes should be retained in closed container 

until all cinders have thoroughly cooled. 

A.  General Maintenance

1.  Types of Fuel 

Depending on the type of fuel you are burning will dictate how 

often you have to clean your firepot.  If the fuel you are burning 

has a high dirt or ash content or you are burning shelled field 

corn, it may be necessary to clean the firepot more than once 

a day.  Dirty fuel will cause clinkers to form in the firepot.  A 

clinker is formed when dirt, ash or a non-burnable substance 

is heated to 2000

°

F (1093

°

C) and becomes glass-like.  See 

F”

  in  this  section  for  more  details  on  fuels  with  high  ash 

content.

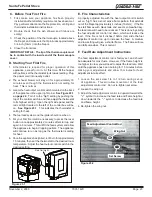
2.  Cleaning Firepot with Cleaning Rod & Firepot 

Scraper

•  Frequency:

  Daily or more often as needed

•  By:

  Homeowner

•  Task:

  a. The appliance must be in complete shutdown and cool 

and the exhaust blower off.

  b. Pull firepot cleaning rod OUT a couple of times to help 

shake debris loose.  If rod is hard to pull, it may be 

necessary  to  use  your  firepot  scraper  to  chip  away 

material that has built up on the bottom plate of the 

firepot and to push out any clinkers.  Larger clinkers 

may have to be removed from the top of the firepot.  

Corn clinkers can be especially difficult to break up.

  c. The  firepot  floor  plate  must  be  fully  closed  when 

finished. 

Clinker

Summary of Contents for SANTAFE-B1

Page 1: ...e read this entire manual before installation and use of this pellet fuel burning room heater Failure to follow these instructions could result in property damage bodily injury or even death Do not st...

Page 2: ...ucts combustionfromthe hopperundercertainconditions Maintainhoppersealingoodcondition Donooverfillthehoppe r ATTENTION CHAUDLORSDE L OP RATION NE PAS TOUCHER GARDEZLESENFANTSET LESV TEMENTSLOIN DEL ES...

Page 3: ...e Wall Vertical 14 E Masonry 15 F Alternate Masonry 15 Section 6 Mobile Home 16 Section 7 Appliance Set Up A Outside Air Kit 17 B Top Vent Adapter 18 C Log Set Placement 19 D Grille Trim Ring Installa...

Page 4: ...ceiling and walls must be maintained The appliance must be properly grounded to the frame of the mobile home and use only listed pellet vent Class L or PL connector pipe A Quadra Fire Outside Air Kit...

Page 5: ...ire Safety Maintain the designated clearances to combustibles Insulation must not touch the chimney You must maintain the designated air space clearance around the chimney This space around a chimney...

Page 6: ...cause a re hazard WARNING Hearth Home Technologies disclaims any responsibility for and the warranty will be voided by the following actions D Measuring Standards 1 Pipe measurements are from center l...

Page 7: ...7 1 Top View Figure 7 3 Side View Figure 7 4 Side View with Top Vent Adapter 25 7 16 in 705 mm 12 11 16 in 322mm 21 3 16 in 538mm C L 27 3 4 in 705mm 28 5 8 in with base 727mm with base 16 7 16 in 41...

Page 8: ...to Appliance 2 51 H Side Wall to Flue Pipe 3 76 Alcove Installation Inches Millimeters Minimum Alcove Height 43 1092 Minimum Alcove Side Wall 6 152 Minimum Alcove Width 38 965 Maximum Alcove Depth 36...

Page 9: ...xtending beneath the ue pipe is recommended with horizontal venting or under the top vent adapter with vertical installation See Figure 9 2 CANADA INSTALLATIONS A noncombustible oor pro tection extend...

Page 10: ...used NO OTHER vent components may be used Substitute or damaged vent components may impair safe operation WARNING B Venting Termination Requirements 1 Termination must exhaust above air inlet elevatio...

Page 11: ...hart until you reach your altitude above sea level If you fall below the diagonal line 3 or 4 inch 76 to 102mm pipe may be used If it is anywhere above the diagonal line a 4 inch 102mm diam eter pipe...

Page 12: ...S ONLY Illustrations diagrams are not drawn to scale Actual installation may vary due to individual design preference A Alcove Figure 12 1 All minimums listed are to a combustible surface Minimum Maxi...

Page 13: ...l Approved for mobile home instal lations Must use 3 or 4 inch 76 102mm L or PL listed pellet venting or listed double wall pipe and a Quadra Fire Outside Air Kit in mobile homes NOTE In Canada where...

Page 14: ...mes Single wall pipe is approved for residential instal lations only C Vertical D Through The Wall Vertical Firestop Flashing Rain Cap 6 in 152mm Min Noncombustible Hearth Pad 3 in 76mm Min Cleanout C...

Page 15: ...sonry Noncombustible Hearth Pad Airtight Cleanout Door Cleanout cover Sheathing 3 in 76mm minimum 1 in 25mm clearance Flashing Fireclay flue liner with airspace Concrete Cap 1 in 25mm clearance with f...

Page 16: ...pro tection requirements on pages 8 9 for listings to combustibles and appropriate chimney systems 6 Use silicone to create an effective vapor barrier at the location where the chimney or other compon...

Page 17: ...vent opening in stove and mark location on wall Use saw to cut opening in wall Cut a 2 1 2 to 3 inch 64 76mm opening on inside wall and a 3 to 3 1 2 inch 76 89mm opening on outside of house 2 Use hose...

Page 18: ...screws Figure 18 1 6 Install the vent pipe into the top vent adapter be sure to silicone all joints 7 To clean the top vent adapter open the clean out cover Figure 18 2 B Top Vent Adapter Installation...

Page 19: ...shown There is a notch in the bottom of the log for clearance for the thermocouple and thermocouple cover ceramic protection tube Figure 19 1 2 Continue placing the last 3 logs around the repot as sho...

Page 20: ...b are completely out of the door Figure 20 2 2 Installing the Trim Ring Rib Face Grille Door Remove 2 screws Rib Locating screws on rib are the 2 outside holes on each side Figure 20 1 Start with stra...

Page 21: ...eadings The thermostat should be mounted on an inside wall and not in direct line with the appliance convection air NOTE If the thermostat is located too close to the appliance you may need to set the...

Page 22: ...actory and eld testing has demonstrated shelled eld corn to be an ef cient and very economical fuel We recommend the use of a 50 50 blend of corn and wood pellets The only change in operation is that...

Page 23: ...ctions D Starting Your First Fire 1 A thermostat is required for proper operation of this appliance except for corn At this time ll the hopper with pellets set the thermostat to its lowest setting Plu...

Page 24: ...ION WARNING Fire Risk Do NOT operate appliance With appliance door open Firepot oor open Cleaning slide plates open Do NOT store fuel Closer than required clearances to com bustibles to appliance With...

Page 25: ...nting system is clean Make sure front door is closed Replace control box Call light on No re Partially burned fuel in repot Firepot clean out plate not closed Firepot is dirty missed ignition Check th...

Page 26: ...x causing loss of vacuum Empty hopper of fuel Use a wet dry vacuum cleaner to remove remaining fuel from hopper including feed tube Check feed chute for obstructions Loosen 2 screws and jiggle feed as...

Page 27: ...stainless steel baf e from rebox to clean ash from on top of baf e Clean behind rear brick panels Change fuel brand to premium Check that repot clean out plate is fully closed Reduce feed rate using...

Page 28: ...fully closed when cleaning is complete See Disposal of Ashes on page 29 WARNING NEVER pull repot cleaning rod or cleaning slide plates out when appliance is operating Hot pellets may fall into ashpan...

Page 29: ...ds OUT and IN a couple of times Figure 29 1 8 Cleaning Beneath Heat Exchanger Frequency Monthly or after burning 1 ton of fuel By Homeowner Task A more thorough cleaning is needed to remove the excess...

Page 30: ...f there is a lot of horizontal pipe sec tions Ash will build up more quickly in the horizontal sections 10 Cleaning the Hopper Frequency Monthly or after burning 1 ton of fuel By Homeowner Task After...

Page 31: ...lf way point in the re pot IMMEDIATE ATTENTION AND CLEANING IS REQUIRED Follow the detailed instructions found in this section for each step listed below Shut down the unit by turning down the thermos...

Page 32: ...aving all wires still attached d Remove the upper rear screen from the appliance by removing 2 screws at the top 1 in the center and 2 screws on the sides at the top Leave both upper side curtains sti...

Page 33: ...the 2 leads with the spade connectors d Double check that the igniter wires are clear of any movement i e ash drawer firepot cleaning rod cleaning slide plates etc f Re install the ash drawer and sid...

Page 34: ...will be ush against the back wall and the braket s notches will be exposed Figure 34 2 3 Pull the right edge of the brick forward and slide the brick into the notches both top and bottom of right brac...

Page 35: ...face down b Using a screwdriver tap the bottom of the rope retainer rod to push it up out of the hole The top end of the rod will slide up Swing the rod toward you from the bottom and remove the rod R...

Page 36: ...hould be set on the lowest setting available 16 Snap Disc 1 Convection Blower 125 F When describing the location of a component it is always AS YOU FACE THE FRONT OF THE APPLIANCE 2 Convection Blower...

Page 37: ...center of the appliance and has a red reset button To access it remove the right side panel If the re tries to burn back into the feed system or push exhaust up the feed tube this snap disc will shut...

Page 38: ...Fuse Control Box Vacuum Switch Junction Box High Med Low Heat Output Switch Reset Button Reset B u tt o n Convection Blower Exhaust Blower Button Cleaning Rods Heat Exchanger Tubes TERMINAL BLOCK CEN...

Page 39: ...6 Screw 10 32 x 1 4 PH PHL MS ZC 7021 006 7 Screw 8 x 1 2 SMS S Grip 12460 57 Grille Assembly 412 5150 58 Face 7001 026 2 56 3 35 5 6 7 55 Figure 39 2 Firepot Assembly Item Description Part Number 56...

Page 40: ...41 Blower Exhaust 51 Top Cast 32 Thermocouple Cover 42 Vacuum Switch 52 Curtain Pedestal Side 33 Ash Drawer 43 Control Box 53 Baf e 34 Base Cast 44 Back 54 Brick Assembly 35 Igniter 45 Top Vent Kit 3...

Page 41: ...Pedestal 7001 169 38 Curtain Side Assembly with magnet 7001 023 30 Door Assembly 7001 035 Door Latch Assembly 7001 042 58 Face Assembly 7001 026 48 Feed Motor Assembly 812 4760 Feed Motor Only w capa...

Page 42: ...0840 Rear Vent Adapter 811 0620 Rear to Top Vent Adapter 811 0610 Top Vent Adapter 3 to 3 inch 811 0890 Top Vent Offset Collar 3 to 6 inch 812 3570 Thermostat Mechanical 812 3760 Thermostat Programmab...

Page 43: ...e Technologies discontinues the model and two 2 years for optional accessories Adjustments regular maintenance cleaning and temporary repairs do not qualify for a service call fee and will not be cove...

Page 44: ...OT discard this manual CAUTION Important operating and maintenance instructions included Read understand and follow these instruc tions for safe installation and operation Leave this manual with party...

Reviews: