11
04/21
7019-802H
J. Feed Rate Adjustment Instructions
The feed adjustment control rod is factory set, and should
be adequate for most fuels. The set screw is located at the
bottom of the hopper and set loose at the factory so the fuel
adjustment control rod will slide by only loosening the wing
nut. Do not re-tighten bottom set screw.
However, if the flame height is too high or too low, you
will need to adjust the feed rate. Wait until the appliance
has been burning for 15 minutes before making your
adjustments and allow 15 minutes for feed adjustment to
take effect. Make adjustments in approximately 1/2 inch
increments.
1. Loosen the wing nut
(Figure 11.3)
.
2. Adjust the fuel adjustment control rod towards the "+"
symbol to increase the feed rate and flame height or
towards the "-" symbol, to decrease the feed rate and
flame height.
3. Re-tighten the wing nut.
Finger Hole in Rod
Wing Nut
Figure 11.3
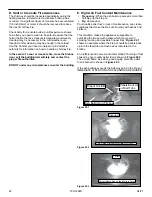
I. Fire Characteristics
A properly adjusted fire with the heat output control button
set on “HIGH” has a short active flame pattern that extends
out of the fire pot approximately 4 inches (102mm). If the
fire has tall flames with black tails and seems somewhat
lazy, the feed rate will need to be reduced. If the fire is not 4
inches (102mm) tall, increase the feed rate. A medium and
low setting will give a shorter flame. The flame will rise and
fall somewhat. This is normal.
Tall, Lazy Flame, Orange in Color
Incorrect
Correct Flame Size, Yellow/White in Color
Correct
Figure 11.1
Figure 11.2
WARNING
Fire Risk.
• High ask fuels, or lack of maintenance,
can cause the fire pot to fill with ash
and clinker. If the fire pot fills to the top,
immediately shut down the appliance and
clean.
• Failure to do so could result in smoking,
sooting and possible hoper fires.


