May 18, 2015
7019-230C
21
Santa Fe Pellet Insert
Access Panels
Open Hopper Lid for
Easier Placement of
Panel Set
Magnet
Hook
Figure 20.4
Figure 20.2
Figure 20.3
Figure 20.1- Completed View
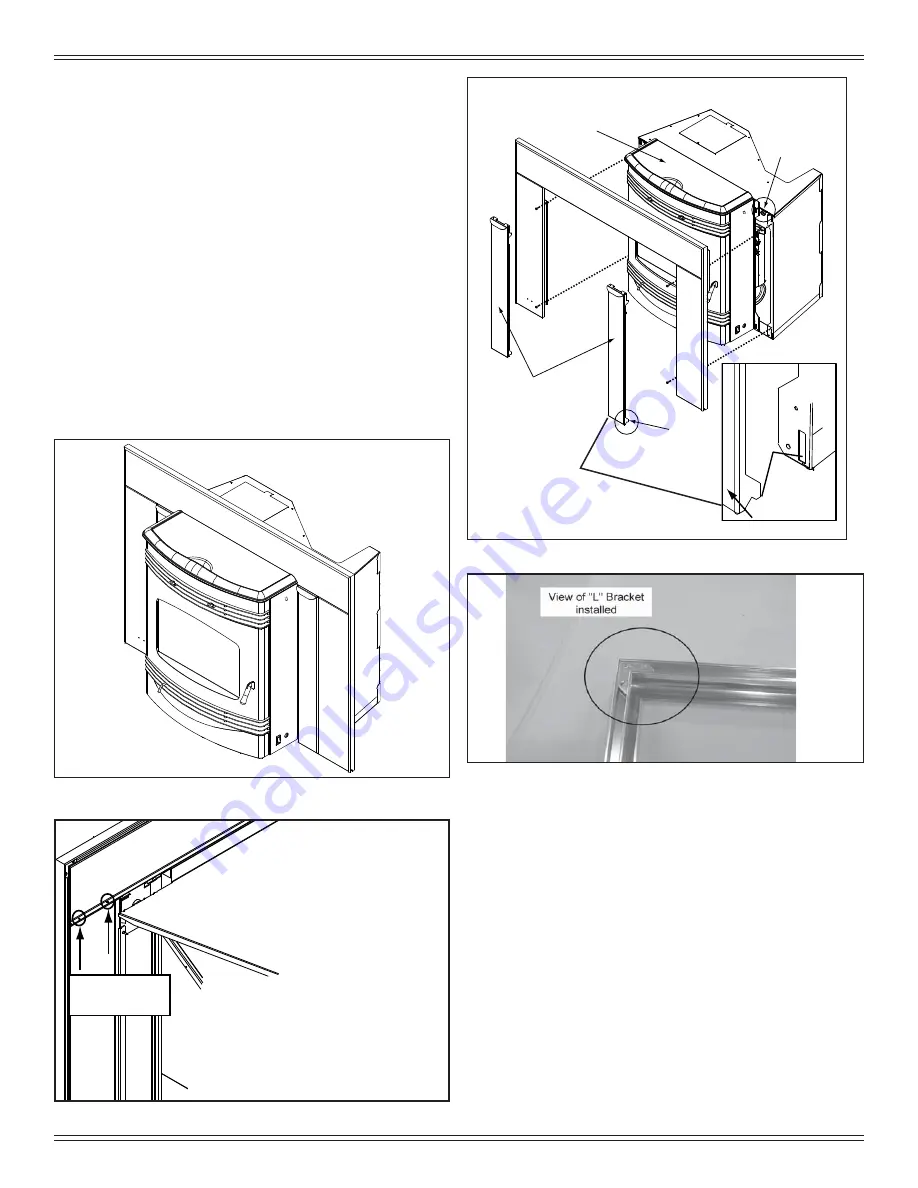
G. Panel and Trim Set
1. Lay panel top and legs face down on protective covering
to prevent scratching.
1. Attach the panel legs to the top panel using a Phillips
head screwdriver. There are 2 screws for each leg.
Figure 20.2.
2. Open the hopper lid by pulling toward you. This will make
it easier to set the panels in place. Secure the panels to
the insert, 2 screws per leg, as shown in
Figure 20.3.
3. Connect the trim pieces together using the “L” Brackets
supplied.
Figure 20.4.
4. Slide the trim over the top of the panels.
5. Install the access panels. At the bottom of the access
panel there are 2 hooks that slip into a slot at the bottom
of the side panel and a magnet at the top that holds the
access panel in place.
Figure 20.3.
Attach panel
legs to top
Back view of pan
el
Access Panel
Side
Panel
H. Thermostat Installation
1
.
A 12 volt AC thermostat is required to operate this pellet
appliance. You may use the included wall mount thermo-
stat or purchase an optional programmable thermostat
or remote control.
The included thermostat is equipped with an adjustable
heat anticipator. The current rating is .05 amps. The
anticipator needs to be adjusted to the lowest setting
available.
2.
When mounting a thermostat on a wall, be sure to follow
your thermostat installation instructions carefully.
NOTE: Thermostat must be mounted level for accu-
rate readings. The thermostat should be mounted on
an inside wall and not in direct line with the appliance
convection air. Remove any packaging from inside
the thermostat before using.


