background image

8

EN

9

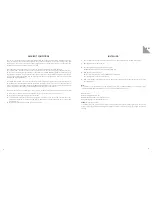
INSTALLING

1.

  Use the power cable supplied in the package to connect the equipment up to the mains supply.

2.

  Check that the unit is switched off. 

3.

  Connect up the CD player to the amplifier inputs. 


(CD-Output) right channel = red / left channel = white 

4.

  Now switch your CD player on. 


Switch the mains switch (3) into the ON position on the back. 


The standby LED on the front will come on.

7.

  Now press the On / Standby button (10) on the front or the button (2) on the remote control to start 

your equipment.

Note:

As your C8 uses a special power-saving standby circuit, you can always switch on / off during normal         

operation using the On / Standby button on the unit or the RC-2 remote control.


Mute (button 3)

Balance setting (buttons 6 & 7)

Multilevel display brilliance setting (button 15)

Input level setting for all inputs (button 14)

Example:

  Input level setting

Use buttons 8 (-) or 9 (+) to select the signal source and then press button 14 (Prog.) and use the volume 

buttons (4 & 5) to set up the input volume to suit yourself. Press button 14 (Prog.) once again to save the 

settings.

AMBIENT CONDITIONS

The remote control has a range of up to 6 m and works without any problems from a radiating angle of up 

to 30° in relation to the front of the equipment. Dust on the transmitter or dirt on the receiving sensor and 

operating it in the vicinity of fluorescent lights might reduce the range. A direct line-of-sight connection 

between the transmitter and the receiver is needed.

Notes about the removal and the correct environmentally-friendly disposal of old batteries

The symbol shown here can be found on the equipment‘s enclosure, the packaging as well as in the doc-

uments or the operating manual. It tells you that batteries provided with the equipment as well as those 

supplied with or fitted in other units must never be disposed of in household waste. They must be disposed 

of in an environmentally-friendly way (in compliance with the local regulations or European Directives 

2002/96/EU and 2006/66/EU).

You should find out where the nearest collection point for electronic scrap is or where the recycling site is.

Correct disposal of the equipment and the batteries will help to preserve our resources and prevent phys-

ical and environmental damage. The battery (CR2032) supplied with the remote control contains lithium 

and it must be disposed of in an environmentally-friendly way as described above.

Proceed as described in the following section to replace or remove the battery fitted in the remote control.

1.

   Undo the screw in the cover underneath the remote control and then remove the cover.

2.

   Remove the battery by sliding it out of its holder.

3.

   You must ensure that the new battery‘s polarity is correct when you fit the new one! The side of the 

battery marked with (+) must point upwards so that it makes contact with the part of the holder 

marked with (+).

4.

   Refit the cover and use the screw to secure it in place.     

Summary of Contents for AURUM C8

Page 1: ...AURUM C8 U S E R I N S T R U C T I O N S B E D I E N U N G S A N L E I T U N G N O T I C E D U T I L I S A T I O N M A N U A L D E I N S T R U C C I O N E S...

Page 2: ...steps listed here for installing the equipment You must abide by all of the warnings and safety instructions that are stipulated on the unit and in this instruction manual Keep this manual close to ha...

Page 3: ...down 8 Play button Press once to start the playback Repeated pressing launches the pause function 9 Stop button Stops the playback 10 On Off switch Press this button to switch the C8 on Press this but...

Page 4: ...T 250 mA L 250 V 230 V T 125 mA L 250 V 110 120 V 50 60Hz 220 240 V 50 60Hz 17W max Power Consumption Analog OUT DO NOT REMOVE COVER NO USER SERVICEABLE PARTS INSIDE REFER SERVICING TO QUALIFIED PERS...

Page 5: ...ce the range A direct line of sight connection between the transmitter and the receiver is needed Notes about the removal and the correct environmentally friendly disposal of old batteries The symbol...

Page 6: ...Sie diese Anleitung so dass Sie bei sp teren Fragen schnell zur Hand ist Das Netzkabel und andere Anschlusskabel m ssen so verlegt werden dass keine Quetschung oder Besch digung durch M bel oder durch...

Page 7: ...von Kindern fern da hier bei unsachgem en Umgang ein Erstickungsrisiko besteht BEDIENELEMENTE AN DER GER TEVORDERSEITE 1 CD Laufwerk 2 Betriebsanzeige Diese Anzeige leuchtet blau wenn sich das Ger t i...

Page 8: ...Fuse 115 V T 250 mA L 250 V 230 V T 125 mA L 250 V 110 120 V 50 60Hz 220 240 V 50 60Hz 17W max Power Consumption Analog OUT DO NOT REMOVE COVER NO USER SERVICEABLE PARTS INSIDE REFER SERVICING TO QUAL...

Page 9: ...ie Schrauben auf der Fernbedienungsunterseite und heben Sie den Deckel ab 2 Entfernen Sie die Batterie durch einfaches schieben aus ihrer Halterung 3 Achten Sie bei dem Erneuern der Batterie auf die P...

Page 10: ...t l humidit peut entra ner un court circuit de l iso lation lectrique et constituer ainsi un risque l tal Placez cet appareil l abri des claboussures Evitez de d poser des r cipients contenant des liq...

Page 11: ...le tout instant de mettre l appareil en fonction par le biais de la t l commande ou par action sur la touche 10 3 Affichage C est cet endroit que s affichent les informations d tat et les messages ce...

Page 12: ...SPDIF Digital OUT ON OFF Fuse 115 V T 250 mA L 250 V 230 V T 125 mA L 250 V 110 120 V 50 60Hz 220 240 V 50 60Hz 17W max Power Consumption Analog OUT DO NOT REMOVE COVER NO USER SERVICEABLE PARTS INSI...

Page 13: ...vant dans la t l commande par une pile neuve 1 D vissez les vis se trouvant sur le dessous de la t l commande et soulevez le capot 2 Extrayez la pile en la faisant simplement glisser hors de son suppo...

Page 14: ...cables de conexi n deben tenderse de forma que no sean aplas tados ni da ados por muebles o al pisarlos y que se eviten tropiezos Desenchufe el aparato cuando haya una tormenta o no vaya a utilizarlo...

Page 15: ...z de este indicador es azul cuando el aparato se encuentra en modo de espera se alando que el aparato puede encenderse en cualquier momento con el mando a distancia o con la tecla 10 3 Pantalla Aqu se...

Page 16: ...use 115 V T 250 mA L 250 V 230 V T 125 mA L 250 V 110 120 V 50 60Hz 220 240 V 50 60Hz 17W max Power Consumption Analog OUT DO NOT REMOVE COVER NO USER SERVICEABLE PARTS INSIDE REFER SERVICING TO QUALI...

Page 17: ...su compartimento desliz ndola 3 Aseg rese de que la polaridad de la pila nueva es la correcta El lado marcado con el signo positivo debe estar arriba junto al contacto se alado tambi n con 4 Coloque l...

Page 18: ...a digital Cinch SPDIF Tensi n de salida 0 5 Vss Impedancia de salida 300 Ohm Conexi n de alimentaci n 115 V 230 V conmutable Consumo de potencia en modo normal 12W Consumo de potencia en modo standby...

Page 19: ...ral GmbH Co KG Am Herrenh user Bahnhof 26 28 30419 Hannover Germany Telefon 49 0 511 79 04 0 E Mail info quadral com www quadral com www facebook com quadralhifi www youtube com quadralhifi Art Nr 894...

Reviews: