506-Rock Winch Bumper
2
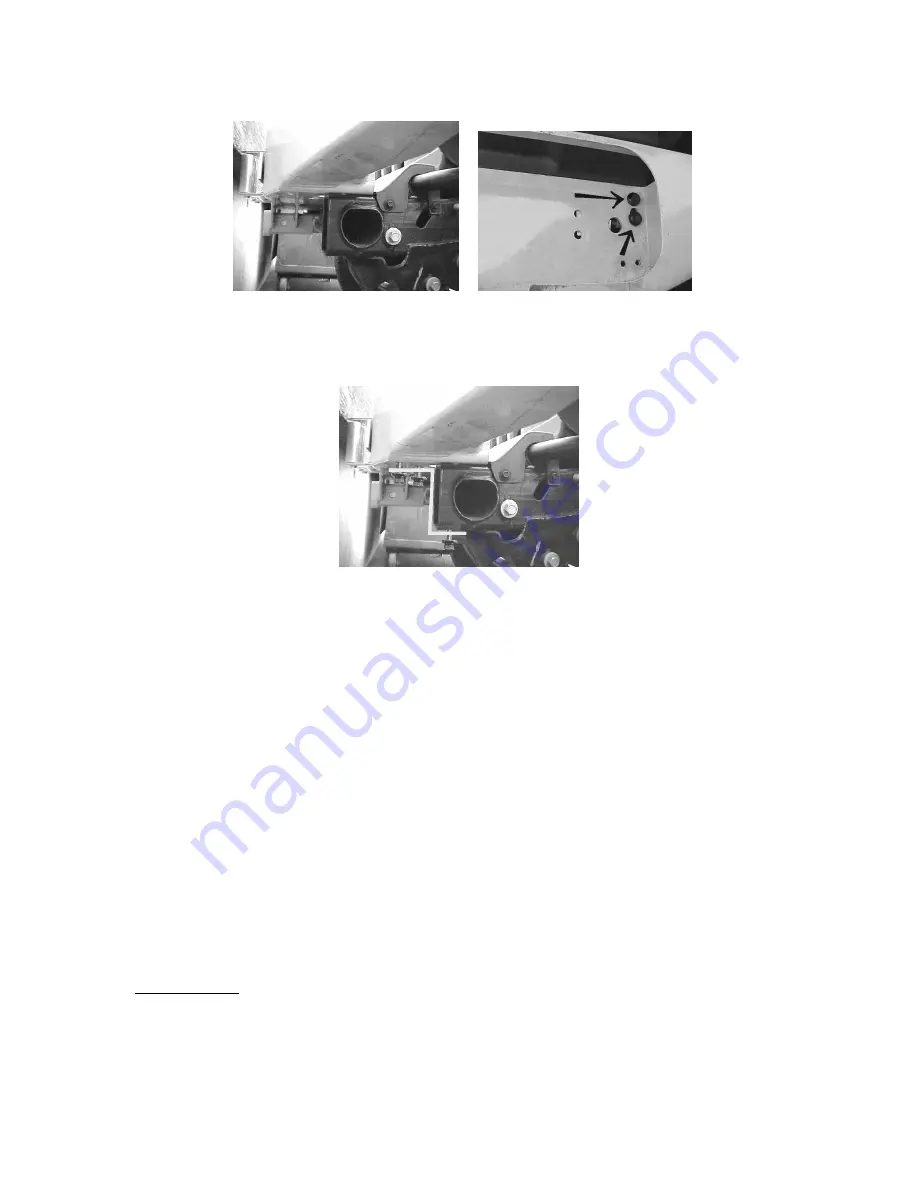
Photo 3 Photo 4
Step 2.
Slide your new bumper over the vehicle frame and line up the mounting holes in the bumper with the
mounting holes in the frame. See photos 3 &4. Photo 4 shows how the mounting holes line up with the
holes in the frame the arrows point to where your OEM bumper mounting hardware will be installed. Do
not fully tighten these bolts. On Jeep CJ’s use the large hole that is to the left of the arrows in photo 4 to
secure bumper to frame, you will also need to use one of the large square washers.
Photo 5
Step 3.
Bolt Z-bracket to winch bumper using 5/16” hex head bolts flats washers, lock washers and 5/16” nuts. Do
not fully tighten these bolts. See photo 5.
Step 4.
Bolt Z-bracket to the bottom of the vehicle frame using OEM bumper mounting bolts. Fully tighten these
bolts now, and then tighten the 4 OEM bumper mounting bolts that are inside the bumper.
Step 5.
Fully tighten the 5/16” bolts that secure the Z-bar to the winch bumper.
Step 6.
Install your winch fairlead and then install your choice of winch. If optional stinger was purchased, install
stinger before installing the winch. Install winch by placing winch mounting bolts into the slots on your
winch and then lowering winch into the bumper so that the winch mounting hardware slides through winch
bumper. Secure winch with the winch mounting bolts (usually included with winch). You may want to
install flat washers and lock washers on the winch mounting bolts before you install the winch mounting
nuts, or use loc-tite on winch mounting bolts.
Note:
Some winch manufactures supply winch mounting hardware that is not long enough, square head grade 8
bolts that are of proper length can be purchased at most hardware stores. Winch mounting hardware that
is long enough has at least 2 rows of thread exposed when the flat washer, lock washer and nut are
completely tightened down. Do not use NyLock nuts to secure winch to bumper, they are not strong
enough, use grade 8 or higher nuts with flat washers. Use loc-tite on winch mounting bolts. Medium
strength or higher is recommended. Permanent loc-tite will also deter theft of your winch.
Step 7.
After 500 miles or first off-road trip, re-check tightness on all nuts and bolts.
Note:
For getting unstuck in an off-road situation, simply place your snatch strap into your receiver hitch and
secure it in place with a clevis/hitch pin. You can place a receiver D-ring into the receiver hitch to assist
you when attaching a winch cable hook or tow strap to the bumper, simply attach the hook on the end of
the cable to the back side of the receiver hitch.
266-Stinger install
Line stinger up with holes in winch bumper and secure the threaded mounts using 1/2” flat washer, 1/2”
lock washer and 1/2” nut. Do not fully tighten. Then install 1/2” X 1 1/4” hex head bolt with lock washer
and flat washer through winch bumper and into the threaded mounts that are inside the stinger. Fully
tighten these bolts then fully tighten the 1/2” nuts. You must install the 266-stinger before installing a
winch.


