4
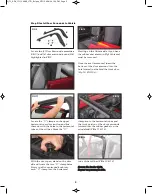
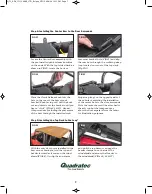
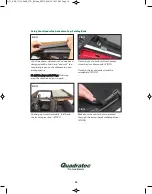
Put on safety glasses. After removing all
existing Soft top or hard top hardware,
fabric and top, locate the Header/Top
Deck assembly shown in FIG1 and lay the
assembly on either the box lid or a soft
towel. Locate the two over door bows
shown in Fig2. These bows have the
quick release knuckles pre-installed on the
rear of the bow ends and have the set
screw installed on the other end of the
bow. The “knob” on the bow end must
be facing inward on the header/Top deck
assembly and the slot of the quick release
must be facing up as shown in Fig3.
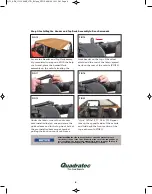
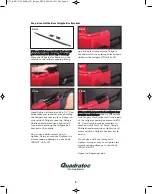
Repeat this on the
opposite side (Fig7).
Remove the Bow
end from the
Header and again
using the 3/32”
drill bit, drill a hole
through the previ-
ous drilled pilot
holes into the inner steel rod of the header
until you feel the drill go through the steel
inner. This may take some force.
Once the hole is
drilled, locate the
set screw just re-
moved from the side
tube and using a
phillip head screw
driver, install the
over door bow to
the Header (Fig 8).
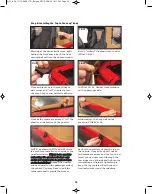
Repeat this on the other side of the header
so you have both side tubes installed to
the header/top deck assembly.
Set this completed assembly aside.
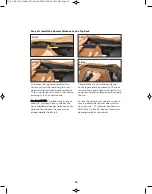
Remove the set screw. Slip the front
bow end into the Header mount as
shown in Figs 4 & 5 making sure it is
as far forward as possible.
Using a 3/32” drill bit and drill, drill a
pilot hole through the pre-drilled hole
located on the over door tube (Fig6).
FIG1
FIG2
Step 1: Windshield Header/Over Door Bow Installation
FIG3
FIG4
FIG5
FIG6
Knob facing inward
with the slot in the
quick release
facing straight up
FIG7
FIG8
Q_TJ_ADV_11113.00XX_LTR_BU.qxp_QTOP 6/16/20 1:38 PM Page 4


