


ENGLISH
Declaration of Conformity
This device is manufactured in accordance with applicable European standards on safety,
EC Council Directive
2006/95/EC (Low Voltage Directive)
) and electromagnetic compatibility,
EC Council Directive 2004/108/EC
(EMC Directive)
.
Assembly instructions
Operating instructions
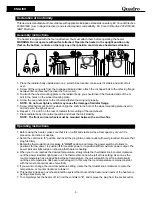
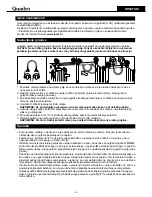
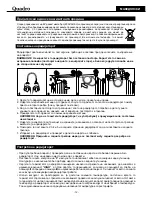
The heater is supplied with the feet unattached. You must attach them before operating the heater.
WARNING: Do not operate without feet attached. Operate the heater in the upright position only
(feet on the bottom, controls on the top), any other position could create a hazardous situation.
1. Place the radiator body upside-down on a scratch-free location, make sure it's stable and will not fall
over.
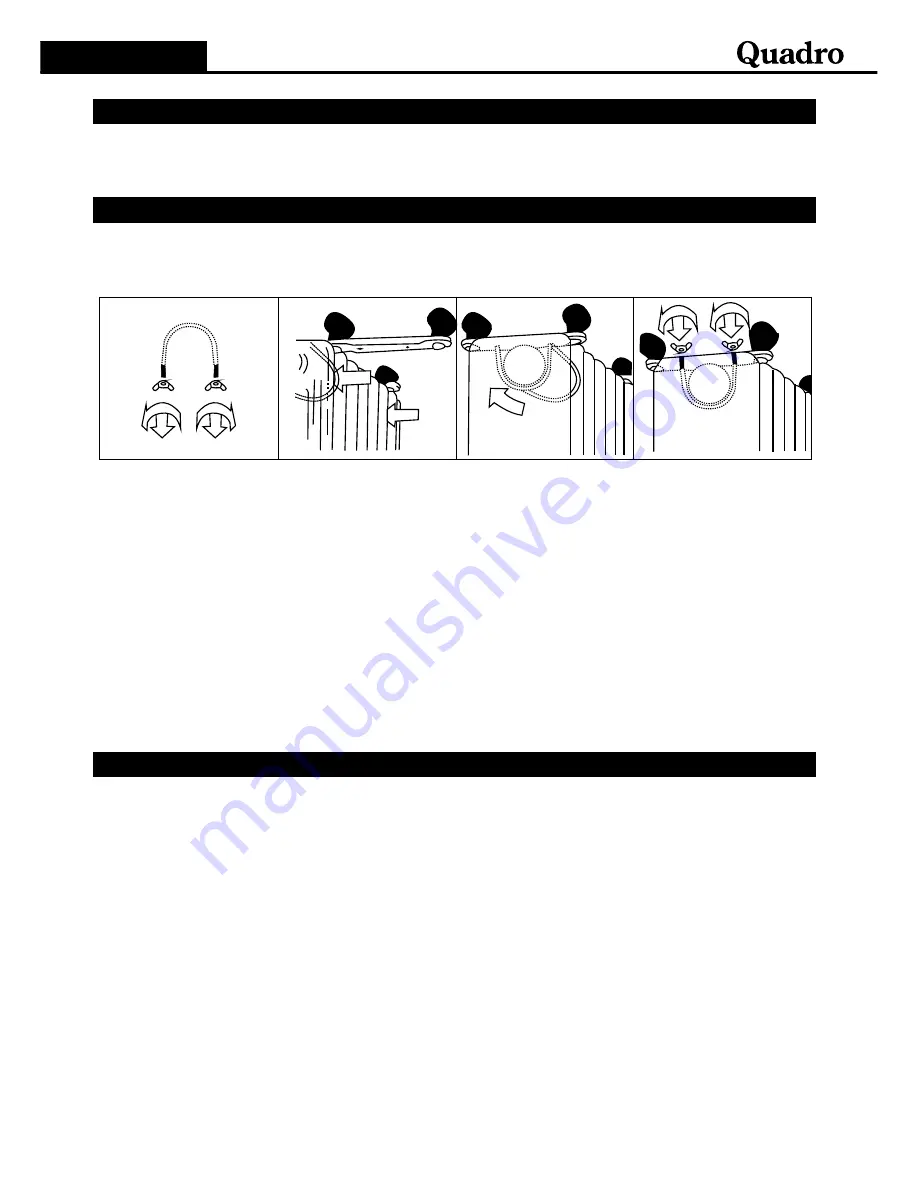
2. Screw off the wing nuts from the U-shaped blot provided, attach the U-shaped bolt to the U-facing flange
between first and second fins (near the front cover).
3. To attach the wheel mounting plate to the radiator body, you should insert the threaded ends of the U-
bolt in the holes on the wheel mounting plate.
4. Screw the wing nuts back to the U bolt and fasten the wing nut properly.
N
OTE
:
D
o not over tighten, which may cause the damage of radiator flange.
5.
Screw off spherical nut from the
wheel
, align the shaft to the hole of the
wheel
mounting plate, insert in,
and screw on the spherical nut.
6.
Repeat 2, 3, 4 and 5 on the rear of radiator for mounting of the rear
wheels
.
7. Place radiator body into normal position and check that unit stability.
NOTE: The front and rear wheels must be mounted between the end two fins.
1. Before using the heater, make sure that it is on a flat and stable surface. Damage may occur if it is
placed on an incline or decline.
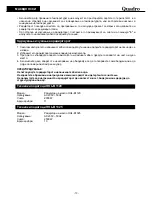
2. Set all the controls to "
0
" position and insert the plug into a socket-outlet with well grounded. Be sure that
plug fits firmly.
3. Rotate the thermostat knob clockwise to "
HIGH
" position and rotate the power switch as follows: to
position
I
for low power, to position
II
for medium power or to position
III
for maximum power output. The
power indicator light will go on showing that heater is heating.
4. When your room reaches the desired temperature, slowly rotate the thermostat knob counter clockwise
until the power indicator light goes out. The thermostat can now be left at this setting. As soon as the
room temperature has dropped below the set temperature, the unit will switch it self on automatically
until the set temperature has been reached again. In this way the room temperature remains constant
with the most economical use of electricity.
5. If you want to change the room temperature setting, rotate the thermostat knob clockwise to raise the
temperature, or counter clockwise to lower it.
6. This heater includes an overheat protection system that shuts off the heater when parts of the heater are
getting excessively hot.
7. To completely shut the heater off, turn all the controls to "
0
", and remove the plug from the socket outlet.
- 3 -
4
3
2
1
Summary of Contents for HOL-B1120
Page 12: ...11 Quadro 10A 5m 1m 50cm O...
Page 13: ...12 2002 96 1 2 U U 3 U 4 U 5 6 2 3 4 5 7 0 HIGH I II III 4 3 2 1...
Page 15: ......
Page 16: ...www quadro electronics com...


