background image


7

6


Customer Helpline 

0845 034 2279

www.gardenservicecentre.co.uk

Customer Helpline 

0845 034 2279

www.gardenservicecentre.co.uk

Assembly

Step 2 - Using the battery pack 

Assembly

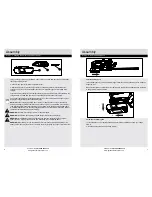
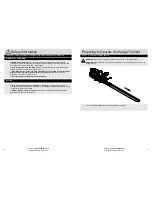
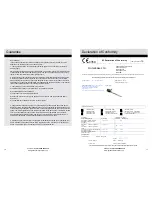
1. Plug the charger into an appropriate AC power outlet. The green LED light comes on indicating 

the charger is ready for use.

2.  Connect the plug wire (B) to the charger station (A). 

3. Insert battery pack (C) into the charge station (A).The battery pack (C) will only fit into the 

charger one way. Do not force the battery pack. Be sure that battery pack is fully seated in the 

charger. 

4. Insert the battery pack(C) into the charger station (A), making sure the pack is fully seated in the 

charger station. The Red LED light comes on indicating the battery pack is on charge.

5. The battery pack will be fully charged after about 1 hour, and the red LED will change to green. 

Unplug the charger (B) and remove the battery pack.

NOTE!

 When the charging is finished, do not leave your battery pack on charge continuously. 

This may damage the battery cells. If the battery pack is very hot, you must allow it to cool firstly 

to ambient temperature and then recharging can be started. If you charge a second battery pack 

immediately after the first one, then the charger adapter can be overheated. Always allow at least 

15 minutes rest between battery pack charging.

WARNING!

 Do not immerse charger in water or any other liquid.

WARNING!

 Do not allow any liquid to get inside charger. Electric shock may result.

WARNING!

 To facilitate the cooling of the battery pack after use, avoid placing the charger or 

battery pack in a warm environment such as a metal shed or an uninsulated trailer.

WARNING! 

Never attempt to open the battery pack for any reason. If the plastic housing of the 

battery  pack breaks or cracks, return to a service center for recycling. Do not put it into further use.

Step 1 - Charging the battery pack (continued)

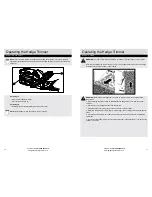
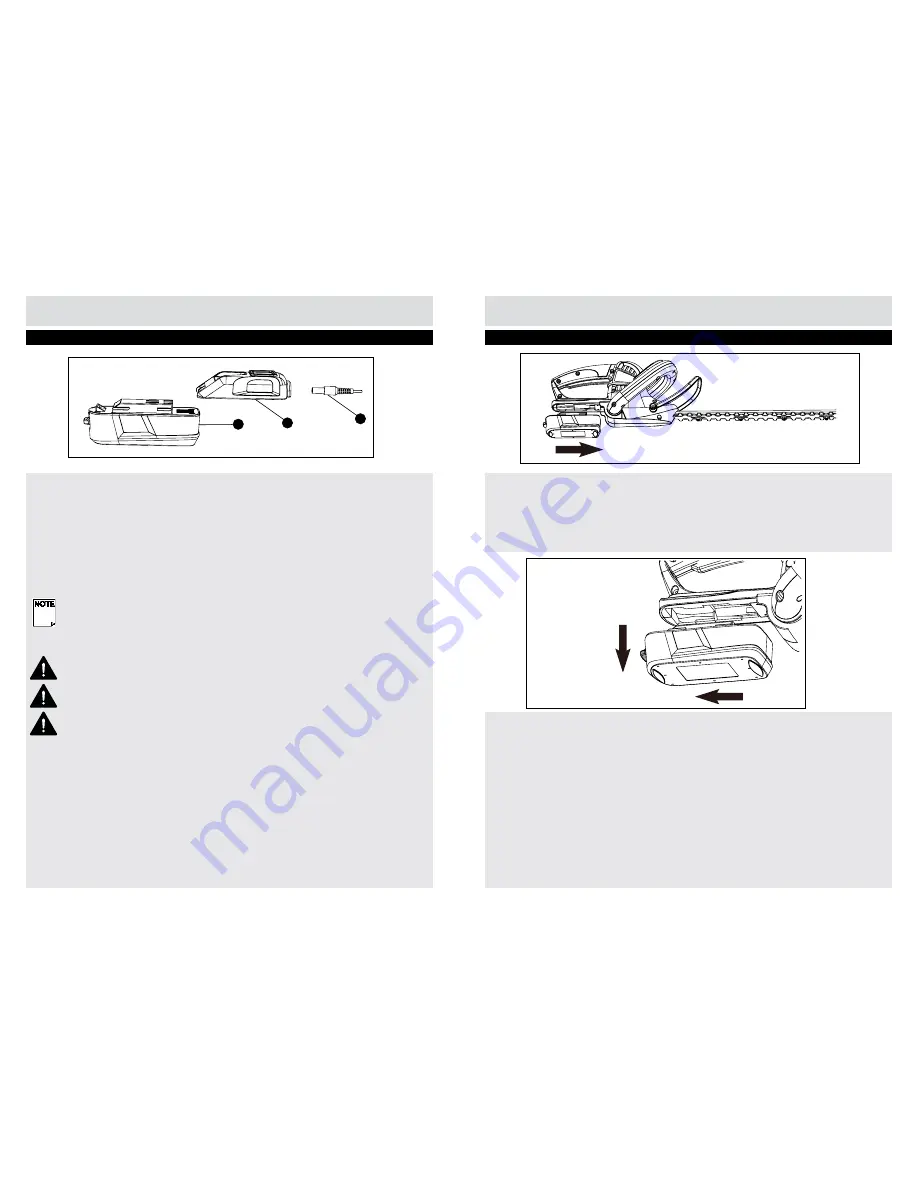
To fit the battery pack

1. Place battery pack in your hedge trimmer. Align raised rib on battery pack with groove inside the 

hedge trimmer.

Make sure the latches on each side of your battery pack snap in place and battery pack is secured 

in hedge trimmer before operation.

A

C

B

To remove the battery pack

1. Locate latches on end of battery pack and depress to release battery pack from your hedge 

trimmer.

2. Remove battery pack from your hedge trimmer.

1

2

Summary of Contents for SHT19

Page 1: ...that will help you get the best from your cordless hedge trimmer ensuring it is assembled correctly and safely If you need help or have damaged or missing parts call the Customer Helpline on 0845 034...

Page 2: ...or damage to the hedge trimmer WARNING Always take care when removing the packaging to prevent damage to you or to the hedge trimmer IMPORTANT Before assembling the hedge trimmer check all the parts i...

Page 3: ...WARNING Read all of the instructions in the battery charger section of this manual before attempting to charger the battery pack for your tool Always use correct battery pack pack supplied with tool...

Page 4: ...ool firstly to ambient temperature and then recharging can be started If you charge a second battery pack immediately after the first one then the charger adapter can be overheated Always allow at lea...

Page 5: ...tion that will help you get the best from your cordless hedge trimmer ensuring it is assembled correctly and safely If you need help or have damaged or missing parts call the Customer Helpline on 0845...

Page 6: ...and recycled environmentally Take advantage of the collection facilities Ask your local council for the collection systems If electrical appliances are disposed incorrectly the environment can be poi...

Page 7: ...l under the influence of alcohol medication or drugs c Use appropriate tool This device is only intended for trimming hedges bushes and shrubs and only designated for use on private property Do not fo...

Page 8: ...n invites accidents e Remove any adjusting key or wrench before turning the power tool on A wrench or a key left attached to a rotating part of the power tool may result in personal injury f Do not ov...

Page 9: ...d free from oil and grease b Keep cutting tools sharp and clean Properly maintained cutting tools with sharp cutting edges are less likely to bind and are easier to control c Store idle power tools ou...

Page 10: ...hing on Push the front handle switch C Press the On off switch D Switching off Release both front handle switch C and On off switch D NOTE Never attempt to lock the switch in the on position D C 15 0...

Page 11: ...icant along the edge of the cutting device to retain a good cutting performance 3 Keep the cutting blade sharp Have a worn or damaged cutting device replaced with a new one of the same type by a quali...

Page 12: ...vital to ensure the success of these schemes and for the protection of the environment 5 Recycle packaging where facilities exist 6 This symbol is known as the Crossedout Wheelie Bin Symbol When this...

Page 13: ...placed In such cases the work performed or parts fitted will not result in an extension of the guarantee period and no new guarantee will become active for the work performed or parts fitted This also...

Reviews: