background image


3. Commissioning 


1)  Remove the lid and fill the water tank with water up to the maximum  mark (see water 

level device at the MiniCHILLY units). Close the lid. 
 

      Never operate the unit when it is open with the lid removed!


2)  Connect the water pipes, check for possible leaks 


3)  Establish the electric network connection (see 1.5 Electrical installation) 


4)  Start the pump (switch on the pump switch next to the controller)  


After start-up of  the pump the liquid level may drop as the tubes which are outside of the unit 
will start filling with water from the unit container. In this case the liquid level has to be 
checked and if necessary water has to be refilled. If you are using Glycol, ensure 30% 
concentration in the water of your installation (unit and pipes). 

Never 

operate the unit with a 

liquid level beneath the lowest water level mark 

"min“ (at MiniCHILLY units) or the water tank 

must be filled with sufficient water all the time in order to protect the unit e.g. against damage 
to the pump. 
 
5)  Adjust the required temperature on the thermostat (see 5. temperature setting). After    
      reaching the adjusted set-point temperature the unit is ready for operation.


3.1 Connection 

Verify that all connections are sealed. No dirt particles may gain access into the pipes.   


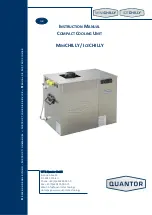
3.2 Chart 


1   

Water level device and tank emptying (only MiniCHILLY) 


Electric motor of the pump 

2   

Connection 3/4"   


Thermostatic controller 

3      

Cover fastener 


Summary of Contents for ICECHILLY

Page 1: ...S D E S E R V I C E M A N U A L D E I N S T R U C C I O N E S GB INSTRUCTION MANUAL COMPACT COOLING UNIT MINICHILLY ICECHILLY WTG Quantor GmbH Europa Allee53 D 54343F hren Phone 49 0 650299995 0 Fax 4...

Page 2: ...Commissioning 4 3 1 Connection 4 3 2 Chart 4 4 Decommissioning 5 5 Temperature setting 8 1 0 Buttons and LED 9 2 0 Set basic Function 9 3 0 Programming Menu 7 4 0 Set Point Adjustment 10 7 Troublesho...

Page 3: ...ectrical components and in this instruction manual 1 2 Safety information The unit should be connected and operated by trained personnel Adjustments maintenance and repairs should be performed by qual...

Page 4: ...ualified personnel under the conditions The electrical unit has been unplugged from the electric socket and secured against unintentional resetting Disconnection from electric power has been verified...

Page 5: ...cked and if necessary water has to be refilled If you are using Glycol ensure 30 concentration in the water of your installation unit and pipes Never operate the unit with a liquid level beneath the l...

Page 6: ...urs after starting the unit Recommended set point temperature for using an ice bank 1 0 C 30 2 F ATTENTION to avoid damage on the unit internal freezing Never let the working machine unattended over a...

Page 7: ...operation Press and release Scrolls through the menu options Increases thevalues Press for at least 5 s Activates the manual defrost functionP DOWN Press and release Scrolls through the menu options...

Page 8: ...than 5 seconds Programming menu can be accessed If the keyboard is not used for more than 15 seconds timeout or after pressing the key once the last value shown on the display is taken over and the p...

Page 9: ...eakage in the refrigeration system Compressor interference Clean the condense Exchange the fan Repair the leakage evacuate gas and fill with the refrigerant gas R134a Exchange the compressor Unit does...

Page 10: ...1 2 8 8 12 25 100 Connected load W 250 350 490 730 1600 3050 at 32 C surrounding temperature Cooling circuits 1 type MiniCHILLY 2 type IceCHILLY Evaporator 1 4301 stainless steel Casing Stainless ste...

Page 11: ......

Page 12: ...B E D I E N U N G S A N L E I T U N G I N S T R U C T I O N M A N U A L I N S T R U C T I O N S D E S E R V I C E M A N U A L D E I N S T R U C C I O N E S Doc ID 2017 07 www quantor technology...

Reviews: