Opus One
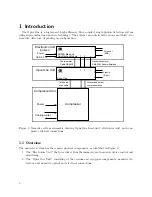
Refer to the diagram of the Opus One unit shown in Figure
for the
procedures in this section.
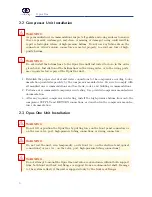
1. Lift and position the Opus One according to the following guidelines. Avoid lifting by any
valve, port, electrical, or tubing connections. As long as you avoid the tubing lines, you
may
lift by the central solid aluminum block at the rear of the unit, as shown in Figure
2. Carefully remove the Opus One unit from its packaging. Note that the unit has a significant
fraction of its weight toward the back.
3. Remove any protective wrapping around the Opus One unit and on the front panel.
4. For rack-mount operation, contact Quantum Opus support for guidance on the selection of
an appropriate shelf mount.
5. If desired, apply the provided adhesive feet near the corners of the bottom panel of the Opus
One. The unit may be set temporarily on its top, bottom, right or left sides to facilitate
applying the feet.
6. Temporarily place the Opus One unit in a location near its operation location so that, after
the high-pressure helium lines are connected, it can be positioned into its final installed
location with minimal strain on the high-pressure helium connections at the rear of the
unit.
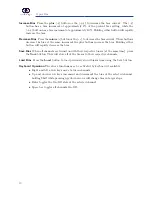
7. The pressurized helium lines must be connected in the following order.
a) Ensure the SUPPLY and RETURN lines are already connected to the compressor and
properly labeled SUPPLY and RETURN.
b) If (optional) pressurized right-angle adapters are to be used, contact Quantum Opus
for the proper installation procedure.
WARNING
Using the improper method of connecting the helium lines, connecting in the
improper order, or erroneously interchanging the RETURN and SUPPLY
lines may result in permanent damage to the tubing lines or necessitate
service to the Opus One unit. Adhere to the following procedures carefully.
B
c) First, using the proper “three-wrench” procedure as illustrated on page 26 of the Sum-
itomo Cryocooler Operations Manual (available in the Support section of our website),
connect the “RETURN” high-pressure helium line to the “RETURN” connector on
the rear of the Opus One unit.
d) Second, again using the proper “three-wrench” procedure, connect the “SUPPLY”
high-pressure helium line to the “SUPPLY” connector on the rear of the Opus One
unit.
e) Connect the provided electrical drive cable between the compressor and the Opus One
unit.
10


