background image

Replacing Decommissioned Disks 

in a Lattus Storage Node


Each Lattus Storage Node contains the following customer replaceable units (CRUs):


l

12 hard disk drives


l

2 power supplies

The instructions in this document describe how to replace decommissioned hard disk drives in a Lattus 
storage node. 

© 2017 Quantum Corporation. All rights reserved. Your right to copy this manual is limited by copyright law. Making copies
or adaptations without prior written authorization of Quantum Corporation is prohibited by law and constitutes a punishable
violation of the law. Artico, Be Certain (and the Q brackets design), DLT, DXi, DXi Accent, DXi V1000, DXi V2000, DXi
V4000, DXiV-Series, FlexTier, Lattus, the Q logo, the Q Quantum logo, Q-Cloud, Quantum (and the Q brackets design), the
Quantum logo, Quantum Be Certain (and the Q brackets design), Quantum Vision, Scalar, StorageCare, StorNext,
SuperLoader, Symform, the Symform logo (and design), vmPRO, and Xcellis are either registered trademarks or trademarks
of Quantum Corporation and its affiliates in the United States and/or other countries. All other trademarks are the property of
their respective owners. Products mentioned herein are for identification purposes only and may be registered trademarks
or trademarks of their respective companies. All other brand names or trademarks are the property of their respective
owners. Quantum specifications are subject to change.

6-68540-02 Rev A, March 2017

Summary of Contents for Lattus S20

Page 1: ...i DXi Accent DXi V1000 DXi V2000 DXi V4000 DXiV Series FlexTier Lattus the Q logo the Q Quantum logo Q Cloud Quantum and the Q brackets design the Quantum logo Quantum Be Certain and the Q brackets de...

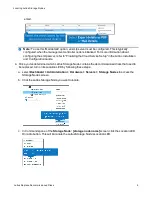
Page 2: ...dministration Hardware Disks Decommissioned The names of the nodes with decommissioned disks are listed in the Machine column 2 Navigate to the Storage Nodes storage node name screen a If you re tryin...

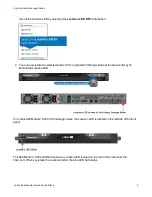
Page 3: ...cted Lattus S10 or original S20 Storage Node at the data center by its illuminated Location LED For Lattus S20 Model 2 S30 or S50 storage nodes the Location LED is located on the left side of the fron...

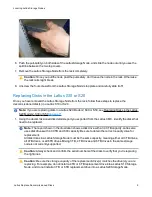
Page 4: ...electric shock Caution When replacing items from the inside of the chassis ensure that you take precautions to prevent Electrostatic Discharge ESD Note Unless otherwise specified the procedures in th...

Page 5: ...ode by clicking here to access the Lattus Documentation Center and then select Learn Videos Lattus CRU Hardware Replacement Videos Exporting the Decommissioned Disk Details To properly identify decomm...

Page 6: ...in the Lattus Installation and Configuration Guide 4 Once you ve determined which Lattus Storage Node contains the decommissioned disks that need to be replaced turn on its Location LED by following t...

Page 7: ...us Storage Node at a time If you shut down too many storage nodes at once data unavailability may occur 1 In the Lattus CMC navigate to Dashboard Administration Hardware Servers Storage Nodes 2 When t...

Page 8: ...isconnect the network cables from the Lattus Storage Node s network ports Note If labels or different colored network cables were not used to identify the network cables mark them before unplugging th...

Page 9: ...odel 2 S30 or S50 on page 11 1 Using the decommissioned disk details report you exported from the Lattus CMC identify the disks that need to be replaced Note The report shown in the illustration shows...

Page 10: ...ge Node Note There are four posts that must be inserted into the four holes on the bottom of the drive sled when you install the drive into the storage node The drive will not sit flush in the storage...

Page 11: ...models and you are replacing drives in multiple storage nodes be sure the storage capacity of the replacement drive s matches the drive s you are replacing For example do not install a 3 TB 6 TB or 1...

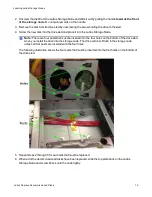
Page 12: ...12 you disconnect the drive connector cable 5 Disconnect the SATA power and signal cables from the failed hard drive To help you identify the correct drive cable the cable is numbered both where it co...

Page 13: ...Locating Lattus Storage Nodes Lattus Replace Decommissioned Disks 13 The following illustration shows which cable to disconnect from the hard drive...

Page 14: ...in the rack Slide it all the way into the rack Otherwise the rack rails might break 2 Tighten the two front screws 3 Reconnect the network cables to the ports from which you disconnected them 4 Recon...

Page 15: ...is information to help determine the cause and resolution for the failed disk initialization Repurposing a Disk In the event that the automatic replacement does not take place there is no initializing...

Page 16: ...s in the Lattus Storage Node If you have additional Lattus Storage Nodes with decommissioned disks that need to be replaced repeat the process for each of those nodes Caution Replace the decommissione...

Reviews: