background image

Remarques relatives à la sécurité, l'environnement et les émissions électroniques

LightSpeed Appliances Getting Started Guide      |      19

Pour éviter d'endommager les cartes système, il est important de les manipuler avec soin. Les mesures
suivantes sont généralement suffisantes pour protéger votre équipement contre les décharges d'électricité
statique :

n

Cet équipement doit être mis à la terre.

n

Avant de manipuler la carte, portez aux poignet un bracelet antistatique relié à la terre.

n

Touchez un objet métallique relié à la terre avant d'extraire la carte de son sachet antistatique.

n

Ne tenez la carte que par ses bords. Ne touchez aucun composant, puce périphérique, module
mémoire ou contact plaqué or.

n

Lorsque vous manipulez des processeurs ou des modules mémoire, évitez de toucher leurs broches
ou les pistes de contact dorées.

n

Remettez dans leur sachet antistatique la carte système et les périphériques de l'appareil de
communications lorsqu'ils ne sont pas utilisés ou installés dans le châssis. Certains circuits sur la
carte système peuvent rester fonctionnels même si l'appareil est éteint.

n

Débrancher l'alimentation de la carte système de sa source électrique avant de connecter ou
déconnecter des câbles ou d'installer ou retirer des composants. À défaut, les risques sont
d'endommager l'équipement et de causer des blessures corporelles.

n

Ne pas court-circuiter la pile au lithium : elle risque de surchauffer et de causer des brûlures en cas de
contact.

n

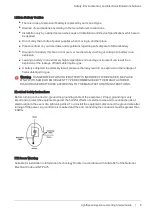
Produit laser de classe 1 : un système laser totalement clos et contenant un laser de classe 1.

Cet appareil n'est pas prévu pour être utilisé dans le champ de vision direct des personnes occupant un
bureau. Pour éviter toute gêne occasionnée par un éventuel reflet, cet appareil ne doit pas être placé dans
le champ de vision direct des personnes occupant un bureau.

Mise en garde concernant les batteries au lithium

n

Un risque d'explosion existe si la batterie est remplacée par une autre de type incorrect.

n

LES PILES DOIVENT ÊTRE MISES AU REBUT CONFORMÉMENT AUX INSTRUCTIONS DE
LEUR FABRICANT.

n

L'installation devra être effectuée uniquement par une personne qualifiée connaissant toutes les
Spécifications concernant l'Installation et l'Appareil applicables.

n

Ne pas tenir par la poignée d'alimentation lors du transport.

n

Veuillez respecter les lois et réglementations locales en matière de mise au rebut sécurisée des piles
au lithium.

n

Jeter une pile au feu ou dans un four chaud, l'écraser ou la couper peut causer une explosion.

n

Laisser une pile dans un environnement de très haute température peut causer une explosion ou la
fuite de gaz ou liquide inflammable.

n

Laisser une pile dans un environnement de très basse pression peut causer une explosion ou la fuite
de gaz ou liquide inflammable.

Avertissement - DANGER D'EXPLOSION SI LA PILE EST MAL REPLACÉE. NE REMPLACER
QU'AVEC UN TYPE IDENTIQUE OU ÉQUIVALENT, RECOMMANDÉ PAR LE
CONSTRUCTEUR. LES PILES DOIVENT ÊTRE MISES AU REBUT CONFORMÉMENT AUX
INSTRUCTIONS DE LEUR FABRICA

Summary of Contents for LightSpeed Appliance QLS250

Page 1: ...Classification Protected 07 June 2023 LIGHTSPEED APPLIANCES QLS250 QLS450 QLS650 QLS800 MLS200 MLS400 Getting Started Guide...

Page 2: ...recaution has been taken in the preparation of this book Check Point assumes no responsibility for errors or omissions This publication and features described herein are subject to change without noti...

Page 3: ...cations For third party independent certification of Check Point products see the Check Point Certifications page Check Point LightSpeed Appliances Getting Started Guide For more about this release se...

Page 4: ...00 and MLS400 LightSpeed Appliances Changed the line card name from NVIDIA ConnectX 100G QSFP28 to 2 Port Dual Width 10 25 40 100G 22 May 2022 Updated French and German Safety Environmental and Electr...

Page 5: ...Carton Contents 40 Terminology 41 Configuring Appliances 42 Connecting to the Appliance CLI 42 Starting the Appliance 42 Initial Gaia Configuration 42 Configuring the Security Gateway Object in SmartC...

Page 6: ...Getting Started Guide 6 Gaia OS Port Assignments 68 Restoring Factory Defaults 71 Restoring from the Gaia Portal 71 Restoring from the Boot Menu 72 Restoring from Gaia Clish 72 Registration and Suppo...

Page 7: ...rounded wrist strap designed for static discharge elimination n Touch a grounded metal object before removing the board from the antistatic bag n Handle the board by its edges only Do not touch its co...

Page 8: ...he leakage of flammable liquid or gas n A battery subjected to extremely low air pressure that may result in an explosion or the leakage of flammable liquid or gas Warning DANGER OF EXPLOSION IF BATTE...

Page 9: ...ircuit e g use of power strips For California Perchlorate Material special handling may apply See http www dtsc ca gov hazardouswaste perchlorate The foregoing notice is provided in accordance with Ca...

Page 10: ...igital device or peripheral This equipment has been tested and found to comply with the limits for a Class A digital device pursuant to Part 15 of the FCC Rules These limits are designed to provide re...

Page 11: ...e equipment by handing it over to a designated collection point for the recycling of waste electrical and electronic equipment The separate collection and recycling of your waste equipment at the time...

Page 12: ...onenten k nnen durch elektrostatische Entladung ESD besch digt werden Befolgen Sie die hier beschriebenen Vorsichtsma nahmen und vor bestimmten Verfahren die in dem Dokument beschrieben werden um elek...

Page 13: ...erwahren Sie die Systemplatine des Kommunikationsger ts und die Peripheriemodule wieder in der antistatischen Verpackung wenn sie nicht benutzt oder in das Geh use eingebaut werden Einige Schaltkreise...

Page 14: ...entflammbarer Fl ssigkeit oder Gas f hren n Eine extrem niedrigem Luftdruck ausgesetzte Batterie kann zu einer Explosion oder zum Auslaufen von entflammbarer Fl ssigkeit oder Gas f hren Achtung WENN...

Page 15: ...weniger die direkten Verbindungen zum Abzweigstromkreis beachtet werden z B durch die Verwendung von Adapterleisten F r Kalifornien Perchlorate m glicherweise ist eine spezielle Handhabung erforderlic...

Page 16: ...inie ber elektromagnetische Vertr glichkeit 2014 30 EU konform ist Das genannte Produkt ist mit der Niederspannungsrichtlinie 2014 35 EU konform und erf llt die Auflagen betreffend elektrische Betrieb...

Page 17: ...rgt werden darf Es obliegt Ihrer Verantwortung das Ger t an einer entsprechenden Stelle f r die Entsorgung oder Wiederverwertung von Elektroger ten aller Art abzugeben Die separate Sammlung und das Re...

Page 18: ...grand nombre des composants d crits dans ce document peuvent tre endommag s par D charge lectrostatique ESD Veuillez respecter les pr cautions d crites ici et avant toute proc dure sp cifique d taill...

Page 19: ...surchauffer et de causer des br lures en cas de contact n Produit laser de classe 1 un syst me laser totalement clos et contenant un laser de classe 1 Cet appareil n est pas pr vu pour tre utilis dans...

Page 20: ...rm e ou un rack plusieurs unit s la temp rature du rack en fonctionnement peut tre sup rieure la temp rature ambiante de la pi ce Avant d installer l quipement il faut donc s assurer qu il sera dans u...

Page 21: ...orme la section 15 des r glementations de la FCC Son fonctionnement est soumis aux deux conditions suivantes 1 Cet appareil ne doit pas causer d interf rence pr judiciable et 2 Cet appareil doit tol r...

Page 22: ...duira dans le cadre d une installation particuli re Si cet appareil provoque des interf rences avec un r cepteur radio ou un t l viseur ce qui peut tre d tect en mettant l appareil sous et hors tensio...

Page 23: ...re responsabilit de le porter un centre de collecte d sign pour le recyclage des quipements lectriques et lectroniques Le fait de s parer vos quipements lors de la mise au rebut et de les recycler con...

Page 24: ...EMI CE EN 55032 2015 AC 2016 Class A EN 61000 3 2 2014 Class A EN 61000 3 3 2013 EN 55024 2010 A1 2015 EN 61000 4 2 2009 EN 61000 4 3 2006 A1 2008 A2 2010 EN 61000 4 4 2012 EN 61000 4 5 2014 AC 2017 E...

Page 25: ...1 2005 AMD2 2013 EN 60950 1 2006 A11 2009 A1 2010 A12 2011 A2 2013 UL ULc 62368 1 IEC 62368 1 2014 EN 62368 1 2014 A11 2017 Information technology equipment Electrical Safety requirements LVD RoHS EN...

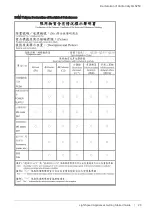
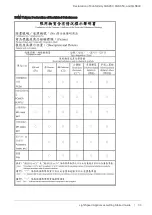
Page 26: ...Declaration of Conformity QLS250 LightSpeed Appliances Getting Started Guide 26 BSMI Taiwan Declaration of Restricted Substances...

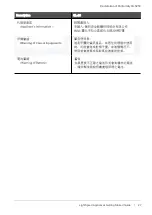
Page 27: ...Declaration of Conformity QLS250 LightSpeed Appliances Getting Started Guide 27 Description QL 20...

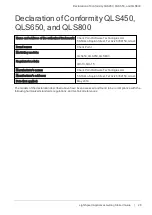
Page 28: ...Street Tel Aviv 6789159 Israel Brand name Check Point Marketing models QLS450 QLS650 QLS800 Regulated models QD 10 QD 15 Manufacturer s name Check Point Software Technologies Ltd Manufacturer s addres...

Page 29: ...C63 4 201 ICES 003 Issue 7 2016 updated April 2017 Class A Information Technology Equipment Radio Disturbance Characteristics VCCI VCCI TECHNICAL REQUIREMENTS VCCI CISPR 32 2016 CISPR 32 2015 C1 2016...

Page 30: ...Declaration of Conformity QLS450 QLS650 and QLS800 LightSpeed Appliances Getting Started Guide 30 BSMI Taiwan Declaration of Restricted Substances...

Page 31: ...Declaration of Conformity QLS450 QLS650 and QLS800 LightSpeed Appliances Getting Started Guide 31 Description QD 10 QD 15...

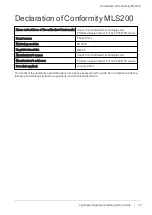
Page 32: ...l Aviv 6789159 Israel Brand name Check Point Marketing models MLS200 Regulated models QM 35 Manufacturer s name Check Point Software Technologies Ltd Manufacturer s address 5 Shlomo Kaplan Street Tel...

Page 33: ...0 4 4 Information Technology Equipment Fast Transient Immunity IEC 61000 4 5 Information Technology Equipment Surge Immunity IEC 61000 4 6 Information Technology Equipment Conducted RF Immunity IEC 61...

Page 34: ...nd the Amendment Directive 93 68 EEC Federal Communications Commission FCC Notice US This equipment has been tested and found to comply with the limits for a Class A digital device pursuant to part 15...

Page 35: ...other means of security and is controlled by the authority responsible for the location Die Erdung diehnt als Sicherheitsmassnahme Stellen Sie sicher dass das Netzkabel an eine Steckdose mit Erdungsa...

Page 36: ...Declaration of Conformity MLS200 LightSpeed Appliances Getting Started Guide 36...

Page 37: ...32 2015 A11 2020 Class A BS EN 55032 2015 A11 2020 Class A AS NZS CISPR 32 2015 Class A CISPR 32 2015 COR1 2016 Class A EN IEC 61000 3 2 2019 Class A BS EN IEC 61000 3 2 2019 Class A EN 61000 3 3 2013...

Page 38: ...005 AMD2 2013 EN 60950 1 2006 A11 2009 A1 2010 A12 2011 A2 2013 UL ULc 62368 1 IEC 62368 1 2014 EN 62368 1 2014 A11 2017 Information technology equipment Electrical Safety requirements LVD RoHS EN 505...

Page 39: ...g all of your current and future network application and management security needs LightSpeed Appliances Overview Check Point LightSpeed Appliances provide hyper fast network security to Data Centers...

Page 40: ...3 PSU restraints n 1 RJ45 network cable n 1 RJ45 console cable n 1 RJ45 loopback adapter n 1 Fiber loopback adapter n 1 USB type C cable n 8 SFP 1G 10G transceivers n 3 power cables n 3 PSU restraints...

Page 41: ...in this guide n Security Gateway The security engine that enforces the organization s Security Policy and acts as a security enforcement point n Security Policy The policy created by the system admini...

Page 42: ...C console cable When you finish using the RJ45 port reconnect the mini USB console cable Note To use the USB type C console port you must install a driver on the console client machine desktop laptop...

Page 43: ...ilable Software Images The LightSpeed Appliances come with software images See sk176466 Reverting to a previous software image takes a few minutes To follow the progress and see when the appliance is...

Page 44: ...added or removed n After the first boot and after you replace a second storage device the RAID state in the VolumeID line shows DEGRADED this indicates that the drives are not synchronized The State o...

Page 45: ...Gateways Servers select the object that represents the appliance 2 In the Summary tab click Device Information Example 3 Click RAID Volumes The window shows volume and disk information Example To mon...

Page 46: ...re that there is at least one fully synchronized storage device in the system 1 When the system is up remove the failed storage device 2 Wait 15 seconds The appliance recognizes that you removed a sto...

Page 47: ...0 17 40 in 44 2 cm 24 01 in 61 0 cm 3 46 in 8 8 cm 2U 32 F 104 F 0 C 40 C from 100V 13 8A to 240V 8 5A 47 63Hz QLS450 QD 10 17 40 in 44 2 cm 24 01 in 61 0 cm 5 19 in 13 2 cm 3U 32 F 104 F 0 C 40 C fro...

Page 48: ...appliance is mounted in a rack Important If the appliance vents are blocked the appliance can become too hot and it can be damaged The appliance and rack rails have been tested in extreme conditions...

Page 49: ...nces Getting Started Guide 49 LightSpeed Appliances Hardware This chapter contains information about the appliance hardware on the Front Panel and the Rear Panel Front Panel Note The diagrams below sh...

Page 50: ...800 Item Component Description 1 Service tag A slide out card that identifies the appliance and shows its serial number and MAC address 2 Locator button Turns the location beacon LED on and off in the...

Page 51: ...gement port is for an Ethernet connection to a remote management computer 9 ESD grounding point When servicing the appliance connect an ESD strap to this point 10 2 Storage devices When monitoring the...

Page 52: ...l Appliance Ports on MLS200 on the next page Use these ports to connect to the appliance 4 Identification Service Tag A slide out card that identifies the appliance and shows its serial number MAC add...

Page 53: ...e Appliance CLI on page 42 3 Port activity LED n Off No activity n Slow Blink Green Activity 4 Link speed LED n Off No Link or 10M link n On Green 100M link n On Amber 1000M link 5 Management port For...

Page 54: ...SFP28 ports See Gaia OS Port Assignments on page 68 For more information see the LightSpeed 10 25 40 100G QSFP28 Ports Administration Guide 6 USB Type C port For a serial connection to the appliance 7...

Page 55: ...y status n Off No power no status n Amber Power supply fault detected n Green All power supplies are functioning correctly 4 Alert n Off No faults detected n Blinking red System fault detected 5 Locat...

Page 56: ...Rear Panel LightSpeed Appliances Getting Started Guide 56 Rear Panel QLS250 QLS450 QLS650 and QLS800...

Page 57: ...e the appliance cover 2 ESD grounding point When servicing the appliance connect an ESD strap to this point 3 Alarm Off button for power supply units If a power supply cable is not connected to the ou...

Page 58: ...nd MLS400 appliances The PSUs are numbered from left to right in the OS as Power Supply 1 and Power Supply 2 See PSU Configuration and Monitoring on page 63 7 Thumb screws for cooling fan unit Loosen...

Page 59: ...a Portal CLI System Fan 1 System Fan 1 Inside System Fan 2 System Fan 2 Inside System Fan 3 System Fan 3 Inside System Fan 4 System Fan 4 Inside System Fan 5 System Fan 1 Outside System Fan 6 System F...

Page 60: ...b 4 Restraint strip Legend QLS250 and MLS400 The image below is for the QLS250 appliance but installing the power cable restraint is the same for the MLS400 appliance Item Description 1 Restraint stri...

Page 61: ...restraint tab to the side to move the cable loop on the restraint strip 7 Move the cable loop until you can put it around the power cable as shown in the next figure 8 Insert the open side of the cab...

Page 62: ...ppliances Getting Started Guide 62 3 Push down on the restraint clip to close it and secure the power supply cable Item Description 1 Restraint clip in the open position upward 2 Restraint clip in the...

Page 63: ...monitor the PSUs on the appliance in Gaia Clish 1 Connect to the command line on the appliance 2 Log in to Gaia Clish 3 Run show sysenv ps Example output on a QLS800 appliance QLS800 show sysenv ps H...

Page 64: ...ed Appliances Getting Started Guide 64 Column Description Status 0 No problems found 1 Error Maximum The maximum threshold For PSUs it is only measured as Up and Down Minimum The minimum threshold For...

Page 65: ...use a dedicated management channel to remotely control Check Point appliances Lights Out Management can also work when the appliance is turned off or does not respond However the appliance must be co...

Page 66: ...n in the event of a BIOS failure n The appliance s Alert LED on the front panel blinks red n The Gaia Portal Maintenance Hardware Health page shows that the BIOS sensor is Invalid and its status is Of...

Page 67: ...at can be used with the appliance n Telescopic rails n Line cards excluding MLS200 and MLS400 n Transceivers n AC and DC power supply units n Storage devices excluding MLS400 n System memory n Cooling...

Page 68: ...10 25 40 100G QSFP28 ports are supported for connecting the Security Appliances to Maestro Orchestrators QLS250 Left 2 Port Dual Width 10 25 40 100G QSFP28 Card eth1 01 and eth1 02 Middle expansion li...

Page 69: ...2 Bottom row right expansion line cards eth7 01 to eth7 04 and eth8 01 to eth8 04 QLS800 Top row left 2 Port Dual Width 10 25 40 100G QSFP28 Card eth1 01 eth1 02 Top row right 2 Port Dual Width 10 25...

Page 70: ...Gaia OS Port Assignments LightSpeed Appliances Getting Started Guide 70 MLS400 From left to right eth1 eth2 eth3 and eth4...

Page 71: ...rtal to restore the appliance to the factory default settings To restore a Gaia appliance from the Gaia Portal 1 In your web browser connect to the management IP address https IP Address of Appliance...

Page 72: ...bits no parity 1 stop bit Flow control None 5 Connect to the appliance 6 Reboot or turn on the appliance The appliance initializes and status messages are shown in the terminal emulation program 7 Wh...

Page 73: ...73 Registration and Support Support For additional technical information about Check Point products consult the Check Point Support Center Where To From Here You have the basics to get started The nex...

Reviews: