Scalar i6000 Installation Guide
139
Additional Requirements:
•
Height of the visible portion of the barcode: 10 mm ±2 mm
•
Length of the rest zones: 5.25 mm ±0.25 mm
•
No black marks should be present in the intermediate spaces or rest zones
•
No white areas should be present on the bars
Importing Cartridges Using the I/E Station
These instructions assume that you have already entered your license key, set up your partitions, and
attached the barcode labels to the cartridges. You will use the I/E station to load cartridges.
1
Make sure that you are viewing the partition into which you want to import a cartridge.
2
From the
View
menu, select a partition.
3
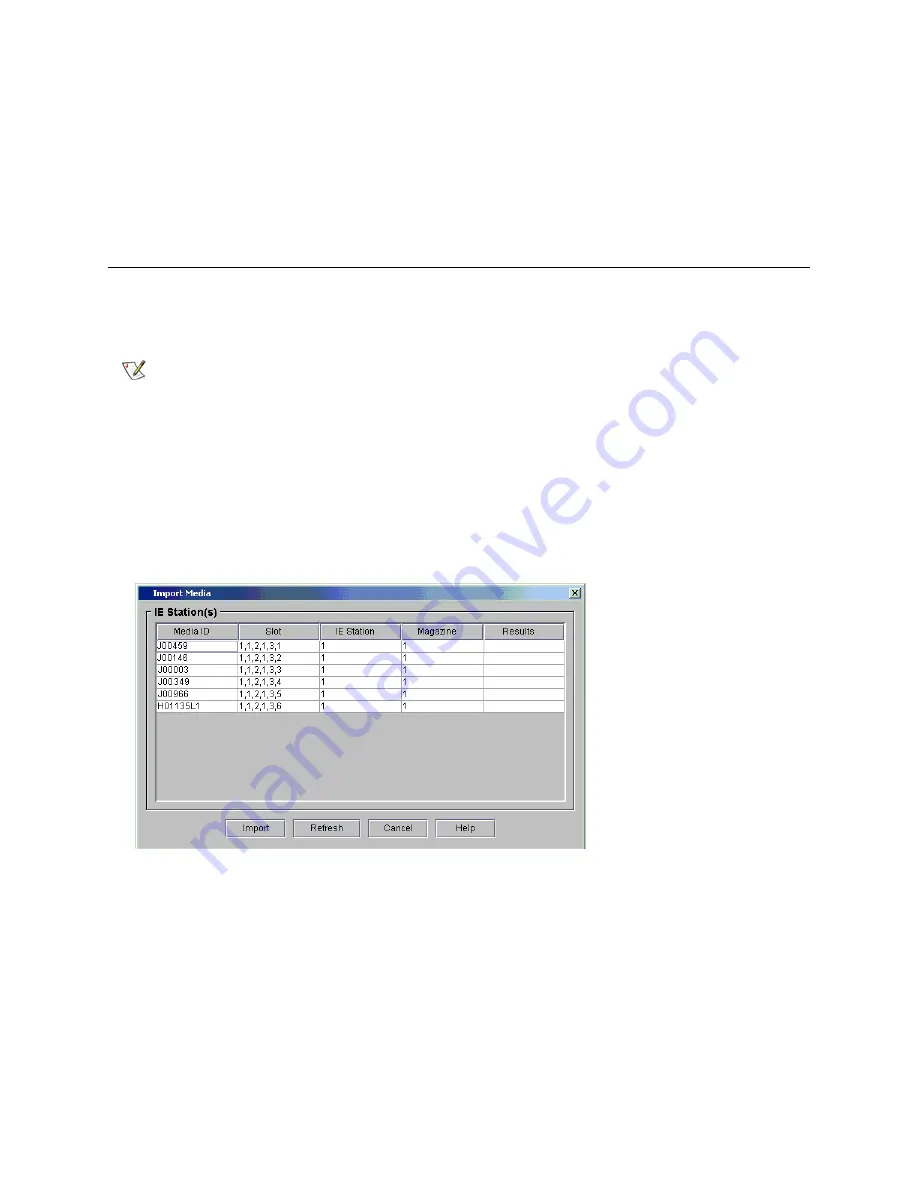
Click
Operations > Import
to add cartridges into the partition.
The
Import Media
dialog box appears.
4
Click
Yes
if you are prompted to take the partition offline.
Note
To ensure the proper operation of tape cartridges, pickers, and drives, make
sure your hands are dirt- and grease-free before handling tape cartridges.
Clean the sides of all tape cartridges with a clean, dry paper towel or cloth
before installing them in the library.
Summary of Contents for Scalar i6000
Page 20: ...8 About This Guide and Your Product...
Page 38: ...26 Installing a Stand Alone Control Module...
Page 104: ...92 Installing a Multi Module Library...
Page 156: ...144 Installing Cartridges...
Page 164: ...152 Setting up Your Library for Access...
Page 242: ...230 Configuring the Library...
Page 304: ...292 Adding Optional Hardware eight 2 5 mm screws...
Page 318: ...306 Adding Optional Hardware...
Page 336: ...324 Installation Testing and Verification Figure 35 Example Test Log Output...
Page 356: ...344 Testing and Calibrating the Digital Level...
Page 362: ...350 LBX Board and Terminator...
Page 380: ...368 Glossary...
Page 384: ...372 Index...


