Scalar i2000 Installation Guide
243
13
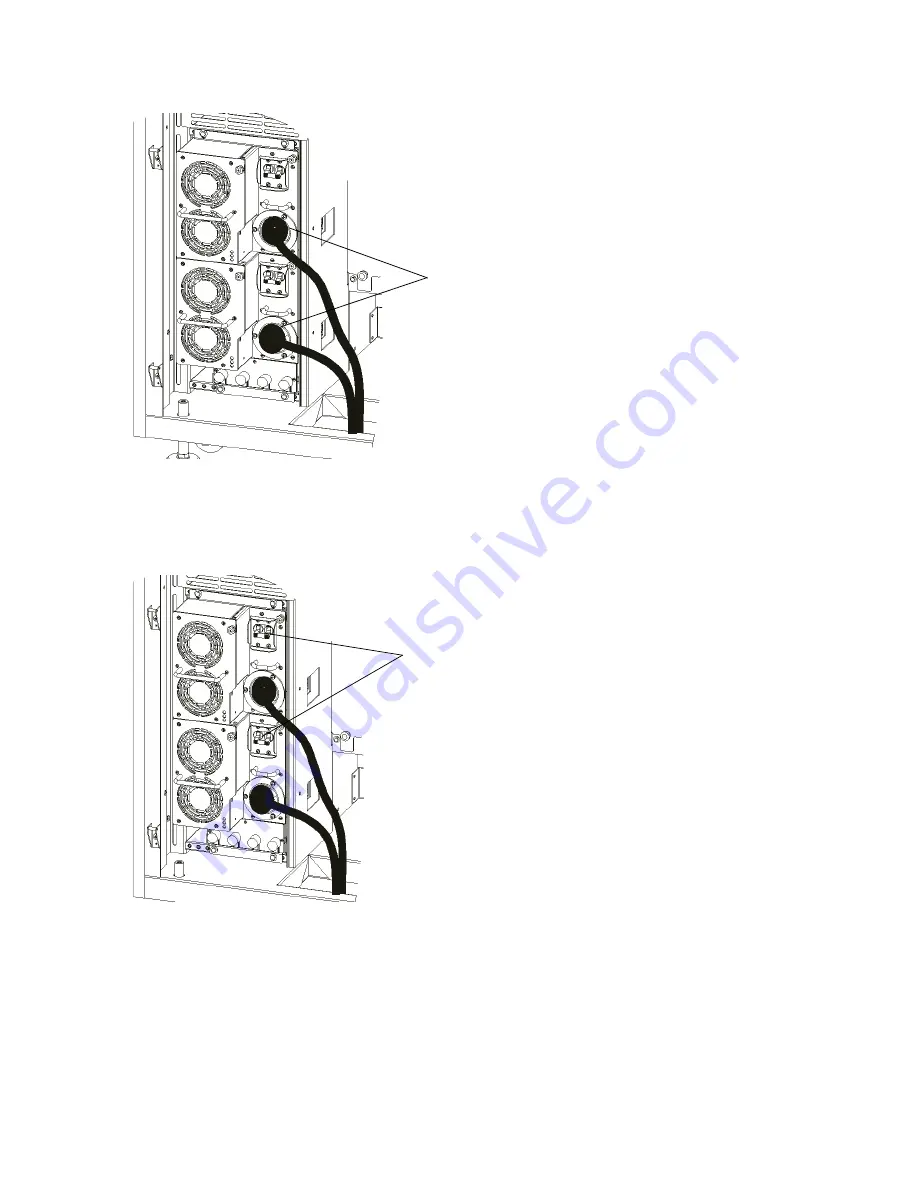
Insert the power cords into the power distribution units and turn them clockwise.
14
Plug the two power cords into the power source.
15
On both power distribution units, toggle the power switch to the up (I) position to turn on the power. If
you have power coming to other modules of the library, they must be turned on as well.
16
Detach the ESD strap and close the door.
17
To turn on power to the library, press the
Power
button on the indicator panel.
The library begins to boot up. Within five minutes, the LMD display appears on the library’s touch
screen. A library with only a few drives usually will be fully powered on and ready for use within 10
minutes. However, if a library is large with a high number of drives, it can take more than an hour for the
library to fully power on, complete its discovery process, and become ready for use. During the power-
on process, the
Robotics Enabled
indicator flashes. When the library is fully up and ready to receive
commands, the
Robotics Enabled
indicator turns solid green.
plug the power cables into
the power distribution units
turn both power switches
to the on position (I)
Summary of Contents for Scalar i6000
Page 20: ...8 About This Guide and Your Product...
Page 38: ...26 Installing a Stand Alone Control Module...
Page 104: ...92 Installing a Multi Module Library...
Page 156: ...144 Installing Cartridges...
Page 164: ...152 Setting up Your Library for Access...
Page 242: ...230 Configuring the Library...
Page 304: ...292 Adding Optional Hardware eight 2 5 mm screws...
Page 318: ...306 Adding Optional Hardware...
Page 336: ...324 Installation Testing and Verification Figure 35 Example Test Log Output...
Page 356: ...344 Testing and Calibrating the Digital Level...
Page 362: ...350 LBX Board and Terminator...
Page 380: ...368 Glossary...
Page 384: ...372 Index...


