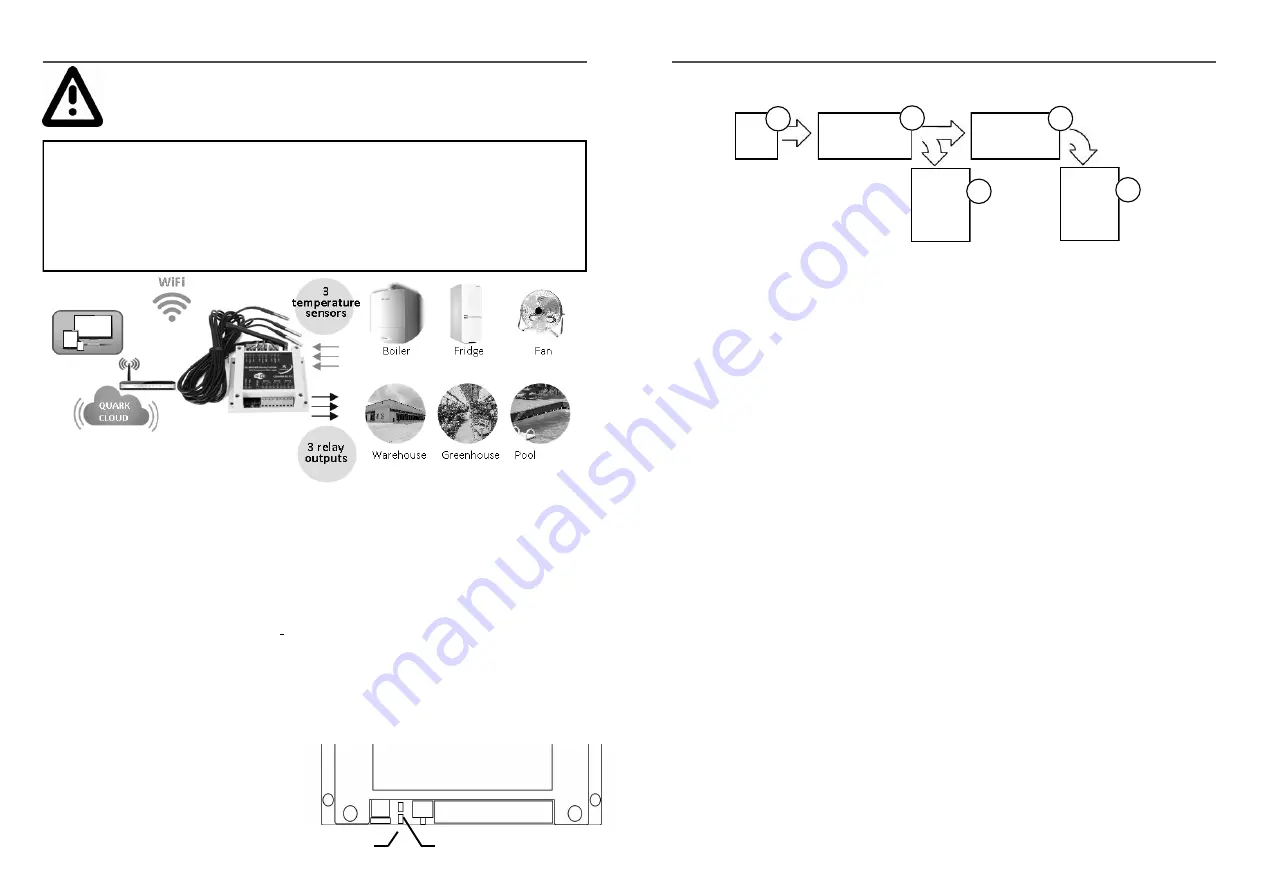
YOU WILL NEED:
1. Temperature sensors (included)
which come in 1, 2 and 6 metre lengths and can be shortened
or extended (we recommend a maximum of 8 metres for best results).
2. WiFi reception
in the location that the W016 will be installed (you can check this using a
mobile phone).
3. Power supply cable (included if ordered),
long enough to reach your W016 location.
INSTALLATION
1. W016 location:
the W016 unit (excluding sensors) must be installed in an indoors
environment, unexposed to water or high humidity.
2. Download/install your APP and/or Windows software:
Software for Windows
(only) https://www.quark-elec.com/product/qk-w016-wifi-
temperature-controller/
Android or iOS app
for mobile phones. https://www.quark-elec.com/downloads/apps/
3. Connect temperature sensors
by inserting the connector block into the slots at the back of the
W016. Good practice is to label each sensor and its corresponding relay. This will help later on.
4. Connect the relay output (
if required). Connect either normal closed or normal open
depending on your requirements. Check the back page of this guide for details.
QK-W016
This is an overview only. Familiarize yourself with the manual and the manuals of
any connecting devices before installation. It is always recommended that
electronic equipment be installed by an experienced installer.
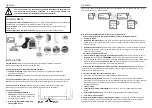
Blue LED -
Network
Red LED -
System
5. Connect to power
Check the blue NETWORK LED is
flickering.
Once the W016 is powered up
the network LED will begin to flash. This
will flicker every 1 second.
Wait for the red SYSTEM LED to stop
flickering and stay lit.
QK-W016
You are now ready to configure the W016 to work through Ad-hoc or Station mode WiFi, To do
this, follow steps 6 to 7 laid out below.
6.To connect to the W016 directly, without a router (Ad-hoc WiFi):
6.1 Use the reset function to prepare the W016 to connect through Ad-hoc WiFi
Unplug the W016.
Hold down the reset button
on the front. Re-connect to power whilst still holding the reset
button, wait for the red LED to appear. Continue to hold for another 4 seconds once red LED
appears and then,
Release the reset button.
The blue LED will flash rapidly when it is time to release the button.
Wait about 60 seconds. Once the red LED comes back on, the W016 is in reset and ready to
connect via Ad-hoc mode.
6.2. Connect via Ad-hoc WiFi mode
Scan for the WiFi signal using your phone/PC and connect.
The WiFi name will be similar to
‘WiFi168
’ and the password is
‘88888888
’. If you cannot find the WiFi name, redo step 6.1.
If connecting to Ad hoc WiFi via your PC, also open the W016 application and type in the W016
IP address which should be
‘192.168.1.100’
and click ‘connect WiFi’. The blue LED will stay
constantly lit once the connection is successfully established.
7. If you only want the W016 to work in Ad-hoc mode, repower the device now.
Otherwise, if
you want to connect through your router (station mode) or access your W016 off-site, do not
repower and simply skip to step 8.
8. To connect through your router (Station mode):
Ensure you are connected to your W016 via Ad-hoc mode
(step 6).
Open the Android/iOS APP
(Please note, although you can do this on the W016 Windows
application, if you ever intend to access your W016 through WiFi off-site or through a different
WiFi connection, you will need to do this step on the Android/iOS phone app, not the
Windows application.)
Click on ‘Setup’
Enter your WiFi network name (SSID)
and click ‘save’, wait for feedback that it has been
saved.
Enter network password
and click ‘save’, wait for feedback that it has been saved.
Click ‘Connect Station mode’
9. Repower the W016 to load your Station mode settings .
The blue LED will stay constantly lit
once the connection is successfully established. You will now be able to connect to the W016
through your normal wireless network, and off site using your mobile data.
Ad-hoc
Mode WiFi
Repower
to use in
Ad-hoc
mode.
Station
Mode WiFi
Re-
set
Repower
to use in
Station
mode.
6.1
8
6.2
9
7


