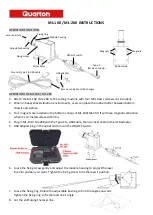
ML-100 / ML-200
INSTRUCTIONS
OPERATION FUNCTIONS
OPERATION THE ML-100 / ML-200
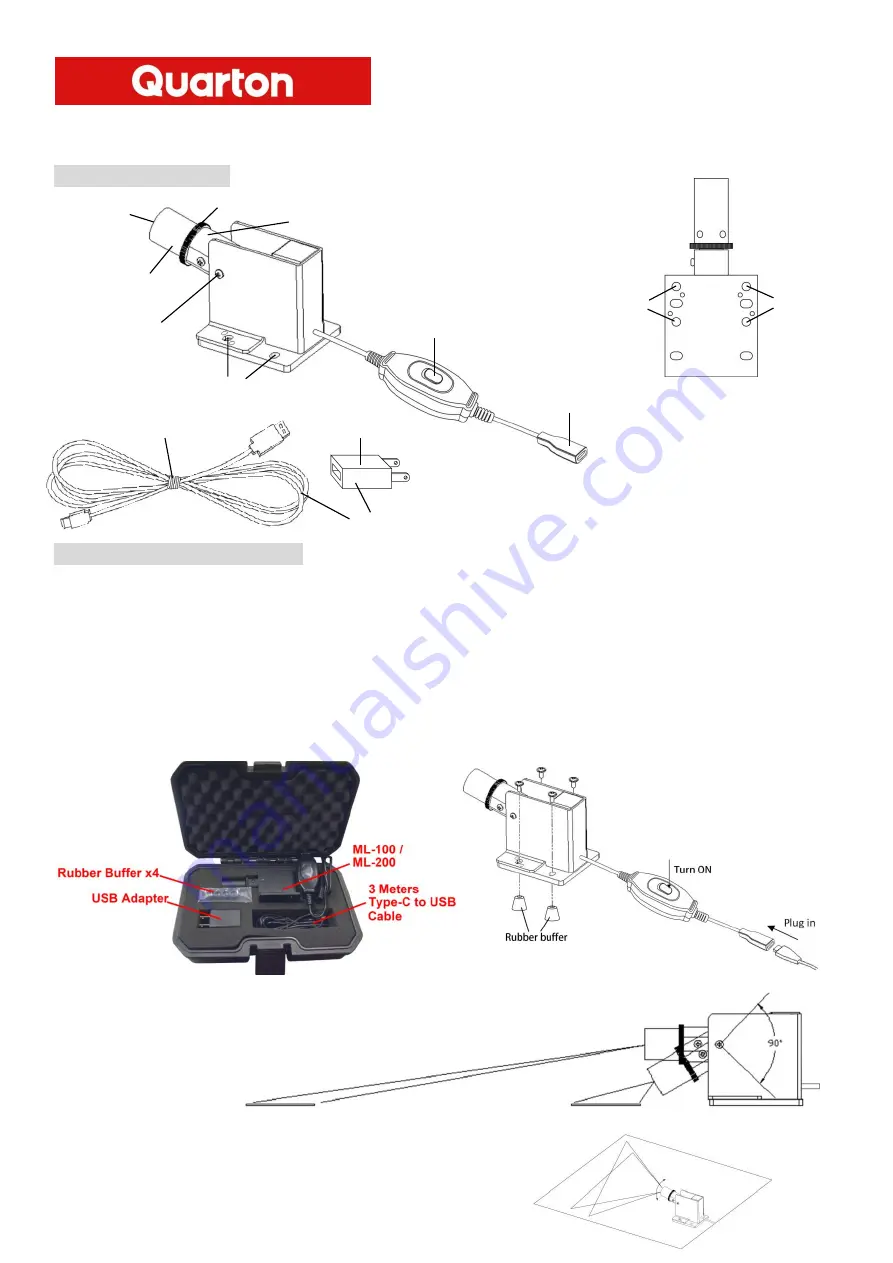
1.
Attach the ML-100 / ML-200 to the cutting machine with four M4 screws
(screws not included).
2.
When in heavy shock/vibration environments, users can place the rubber buffer between bottom
chassis and surface.
3.
Four magnets are installed in the bottom chassis of ML-100/ML-200. It will have magnetic attraction
when it's on metal surface with iron.
4.
Plug in ML-100 / ML-200 with the Type-C to USB Cable, then connect cable to the USB adapter.
5.
USB adapter plug in the outlet and turn on the ON/OFF switch.
6.
Loose the fixing screw gently and adjust the module housing to project the laser
line into position you want. Tighten the fixing screw to fix the laser’s position.
7.
Loose the fixing ring. Rotate the adjustable bushing to find the angle you want.
Tighten the fixing ring to fix the laser line’s angle.
8.
Cut the stuff along the laser line.
Fixing ring
Laser aperture
ON/OFF switch
Module housing
Adjustable bushing
Fixing screw
Screw holes
Type C
female connector
Bottom Side
Magnets
Magnets
3 meters Type C to USB cable
USB adapter
Same as cell phone USB charger


