background image

INSTALLATION AND OPERATING INSTRUCTIONS

Room Air Conditioner

Model: 

HQ-2051TH

Please read these operating instructions thoroughly
before using your air conditioner and keep for future
reference.

For assistance, please call: 1-800-211-PANA(7262) or 
Register your product at : http://www.panasonic.com/register

Summary of Contents for HQ-2051TH

Page 1: ...onditioner Model HQ 2051TH Please read these operating instructions thoroughly before using your air conditioner and keep for future reference For assistance please call 1 800 211 PANA 7262 or Registe...

Page 2: ...ll find many answers to common problems in the chart of troubleshooting tips If you review our chart of Troubleshooting Tips first you may not need to call for service at all READ THIS MANUAL CAUTION...

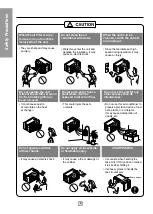
Page 3: ...below Be sure not do this Be sure to follow the instructions Plug in the power plug properly Otherwise it will cause electric shock or fire due to heat generation Do not operate or stop the unit by i...

Page 4: ...d cause dust to accumulate on the heat exchanger Do not put a pet or house plant where it will be exposed to direct air flow This could injure the pets or plants Do not use the unit for any other purp...

Page 5: ...umber the greater the cooling FOR NORMAL COOLING 1 Turn the operation switch to the High Cool or the Low Cool setting 2 Set the thermostat control to the desired temperature mark 5 the mid point is a...

Page 6: ...and lukewarm water then polished with a liquid wax used for appliances To ensure continued peak efficiency the condenser coils outside of unit should be checked periodically and cleaned if clogged wit...

Page 7: ...parts name prior to installation will help you understand the installation procedure Features 1 CABINET 2 HORIZONTAL AIR DEFLECTOR 3 COOL AIR DISCHARGE 4 FRONT GRILLE 5 INLET GRILLE 6 AIR FILTER 7 KNO...

Page 8: ...sents interference fasten a 2 wide wood strip to the inner window sill across the full width of the sill The wood strip should be thick enough to raise the height of the window sill so that the unit c...

Page 9: ...ll with short side of bracket as shown Use the 2 screws TYPE A provided b The bracket helps to hold the unit securely in place Be sure to place bracket edge flush against back of inner sill See Fig 9...

Page 10: ...in the inner window sill with a screw TYPE B as shown Fig 13 7 Window installation of room air conditioner is now completed See ELECTRICAL DATA for attaching power cord to electrical outlet C HOW TO...

Page 11: ...ains blinds or furniture blocking the front of the air conditioner Turn the knob to a higher number The highest setting provides maximum cooling Clean the filter at least every 2 weeks See the C are a...

Page 12: ...ntrar respuestas a la mayor a de los problemas m s comunes Si consulta primero la tabla de Sugerencias para la resoluci n de problemas quiz ni siquiera necesite avisar al servicio t cnico Consulte con...

Page 13: ...a os materiales El significado de los s mbolos utilizados en este manual se indica a continuaci n Aseg rese de no hacerlo Aseg rese de seguir las instrucciones Conecte correctamente el enchufle De otr...

Page 14: ...e calor No ponga un animal dom stico ni una planta donde quede directamente expuesto al flujo de aire Esto podr a da ar al animal o a la planta No lo utilice para prop sitos especiales No utilice este...

Page 15: ...o Low Cool 2 Ajuste el control del Termostat en la marca deseada 5 usualmente el punto medio es un buen punto para comenzar Si la temperatura del cuarto no es satifactoria despu s de un per odo de ti...

Page 16: ...al halando hacia la izquierda ver Fig 1 2 Lave el Filtro de Aire con agua tibia Sac adalo bien cuando est limpio para sacar la humedad completamente Col quelo en su lugar LIMPIEZA DEL AIRE ACONDICINAD...

Page 17: ...tes antes de la instalaci n le ayudar a entender el proceso de instalaci n Caracter sticas 1 GABINETE 2 DEFLECTOR HORIZONTAL DE AIRE VENTANILLAS VERTICAKLES 3 SALIDA DE AIRE 4 REJILLA FRONTAL 5 RECOLE...

Page 18: ...storba col quese una tira de madera de 2 pulg de ancho a lo largo del descanso de la ventana por la parte que de internamente al cuarto y en toda su extensi n La tira de madera debe ser lo suficientem...

Page 19: ...el lado corto del soporte como est ilustrado Utilice 2 tornillos TIPO A proveidos b La m nsula ayuda a que la unidad se encuentre firme Aseg rese de poner la m nsula en L contra la parte posterior del...

Page 20: ...7 La instalaci n del aire acondicionado de ventana no estar completa Vea SEGURIDAD ELECTRICA para conectar la extensi n el ctrica al toma corriente C COMO INSTALAR EL TUBO DE DESAG E En climas h medo...

Page 21: ...r Aseg rese que no haya cortinas persianas o muebles bloqueando el frente del aire acondicionado Elija una temperatura mas fria Entre m s baja sea la temperatura elegida mas fria sera la zona acondici...

Page 22: ...CIRCULATION Cf min CIRCULATION D AIR pi min 140 CIRCULACION DE AIRE pie min DIMENSIONS Height cm inches DIMENSIONS Hauteur cm pouces 31 2 12 9 32 DIMENSIONES Alto cm pulgadas Width cm inches Largeur...

Page 23: ...23 Nota...

Page 24: ...djustment of customer controls improper maintenance alteration modification power line surge lightning damage improper voltage supply commercial use such as hotel office restaurant or other business o...

Reviews: