36
15
10
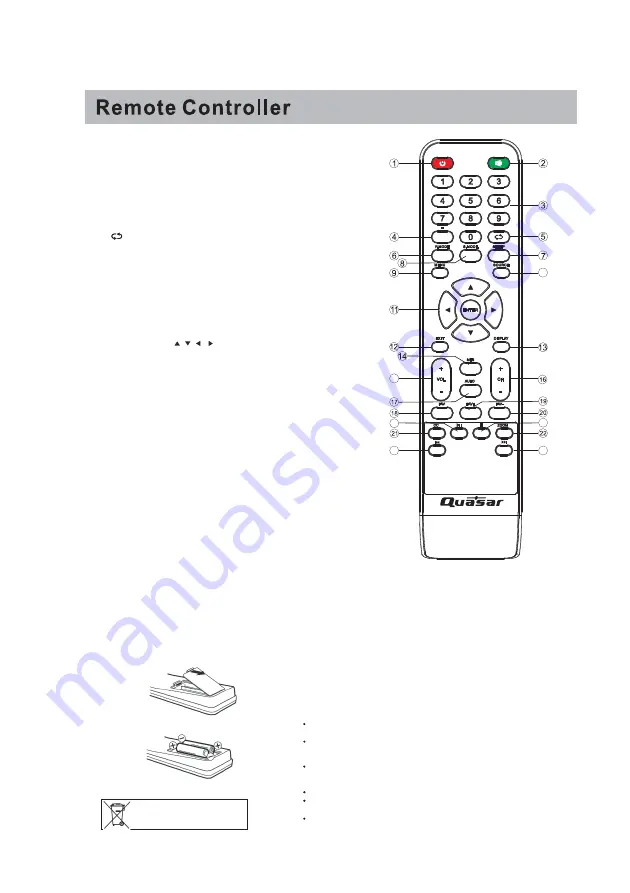
1.
: Set your TV to power on or standby mode.
2.
MUTE
:
Press to mute the sound. Press again or press VOL+
to unmute.
3.
0-9
:
Press 0-9 to select a TV channel directly when you are
watching TV. The channel will change after a few seconds.
4.
-
:
Press “-” to enter a program number for multiple program
channel, such as 2-1etc. Return to the previous channel
viewed.
5. : Return to the previous channel viewed.
6.
P.MODE
:
Press to cycle through the different picture settings.
7.
SLEEP
:
Select the amount of time before TV turns off
automatically.
8.
S.MODE
: Press to cycle through the different sound settings.
9.
MENU
:
Allows you to navigate the on-screen menus.
10.
SOURCE
:
Press to cycle through the input source in following:
TV
→
AV
→
YPBPR
→
HDMI1
→
HDMI2
→
HDMI3
→
PC
11.
THUMBSTICK( / / / / ENTER)
:
Allows you to navigate the on-screen menus and adjust the
system settings to your preference.
12.
EXIT
: Exit from the menu or sub- menu and cancel the
function in progress (if possible).
13.
DISPLAY
: Press to display the source and channel’s
information.
14.
MTS
:
Press to select the audio mode,you can select Stereo,
Mono,or SAP (second audio program).
15.
VOL +/-
: Press to increase or decrease the sound level.
16.
CH+/-
:
Press to scan through or to select a channel.
17.
AUTO
:
Adjusting the PC image rate automatically.
18.
FAV
:
Add or delete the current channel as a favorite channel
.
19.
FAV+
:
Move down to a favorite program
.
20.
FAV-
:
Move up to a favorite program
.
21.
CC
: Press to display the closed caption.
22.
ZOOM
: Select display mode.
23.
STOP
: Press to STOP in the USB mode.
24.
PLAY/PAUSE
: Press to PLAY/PAUSE in the USB mode.
25.
PREV
: Press to skip backward in the USB mode.
26.
NEXT
: Press to skip forward in
USB mode.
Power
23
24
25
26
Use two ”AAA” size batteries. The batteries may last
approximately one year depending on how much the
remote control is used. For best performance, it is
recommended that batteries should be replaced on a
yearly basis, or when the remote operation becomes
erratic. Do not mix old and new batteries or different
types.
BATTERY PRECAUTIONS:
Batteres should not be exposed to excessive heat
such as sunshine, fire or the like.
The remote control units uses infrared beams to
transmit signals, so sunlight or fluorescent light on
the remote sensor may shorten operating distance.
Incorrect use of batteries may cause them to leak
or burst. Read the battery warnings and use the
batteries properly.
Do not mix the old and new batteries.
Do not mix alkaline, standard(carbon-zinc), or
rechargeable,(Ni-Cd, Ni-MH,etc.)batteries.
Remove batteries if the remote control will not be
operated for an extended period of time.
Before using the remote control, batteries must first be installed.
HOW TO INSTALL BATTERIES
1. Open the battery compartment cover.
2. Install two “AAA” batteries(supplied).
3. Replace the battery compartment cover.
If the sy mb ol is sh own , it is on ly
valid in the Eu ropean un ion.
RC6075Q
Summary of Contents for SQ4044
Page 1: ...29...
Page 2: ...2...
Page 3: ...Instructions 3...
Page 6: ...Instructions 6...
Page 9: ...Logos Licenses 9...
Page 11: ...VIDEO Y Pb Pr R L 11 Component Y Pb Pr input connection VIDEO Y Pb Pr R L 5V 0 5A...
Page 12: ......
Page 13: ...13...
Page 14: ...14...
Page 15: ...15...
Page 16: ...Power saving Power saving Produces a lower power consumption mode 16...
Page 17: ...17...
Page 18: ...18...
Page 19: ...19...
Page 20: ...20...
Page 21: ...the default 21...
Page 22: ...22...
Page 23: ...23...
Page 24: ...24 13...
Page 25: ...25 1 800 295 7966 The...
Page 26: ...26 27 28...
Page 29: ...29...
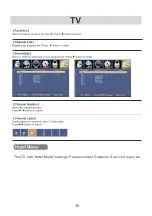
Page 30: ...30 This TV has Hotel Mode settings Please contact Customer Service if required...
Page 31: ...31...
Page 32: ...32...
Page 34: ...at the back of the unit from 34...
Page 37: ......

