PiXtend V2 -L- Hardware Manual
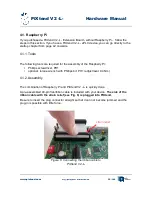
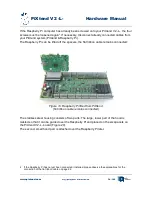
The Raspberry Pi computer can then be attached to the other side of the ribbon cable (Fig.
7). For this, the Raspberry Pi is turned on the back. The 40-pin pin strip of the Raspberry
Pi is plugged into the connector of the flat ribbon cable.
It is a good idea to work with both hands, in order to prevent the wide connector from
being jammed or bent. Also avoid direct contact between soldering points and electronic
components on the Raspberry Pi and PiXtend circuit boards.
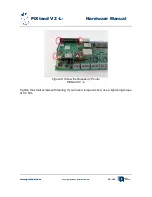
Now the Raspberry Pi can be turned up and placed on the four spacers of your PiXtend V2
-L- board. The Raspberry Pi is screwed onto the spacers with the four enclosed M2.5 x 6
mm cross-head screws.
If the PiXtend V2 -L- stainless steel cover is to be installed afterwards, the Raspberry Pi
can not be screwed onto the spacers now. You can continue with the chapter: 4.2.3
Stainless Steel Hood
from page 33 onward.
www.pixtend.com
Copyright by Qube Solutions GmbH
23 / 146
Figure 7: Connect the Raspberry Pi


