background image

Bedienungsanleitung

14

DE

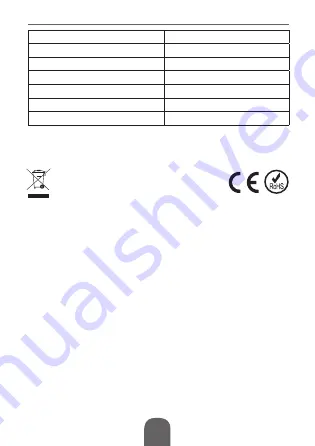
Unterstützte Musikdateien

MP3 / WMA

Abmessungen

83 mm x 35 mm x 12 mm

Gewicht

40 g (Mit Batterie)

Betriebstemperatur

0 - 60°C

Batterie Aufnehmen

Bis zu 20 Stunden

Batterie Wiedergabe

Bis zu 13 Stunden

Batterie

Eingebaute Li-Ion

Deutsch

Korrekte Entsorgung dieses Produkts

(Elektromüll)

(Anzuwenden in den Ländern der Europäischen Union 

und anderen europäischen Ländern mit einem separaten 

Sammelsystem)

Die Kennzeichnung auf dem Produkt bzw. auf der dazugehörigen 

Literatur gibt an, dass es nach seiner Lebensdauer nicht 

zusammen mit dam normalen Haushaltsmüll entsorgt werden 

darf. Entsorgen Sie dieses Gerät bitte getrennt von anderen 

Abfällen, um der Umwelt bzw. der menschilchen Gesundheit nicht 

durch unkontrollierte Müllbeseitigung zu schaden. Recyceln Sie 

das Gerät, um die nachhaltige Wiederverwertung von stofflichen 

Ressourcen zu fördern. Private Nutzer sollten den Händler, bei 

dem das Produkt gekauft wurde, oder die zuständigen Behörden 

kontaktieren, um in Erfahrung zu bringen, wie sie das Gerät auf 

umweltfreundliche Weise recyceln können. Gewerbliche Nutzer 

sollten sich an Ihren Lieferanten wenden und die Bedingungen 

des Verkaufsvertrags konsultieren. Dieses Produkt darf nicht 

zusammen mit anderem Gewerbemüll entsorgt werden. 

Hergestellt in China für LECHPOL ELECTRONICS Sp. z o.o. Sp.k., ul. 

Garwolińska 1, 08-400 Miętne.

Summary of Contents for KOM0797

Page 1: ...Owner s manual Instrukcja obsługi Bedienungsanleitung Manual de utilizare DE EN PL RO DIGITAL VOICE RECODER KOM0797 ...

Page 2: ......

Page 3: ...chenDEL 2 Taste VOL 3 Taste VOL 4 Einstieg USB 5 LED Diode 6 Taste STOPP STOPP 7 Taste REC AUFNEHMEN 8 Taste PLAY PAUSE WIEDERGABE PAUSE 9 Taste MENU MENÜ 10 Taste UP AUFWÄRTS 11 Taste DOWN ABWÄRTS 12 EIN AUS 13 Kopfhörer Eingang 14 Mikrofoneingang 1 2 3 4 5 6 7 8 9 10 11 12 14 13 ...

Page 4: ...ft Batterie ist zu schwach Ein Aus Standby Ein Aus Schiebeschalter befindet sich auf der rechten Seite des Sprachrekorders Schieben Sie den Schalter nach oben um das Gerät einzuschalten oder nach unten um das Gerät auszuschalten Der Sprachrekorder besitzt auch einen Bereitschaftsmodus Um in den Bereitschaftsmodus zu wechseln halten Sie die Wiedergabetaste für 2 Sekunden gedrückt Hauptmenü Beim ein...

Page 5: ...uswählen Option Aufnehmen Funktion VOR Wenn die Option Aufnehmen ausgewählt wurde drücken Sie die Taste MENÜ um die Funktion sprachaktivierte Aufnahme VOR auszuwählen Drücken Sie erneut die Taste MENÜ um VOR auszuwählen und drücken die Taste Aufwärts oder Abwärts um die Funktion VOR zu aktivieren oder deaktivieren drücken Sie die Taste MENÜ zum bestätigen Aufnehmen Wenn die Option Aufnehmen ausgew...

Page 6: ...Aufnahme angehalten Drücken Sie die Taste STOPP zum beenden und speichern der Aufnahme Verlassen der Aufnahme Option Um die Option Aufnahme zu verlassen halten Sie die Taste MENÜ für 2 Sekunden gedrückt Der Sprachrekorder kehrt zum Hauptmenü zurück Wiedergabeoptionen Auswahl einer Datei Wenn Sprachmodus Aufnahme abspielen oder Musikmodus Musikwiedergabe ausgewählt ist wird zuerst die neueste Aufna...

Page 7: ...cklauf Während der Wiedergabe halten Sie die Taste Abwärts gedrückt für schnellen Vorlauf beim loslassen der Taste ist normale Wiedergabe Während der Wiedergabe halten Sie die Taste Aufwärts gedrückt für schnellen Rücklauf beim loslassen der Taste ist normale Wiedergabe Lautstärke Vor oder Während der Wiedergabe drücken Sie die Taste VOL oder VOL um die Lautstärke zu erhöhen oder zu verringern Die...

Page 8: ...gen Modus z B Aufgenommene Dateien oder Musikwiedergabe Ordner wiederholen RT_A zum Wiederholen aller Dateien in einem einzigen Modus Alles Wiederholen ALL zum Wiederholen aller Dateien in beiden arten Zufällig RAND für zufällige Auswahl der Dateien in einem einzigen Modus Intro INTR Wiedergabe der ersten 10 Sekunden aller Dateien in einem einzigen Modus Drücken Sie die Taste MENÜ um eine Wiederho...

Page 9: ...er Abwärts zum auswählen Folgende EQ Einstellungen stehen zur Verfügung Natürlich NOR Rock ROCK Pop POP Klassik CLAS Weicht SOFT Jazz JAZZ DBB DBB für Dynamischen Bass Boost DrückenSiedieTasteMENÜumeineEQOptionauszuwählen Dateien löschen Wählen Sie eine Datei zum löschen aus und drücken die Taste DEL A B Eine Warnmeldung Datei löschen erscheint Drücken Sie die Taste Aufwärts oder Abwärts um Ja ode...

Page 10: ...uswahl Drücken Sie die Taste Aufwärts oder Abwärts um durch die Einstellungsoptionen zu blättern SHQ Super High Quality 192 kbps HQ High Quality 128 kbps SP Short Play 64 kbps LP Long Play 32 kbps Drücken Sie die Taste MENÜ um eine Qualität auszuwählen Hintergrundbeleuchtung Regeln Sie die Helligkeit für die LCD Anzeige Drücken Sie die Taste Aufwärts oder Abwärts um die Helligkeit zu erhöhen oder ...

Page 11: ... Zeit aus auch wenn sich das Gerät in Funktion befindet z B Aufnahme oder Wiedergabe Einstellen in 10 Minutenstufen zwischen 10 und 120 Minuten durch drücken der Taste Aufwärts oder Abwärts Drücken Sie die Taste MENÜ um eineAusschaltzeitauszuwählen 0MinutenumdieFunktion auszuschalten Nach der eingestellten Schlafzeit schaltet das Gerät in den Bereitschaftszustand Halten Sie die Taste Wiedergabe fü...

Page 12: ...er Sprachrekorder erscheint als ein Wechselträger oder MassenspeicheramComputer ÖffnenSiedenSprachrekorder danach den Aufnahmeordner und danach den DVR Ordner Der DVR Ordner enthält die Aufgezeichneten Dateien die Sie auf der Festplatte Ihres Computer speichern können UmMP3DateienaufdenSprachrekorderzukopieren Öffnen Sie den Sprachrekorder vom Computer aus und kopieren die Da teien in den Hauptord...

Page 13: ...quenz 20 Hz 20 KHz Maximaler Ausgang 300 mW Speichermedium Interner Flash Integriertes Mikrofon Kugelförmiges Mikrofon Extern Dynamik 26 mm 8 Ω S N Ratio 80 dB Display 128 x 64 Lattice Screen Stereo Kopfhörer 3 5 mm Stereo Buchse Externes Mikrofone 3 5 mm Stereo Buchse USB Kabel PCVerbindungUSB1 1 USB2 0 Aufnahmeformat MP3 Herunterladen Hochladen Nicht wäh rend des Kopiervorgangs entfernen es führ...

Page 14: ...ltsmüll entsorgt werden darf Entsorgen Sie dieses Gerät bitte getrennt von anderen Abfällen um der Umwelt bzw der menschilchen Gesundheit nicht durch unkontrollierte Müllbeseitigung zu schaden Recyceln Sie das Gerät um die nachhaltige Wiederverwertung von stofflichen Ressourcen zu fördern Private Nutzer sollten den Händler bei dem das Produkt gekauft wurde oder die zuständigen Behörden kontaktiere...

Page 15: ...Brepeat DeletefileDEL 2 Button VOL 3 Button VOL 4 Mini USB input 5 LED light 6 Button STOP 7 Button REC 8 Button PLAY PAUSE 9 Button MENU 10 Button UP 11 Button DOWN 12 Button ON OFF 13 Headphone input 14 Microphone input 1 2 3 4 5 6 7 8 9 10 11 12 14 13 ...

Page 16: ...ery power Battery has half power Battery is almost exhausted Battery is too week On Off Standby On off slide switch is located on the right side of the voice recor der Slide the switch up to turn on or down to turn off the voice re corder The voice recorder includes a standby mode To enter or exit standby hold the PLAY button for 2 sec Main Menu Once on the unit will first show the Record Mode opt...

Page 17: ...Voice Activated Recording VOR function Press the MENU button again to select VOR then press UP DOWN to Open or Close the VOR function press the MENU button to confirm Recording When the record option is selected press the Rec button to be gin recording While recording the LED will illuminate red The screen will display number and duration of the recording ...

Page 18: ...ng a file When in Voice mode Recorded playback Music Mode Music playback is selected it will first display the most recent recorded track or music file Before or during playback press the UP DOWN button to se lect a file Press the MENU button and select the Local Folder option Press the MENU button to enter the Local Folder This option will display available files in list form within a folder Pres...

Page 19: ...uring playback to pause or resume play back Press the Stop button to stop playback Repeat options During playback press the MENU button and select the Repeat settings Press the MENU button to enter the Repeat settings then press the UP DOWN button to select The options available are Normal NOR for normal playback Repeat one ONE for repeating a single file Folder ROOT for repeated playback of all f...

Page 20: ...tart the marks press the DEL A B button and repeat pro cess To resume normal playback press the MENU button EQ Settings During playback press the MENU button and select the Equalizer settings Press the MENU button to enter the Equalizer settings then press the UP DOWN button to select The available EQ set tings are Natural NOR Rock ROCK Pop POP Classic CLAS Soft SOFT Jazz JAZZ DBB DBB for Dynamic ...

Page 21: ...enu Settings When settings mode is selected press the UP DOWN button to move through the settings options Press the MENU button to en ter an option Record type There are 4 recording quality s to choose from Press the UP DOWN button to move through options SHQ Super High Quality 192 kbps HQ High Quality 128 kbps SP Short Play 64 kbps LP Long Play 32 kbps Press the MENU button to select a quality Ba...

Page 22: ... button for 2 seconds to exit standby Sleep time will turn off the unit within the selected minutes even while the voice recorder is in use i e recording or playback Ad just in 10 minute steps between 10 to 120 minutes by pressing the UP DOWN button Press the MENU button to select a sleep time 0 minute is to turn off this function Once the selected sleep time lapses the voice recorder will enter s...

Page 23: ... following image appears on the LCD The voice recorder will come up as a Removable Disk or a Mass Storage Device on My Computer Access the voice recorder then open the Record folder then the DVR folder The DVR folder con tains recorded files which you can save on to your computer s hard drive To upload MP3 music files on to the Voice Record access the voice recorder using My Computer and transfer ...

Page 24: ...mW Storage Media Embedded flash Built in MIC Omnidirectional microphone External mic Dynamic 26 mm 8 Ω S N Ratio 80 dB Display 128 x 64 px LCD Stereo earphone 3 5 mm Stereo socket External Microphone 3 5 mm Stereo socket USB Cable PC Interface USB 1 1 USB2 0 recorder and PC Always safely remove the voice recorder before unplugging it from the computer Never disconnect during this time or a data lo...

Page 25: ...ehold wastes at the end of its working life To prevent possible harm lo the environment or human health from uncontrolled waste disposal please separate this from other types of wastes and recycle it responsibly to promote the sustainable reuse of material resources Household users should contact either the retailer where they purchased this product or their local government office for details of ...

Page 26: ...wDEL 2 Przycisk głośność 3 Przycisk zciszanie 4 Wejście USB 5 Dioda LED 6 Przycisk STOP 7 Przycisk REC nagrywanie 8 Przycisk PLAY PAUSE 9 Przycisk MENU 10 Przycisk DO GÓRY 11 Przycisk W DÓŁ 12 WŁĄCZ WYŁĄCZ 13 Wejście słuchawkowe 14 Wejście mikrofonowe 1 2 3 4 5 6 7 8 9 10 11 12 14 13 ...

Page 27: ...ana Bateria jest naładowana w 50 Bateria jest prawie rozładowana Bateria jest całkowicie rozładowana Włączanie urządzenia i tryb czuwania W celu włączenia urządzenia należy przełącznik ustawić w pozycji ON Przesuń przełącznik w dół do pozycji OFF aby wyłączyć dyktafon Dyktafon wyposażony jest w tryb czuwania Aby uruchomić zakończyć tryb czuwania przytrzymaj przycisk odtwarzania przez 2 sekundy Men...

Page 28: ...wybrana jest opcja nagrywania naciśnij przycisk MENU aby uzyskać dostęp do funkcji nagrywania aktywowanego głosem VOR Ponownie naciśnij przycisk Menu aby wybrać VOR Następnie naciśnij przycisk UP DOWN aby włączyć Open lub wy łączyć Close funkcję VOR Naciśnij przycisk Menu aby potwier dzić Nagrywanie Gdy wybrana jest opcja nagrywania naciśnij przycisk REC aby rozpocząć nagrywanie Podczas nagrywania...

Page 29: ...yć i zapisać nagranie Wyjście z opcji nagrywania Aby wyjść z opcji nagrywania należy przytrzymać przycisk MENU przez 2 sekundy Dyktafon powróci do menu głównego Opcja odtwarzania Wybór pliku Po wybraniu trybu odtwarzania nagrań Voice Mode lub muzyki Music Mode wyświetlona zostanie ostatnio nagrana ścieżka lub plik muzyczny Przed lub podczas odtwarzania użyj przycisku UP DOWN aby wybrać plik Naciśn...

Page 30: ...warzania przytrzymaj przycisk UP aby przewinąć do tyłu puść aby wznowić odtwarzanie Głośność Przed lub w trakcie odtwarzania naciśnij przycisk VOL lub VOL w celu regulacji głośności Głośność jest regulowana w skali od 0 do 32 Pauza Stop odtwarzania Naciśnij przycisk PLAY podczas odtwarzania aby wstrzymać lub wznowić odtwarzanie Naciśnij przycisk STOP aby zatrzymać odtwarzanie Opcje powtarzania rep...

Page 31: ...ENU aby wybrać opcję powtarzania Funkcja A B Repeat powtarzanie wybranego fragmentu Podczas odtwarzania naciśnij przycisk DEL A B aby wejść do funkcji A B repeat Po naciśnięciu przycisku zostanie określony początek fragmen tu wybrany znak A Ponownie naciśnij przycisk aby wybrać ko niec fragmentu znak B Wtedy plik będzie powtarzany od znaku A do znaku B Aby ponownie wybrać zakres powtarzania naciśn...

Page 32: ... Na wyświetla czu pojawi się Usuń pliki Naciśnij przycisk UP DOWN aby wy brać Tak lub Nie Naciśnij przycisk MENU aby potwierdzić wybór Aby usunąć wszystkie pliki w danym trybie naciśnij przycisk MENU i wybierz opcję Usuń wszystkie Naciśnij przycisk MENU aby potwierdzić Wychodzenie z opcje odtwarzania Aby wyjść z jakiejkolwiek opcji odtwarzania przytrzymaj przycisk MENU przez 2 sekundy Dyktafon pow...

Page 33: ... Możliwość dostosowania jasności w skali od O do 50 Naciśnij przycisk MENU aby zatwierdzić Język Naciśnij przycisk UP DOWN aby wybrać dostępne opcje językowe Naciśnij przycisk MENU aby wybrać język Wyłącz zasilanie Istnieją dwie funkcje w ramach tej opcji Off Timer jest funkcją która pozwala ustalić czas po którym urządzenie przechodzi w stan czuwania Stand by jeżeli jest nie używane Czas ten możn...

Page 34: ...zas snu Ustawienie O minut powoduje wyłączenie tej funkcji Po upływie ustawionego czasu uśpienia dyktafon przejdzie w stan czuwania Przytrzymaj przycisk PLAY przez 2 sekundy aby wyjść z trybu czuwania Kontrast ZapomocąprzyciskuUP DOWNustawkontrastwyświetlacza LCD Naciśnij przycisk MENU aby zatwierdzić Pamięć Pokazuje ilość dostępnej pamięci w procentach Naciśnij przycisk MENU aby wyjść Wersja opro...

Page 35: ...der DVR zawiera nagrane dyktafonem pliki które można zapisać na dysku twardym Twojego komputera Aby przesłać pliki muzyczne MP3 na dyktafon otwórz folder dyktafonu na komputerze i prześlij pliki w formacie MP3 do głów nej lokalizacji Nie istnieje odrębny folder ani potrzeba tworzenia kolejnegofolderuwceluzapisaniaplikówMP3 Uwaga Podczas przesyłania danych nigdy nie należy odłączać w tym czasie dyk...

Page 36: ...ny mikrofon Mikrofon wielokierunkowy Zewnętrzny mikrofon Dynamiczny 26 mm 8 Ω Stosuneksygnałudoszumu S NRatio 80 dB Wyświetlacz 128 x 64 px LCD Słuchawki Gniazdo 3 5 mm Stereo Mikrofon zewnętrzny Gniazdo 3 5 mm Stereo Kabel USB PC Interface USB 1 1 USB2 0 Format zapisu MP3 Odtwarzanie plików MP3 WMA Wymiary 83 mm x 35 mm x 12mm Waga 40 g razem z baterią Temperatura pracy O 60 C Czas nagrywania na ...

Page 37: ...od innego typu odpadów oraz odpowiedzialny recykling w celu promowania ponownego użycia zasobów materialnych jako stałej praktyki W celu uzyskania informacji na temat miejsca i sposobu bezpiecznego dla środowiska recyklingu tego produktu użytkownicy w gospodarstwach domowych powinni skontaktować się z punktem sprzedaży detalicznej w którym dokonali zakupu produkt lub z organem władz lokalnych Użyt...

Page 38: ...repetațimodulA B ȘtergețifișiereleDEL 2 Buton VOL 3 Buton VOL 4 Intrare USB 5 Dioda LED 6 Buton STOP 7 Buton REC 8 Buton PLAY PAUSE 9 Buton MENU 10 Buton UP 11 Buton DOWN 12 ON OFF 13 Intrare pentru căști 14 Intrare microfon 1 2 3 4 5 6 7 8 9 10 11 12 14 13 ...

Page 39: ...ie suficienta Bateria are jumatate din putere Bateria este aproape epuizata Bateria este epuizata Pornire Oprire Standby Comutatorul glisant de Pornire Oprire se gaseste pe partea dreapta a dispozitivului Glisati comutatorul in sus pentru a porni dispozitivul si glisati comutatorul in jos pentru al opri Dispozitivul are functia de Standby Pentru a intra in modul Standby tineti apa sat butonul PLAY...

Page 40: ...ne Mod de inregistrare VOR Cand optiunea este selectata apasati butonul MENU pentru a intra in functia de VOR Voice Operated Recording Apasati butonul MENU inca o data pentru a selecta VOR apasati UP DOWN pentru a deschide sau inchide functia VOR apasati butonul MENU pentru a confirma Inregistrarea Dupaceoptiuneaesteselectata apasatibutonulREC intimpul inregistrarii Led ul rosu va fi aprins Pe ecr...

Page 41: ... si a reveni la meniu tineti apasat butonul MENU timp de 2 secunde Redare fisier vocal Selectare de fisier In modul Redare inregistrare si Redare muzica vor fi afisate piesele sau fisierele de muzica recent inregistrate Inainte sau pe durata redarii apasati butonul UP DOWN pentru a selecta un fisier Apasati butonul MENU si selectati director local Apasati butonul MENU pentru a intra in directorul ...

Page 42: ...ii fisierului vocal apasati butonul VOL sau VOL pentru a creste sau reduce volumul Volumul este ajusta bil in 32 de trepte nivele Pauza Oprire redare fisier vocal Apasati butonul PLAY pe durata redarii pentru pauza sau reluare Apasati butonul STOP pentru a opri redarea Optiuni de repetare În timpul redării apăsaţi tasta Meniu şi selectaţi setarea Repetare Apăsaţi butonul MENU pentru a intra in set...

Page 43: ...n apasare va fi selectat punctul de inceput A apasati butonul din nou pentru a selecta punctul de sfarsit B Dupa accea fisierul va repeta de la A la B Pentru a reincepe apasati butonul DEL A B si repetati procesul Pentru a reveni la redarea in mod normal apasati butonul MENU EQ Egalizator În timpul redării melodiei apasati butonul MENU si selectati una din setarile egalizatorului Apasati butonul M...

Page 44: ...nul MENU pentru a confirma lesire optiune de inregistrare Pentru a iesi din orice optiune playback de redare tineti apasat butonul MENU pentru 2 secunde Reportofunul digital va intra in Meniu Principal Setari Cand modul de setare este selectat apasati UP DOWN pentru alege din optiunile de setare Apasati butonul MENU pentru a intra intr o optiune Durata de inregistrare Exista 4 tipuri de inregistra...

Page 45: ... si 60 de minute apasand butoanele UP DOWN Apasati butonul MENU pentru a selecta timpul de oprire Alegeti 0 minute pentru a dezactiva aceasta functie Odata ce uni tate este incativa pentru timpul selectat de oprire reportofonul va intra in modul Standby Tineti de butonul PLAY pentru 2 secunde pentru a iesi din modul standby Functia Sleeptime vaopriunitateainminuteleselectate daca reportofonul este...

Page 46: ...tilizand cablul USB Reportofonul va confirma conexiunea cand imaginea urmatoare apare pe ecran Reportofonul va apare ca Removable Disk sau Mass Storage Device in My Computer Accesati reportofonul apoi deschideti directorul Record si directo rul DVR Directorul DVR va contine fisierele inregistrate pe care le puteti salva pe calculatorul Dvs pe hard disk Pentru a incarca fisiere de muzica MP3 pe rep...

Page 47: ...reSHQ 192kbps 5520 min DuratadeinregistrareHQ 128kbps 7680 min Durata de inregistrare SP 64 kbps 16920 min Durata de inregistrare LP 32 kbps 33120 min Frecventa 20 Hz 20 KHz Putere maxima iesire 300 mW Storage Media Embedded flash Microfon incorporat Microfon omnidirectional Difuzor extern Dynamic 26 mm 8 Ω S N 80 dB Ecran 128 x 64 LCD Casti Stereo 3 5 mm Stereo socket Microfon Extern 3 5 mm Stere...

Page 48: ...ntru a promova refolosirea resurselor materiale Utilizatorii casnici sunt rugati să ia legatura fie cu distribuitorul de la care au achizitionat acest produs fie cu autoritatile locale pentru a primi informatii cu privire la locul si modul in care pot depozita acest produs in vederea reciclarii sale ecologice Utilizatorii institutionali sunt rugati să ia legatura cu furnizorul și să verifice condi...

Page 49: ...49 NOTES ...

Page 50: ...NOTES 50 ...

Page 51: ......

Page 52: ......

Reviews: