10
2)
Enter the calibration mode:
When the temperature is stable, press the keys “
•
” and
“
•••
” at the same time for 7seconds, and then the LCD will display “cal” about two
seconds and the station will enter the temperature calibrating mode.
Input the testing temperature after the hundreds digit twinkling.
3) Press “TEMP ▲”or “TEMP ▼” key to set the data and press “AIR ▲”or “AIR▼”
key to move the cursor. After inputting the testing result, click the “
••
” key.
4) If calibration is successful, the LCD respectively displays “C-L/C-H”
,
if not
successful, the LCD displays “no”.
5) If the temperature still has some differences, you can repeat calibration according to
the above steps.
Note: * Suggest using 191 or 192 thermometer to measure the temperature.
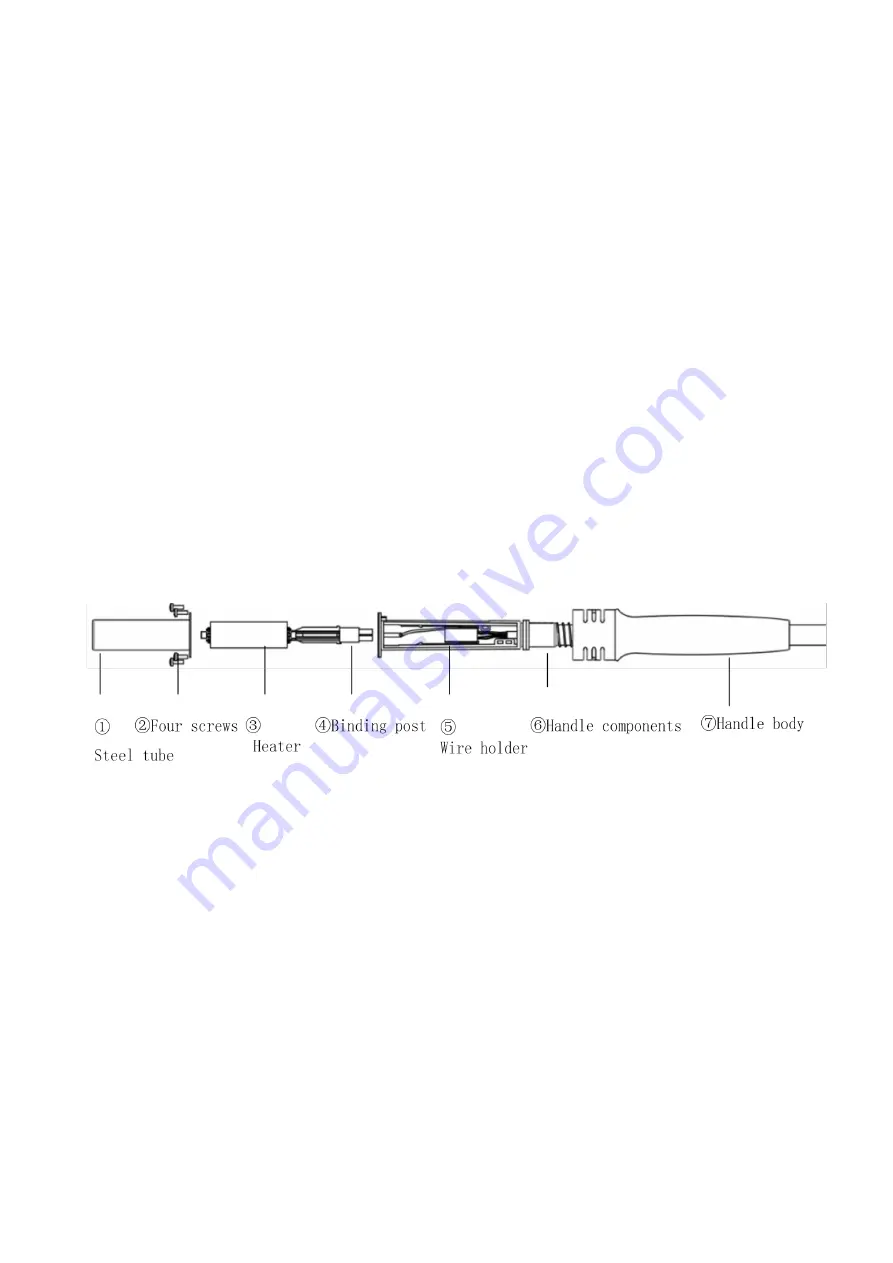
13. Replacement of the Heater
13.1 Steps of removing the Heater
1) Unscrew
②
four screws;
2) Push the
⑥
Handle components out of the
⑦
Handle body;
3) Pull out the Steel tube
①
;
4) Remove and replace the Heater
③
;
Note: All operation steps are carried out under the condition of power cut off and cool
handle.
Summary of Contents for 862DA+
Page 14: ...12 15 Nozzles...


