background image


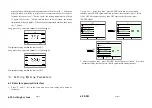
1. Press 1 or +, select    “Address”

  press ENTER, input address password by + 

and 1 key( password is 865637), enter into address setting interface, press enter key 

input address, again enter key confirm.


SET

E S D   t e s t

K e y   T o n e

>>>

  Enetr   Back

P a s s w o r d

a d r e s s


SET

E S D   t e s t

K e y   T o n e

>>>

  Enetr   Back

    A d r e s s

* * * * * *

P a s s w o r d

a d r e s s

A d r e s s   p a s s w o r d :


SET

E S D   t e s t

K e y   T o n e

>>>

  STORE   Back

a d r e s s

6 4

P a s s w o r d

a d r e s s


2.After  setting  ,  press  “STORE”  save,  and  press  “Back”  key  return  parameter 

setting interface, and press “Back” key return main menu. 


Attention: 1. after turn on, hand shank place on iron stand, solder work all the time 

                    no sleep, until take up hand shank and then place on iron stand again, 

start sleep function. 

2.after turn on, take hand shank, solder work all the time, no sleeping, 

until  place  hand  shank  on  iron  stand,  and  take  up  hand  shank 

again, start sleep function. 


5.4 Setting the Temperature 

CAUTION:


Make sure the temperature of the unit can be adjusted (password is correct 

or  the  password  is  initial  000).  When  setting  temperature,  the  heating 

element is on. Operation as following steps:


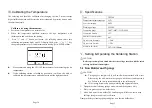
Have three gallery, long press 1,2,3 key enter into gallery 1 

2

3.as following: 

Long press 1 key, enter into channel 1, as following 4-2 

 ESD

200    320     380

CH1

200

pic4-2 

Temperature rising: 

Press  “+”  button  directly.  If  so,  the  setting  temperature  will  raise  1

  and  the 

display  window  will  display  the  set  temperature.  When  loosen  the  “+”  button, 

the display window will delay to display the set temperature about 2seconds. If 

within  2seconds,  press  the  “+”  button  again,  the  setting  temperature  will  raise 

1


again.  If  press  the  “+”  button  and  not  loose  at  least  1second,  the  setting 

temperature will rise rapidly. Till the needed temperature reaches, then loose the 

“+” button.


Temperature dropping: 

Press  “-”  button  directly.  If  so,  the  setting  temperature  will  drop  1

  and  the 

Page5 

Press ENTER 

Page16 

Summary of Contents for TS2200

Page 1: ...Operation Manual Thank you for purchasing an Lead Free Soldering Station It is designed for lead free soldering Please read this manual before operating the unit Store this manual in a safe easily acc...

Page 2: ...ngerous While replace parts or install tips turn the power off and allow the unit to cool to room temperature To prevent damage to the unit and ensure a safe working environment be sure to comply with...

Page 3: ...convenience 5 Anti static device ESD measuring ability Tip Care and Maintenance Select a Correct Tip 1 Select a tip that maximizes contact area between the tip and solder joint Maximizing contact area...

Page 4: ...ns Type TS2200 Temperature displaying type LCD Power consumption 90W Working voltage 220VAC Temperature Range 100 480 212F 896F Temperature Stability 2 Ambient Temperature Max 40 Tip to Ground Resista...

Page 5: ...WER key use for soft switching in hard switching state long press POWER about 3S turn on and working and then press POWER pic4 1 6 12 Language setting 1 Press 1 or select Language press ENTER enter in...

Page 6: ...on iron stand and take up hand shank again start sleep function 5 4 Setting the Temperature CAUTION Make sure the temperature of the unit can be adjusted password is correct or the password is initial...

Page 7: ...l 3 as following 4 2 Temperature setting method the same as CH1 Setting Working Parameters 6 1 Enter into password interface 1 Press 2 and 3 key at the same time enter into setting main menu as follow...

Page 8: ...perature setting interface press ENTER key again CH1 temperature color turn to blue it can be modify press key and key modify value press 1 key move down CH2 temperature color turn to blue it can be m...

Page 9: ...ace 6 8 Reset password 1 press 1 or select password press ENTER enter reset password interface press ENTER again enter into password interface press or import 0 press 1 import original password 000000...

Page 10: ...g interface press Back again return menu interface 6 4 Sleep time setting 1 Press 1 or press ENTER enter into sleep time setting interface press ENTER again enter into sleep time interface press 1 sel...

Page 11: ...Alarm temp press ENTER enter into alarm temperature setting interface press ENTER again select temperature alarm function press 1 select ON or OFF OFF express not alarm ON express alarm press or modi...

Reviews: