background image

6

CLASSIC 100, 160, 160XL

EN

G

LI

SH

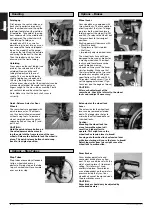
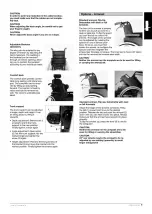
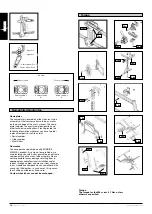
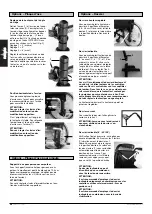
Folding up 

First remove the seat cushion and
back shell (comfort version only)
from the wheelchair and flip up the
(platform) footplate or the individu-
al footplates. Take hold of the sling
from underneath in the middle and
pull upwards. The wheelchair will
then fold up. To fold your
wheelchair until it is as small as
possible, e.g., to put into a car, you
can remove the footrests (depend-
ing on the model). For this purpo-
se, open the latch from the outside
and swing the footrest to the side.
Then the footrest only has to be
drawn out of the frame tubing.

Unfolding

Press down on the seat tubing (see
picture). Your wheelchair is then
unfolded. Now snap the seat
tubing into position in the seat
saddle. This can be facilitated by
slightly tipping your wheelchair. In
this way, the weight can be taken
off of one rear wheel so that the wheelchair can be
more easily unfolded. Be careful not to get your
fingers caught in the cross-tube assembly. Finally
put seat cushion and backshell on again.

Note: Make sure that the back shell snaps in
correctly.

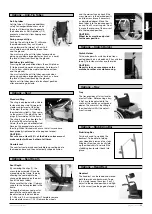
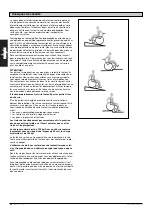
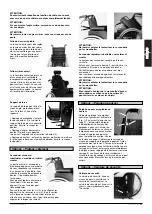
Wheel Locks 

Your wheelchair is equipped with
two wheel locks. They are applied
directly against the tyres. To enga-
ge, press both wheel-lock levers
forward against the stops (Fig. 282
and 283). To release the wheel, pull
the levers back to their original
positions.
Braking power will decrease with: 
• Worn tyre tread
• Tyre pressure that is too low
• Wet tyres
• Improperly adjusted wheel locks.

The wheel locks have not been
designed to be used as brakes for
a moving wheelchair. The wheel
locks should therefore never be
used to brake a moving
wheelchair. Always use the hand-
rims for braking. Make sure that
the interval between the tyres and
wheel locks complies with given
specifications (Fig. 282 and 283).
To readjust, loosen screw (1) and
set the appropriate interval. Tigh-
ten screw (see the page on torque)

CAUTION:
After each adjustment of the
rear wheels, check the interval to the wheel
locks and readjust if necessary.

Handling

Options – Brakes

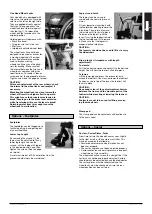
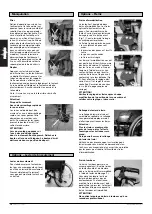
Quick-Release Axles for Rear
Wheels

The rear wheels are equipped with
quick-release axles. The wheels
can thus be installed or removed
without using tools. To remove a
wheel, simply depress the quick-
release button on the axle (1) and
pull it out.

CAUTION:
Hold the quick-release button on
the axle depressed when insert-
ing the axle into the frame to mount the rear
wheels. Release the button to lock the wheel in
place. The quick-release button should snap
back to its original position.

1

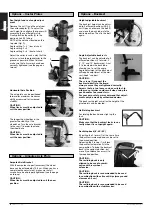
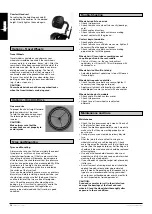
Options – Step Tubes

Step Tubes 

Step tubes are used by attendants
to tip a wheelchair over an
obstacle. Simply step on the tube
to push a wheelchair, for example,
over a curb or step.

3 mm

Extension for the wheel lock
Lever

The extension for the wheel lock
lever can be removed or folded
down. The longer lever helps to
minimize the effort needed to set
the wheel locks. 

Caution:
Mounting the wheel lock too
close toward the wheel will
result in a higher effort to
operate. This might cause the
wheel lock extension lever to break! 

Leaning onto the wheel lock extension lever
while transferring will cause the lever to break!
Splashing water from tyres might cause the
wheel lock to malfunction. 

Drum Brakes

Drum brakes permit safe and
convenient braking for an atten-
dant. They can also be set with the
aid of a locking lever (1) to prevent
rolling. This lever must snap
audibly into place. Drum brakes
are not dependent on the aid of air
pressure inside the tyres. Your
wheelchair cannot be moved when
the drum brakes are set.

CAUTION:
Drum brakes should only be adjusted by
authorized dealers.

1

1

0

0

9

/3/ST-000690634.EMS.2/Rev.

D

Summary of Contents for Classic 100

Page 1: ...Directions for use Notice D Utilisation Manual De Usario Gebruikershandleiding Manuale Per l Uso Classic 100 160 160 XL Comfort Breezy X2 X3 X4 Comfort...

Page 2: ......

Page 3: ...rom R D to production Please contact your local authorised SUNRISE MEDICAL dealer if you have any questions concerning the use maintenance or safety of your wheelchair In the case that there is no aut...

Page 4: ...r securement points or to structural and frame or components without consulting the manufacturer Failu re to do so will invalidate the abili ty of a Sunrise Medical wheelchair to be transported within...

Page 5: ...the rear side frame The straps are fit ted around the side frames at the intersection of the horizontal and vertical frame tubes See Figs 24 28 4 The tie down symbol Fig 29 on the wheelchair frame ind...

Page 6: ...eel locks complies with given specifications Fig 282 and 283 To readjust loosen screw 1 and set the appropriate interval Tigh ten screw see the page on torque CAUTION After each adjustment of the rear...

Page 7: ...ays be maintained Options Footplates 1 2 5 cm Legrests and Latch The legrest can be swung in underneath the seat sling or out wards Fit your legrest by inserting it with the footplate s pointing towar...

Page 8: ...ions 38 40 cm Open and remove the bolt 1 and move the back tube into the desired position Then fix the bolt again Options Backrest Angle Adjustable backrests The backrest can be adjusted to 5 differen...

Page 9: ...ENGLISH 1009 3 ST 000690634 EMS 2 Rev D...

Page 10: ...ngth Feed the belt back through male buckle and slide adjusters Ensure the belt is not looped at the male buckle When fastened check space bet ween the lap belt and the user when correctly adjusted it...

Page 11: ...f the frame By unfastening the Velcro the sling can be readjusted Reverse this procedure to reinstall the sling When finished make sure that all screws have been properly tightened see the page on tor...

Page 12: ...avoid injuries Tyres and Mounting Tyres and Mounting Always make sure you that you maintain the correct tyre pressure as this can have an effect on wheelchair performance If the tyre pressure is too l...

Page 13: ...0 mm 2 2 50 0 2 24 4 6 140 mm 2 2 47 6 3 24 1 8 200 mm 2 0 47 3 1 24 2 8 200 mm 2 0 47 0 2 24 3 8 200 mm 2 0 50 6 3 24 2 8 200 mm 2 1 50 3 1 24 3 8 200 mm 2 1 50 0 2 24 4 8 200 mm 2 1 52 6 3 24 3 8 20...

Page 14: ...gratitude we are providing you with 5 year guarantee on all frame components and the cross tube assembly We are not responsible for any damage resulting from in appropriate or unprofessional installat...

Page 15: ...s et suggestions de sorte que votre produit deviendra pour vous un partenaire familier digne de confiance Pour nous tre PROCHE DU CLIENT est une priorit Nous sou haitons vous tenir au courant des nouv...

Page 16: ...uler Les freins d immobilisation ne servent pas freiner un fauteuil en d placement Utilisez toujours les ascenseurs ou les rampes En l absence de ces moyens d ac c s demandez deux personnes de vous ai...

Page 17: ...xigences des directives CE Options ou accessoires repr sent s disponibles avec un suppl ment de prix Fauteuils roulants 1 Poign e pousser 2 Toile du dossier 3 Accoudoir 4 Toile du si ge 5 Repose pieds...

Page 18: ...errez la vis 1 et r glez la valeur souhait e Resserrez de nouveau la vis Voir la page couples de serrage ATTENTION V rifiez le r glage des freins apr s chaque modification de la position de la roue ar...

Page 19: ...ez le tube et le repose pied la position voulue Resserrez les vis voir page Couples de serrage Veillez en pas d passer la valeur minimale de garde au sol de 2 5 cm Options Repose pied 1 2 5 cm Repose...

Page 20: ...cez le tube arri re la position d sir e Revissez le boulon Options Dossier Dossier inclinable Vous pouvez r gler l inclinaison du dossier 5 positions diff rentes 3 en avant 0 5 10 et 15 en arri re Un...

Page 21: ...curit Ceinture de s curit La ceinture de s curit fix e au niveau du bassin contribue la s curit du fauteuil roulant La ceinture de s curit est fix e sur le ch ssis comme repr sent dans l illustration...

Page 22: ...t En ouvrant la bande velcro la toile du si ge peut maintenant tre r gl e Le montage est effectu dans l ordre inver se Veillez ce qu apr s les travaux d adaptation toutes les vis soient serr es voir l...

Page 23: ...e que la pression de vos pneus soit tou jours correcte car les caract ristiques du fauteuil peuvent changer Quand la pression est insuffisante il faut d penser plus d nergie car la r sistance du faute...

Page 24: ...2 0 47 3 1 24 2 8 200 mm 2 0 47 0 2 24 3 8 200 mm 2 0 50 6 3 24 2 8 200 mm 2 1 50 3 1 24 3 8 200 mm 2 1 50 0 2 24 4 8 200 mm 2 1 52 6 3 24 3 8 200 mm 2 2 52 3 1 24 4 8 200 mm 2 2 47 6 3 24 1 7 180 mm...

Page 25: ...en remercions et vous fournissons une garantie de 5 ans Nous d clinons toute responsabilit pour les d g ts provoqu s par un montage et ou une r paration incorrects et non conformes par la n gligence e...

Page 26: ...26 CLASSIC 100 160 160XL 1009 3 ST 000690634 EMS 2 Rev D...

Page 27: ...la manutenzione o la sicurezza della Vostra carrozzina Vi preghiamo di rivolgerVi al Vostro Rivenditore di fiducia dei prodotti SUNRISE MEDICAL Sunrise Medical S r l Via Riva 20 Montale I 29100 Piace...

Page 28: ...li ascensori o utilizzate le rampe Se questi mezzi d ausilio non fos sero presenti dovreste allora raggiungere la Vostra meta con l aiu to di due accompagnatori Gli accompagnatori devono impugnare esc...

Page 29: ...requisiti delle direttive CE Gli optional e gli accessori sono disponibili pagando un sovrapprezzo Carrozzine 1 Manopole di spinta 2 Rivestimento schienale 3 Spondine 4 Rivestimento sedile 5 Pedana 6...

Page 30: ...pagina relativa a quanto stringere i bulloni ATTENZIONE Dopo ogni modifica della posizione delle ruote posteriori controllate la regolazione dei freni e se necessario provvedete nuovamente alla loro...

Page 31: ...di plastica composita sia nella posizione corretta sotto al vite di arresto Mantenere sempre uno spazio di almeno 2 5 cm da terra Opzioni Pedana 1 2 5 cm Angolo pedana e relativo fermo L angolo pedan...

Page 32: ...are di nuovo il bullone Opzioni Schienale Schienali con angolo di inclinazione regolabile Si pu regolare l inclinazione dello schienale in 5 posizioni 3 avanti 0 e 5 10 15 all indietro Un bullone 2 ub...

Page 33: ...arrozzina 3 Opzioni Manopole di spinta Manopole di spinta regolabili in altezza Grazie all inserimento di un perno le manopole di spinta sono assicu rate da distacchi involontari Aprendo la leva di bl...

Page 34: ...sse operazioni ma in modo inverso Dopo le opera zioni di regolazione verificate che tutte le viti siano ben avvitate vedere la pagina relativa a quanto stringere i bulloni ATTENZIONE Per un adeguata s...

Page 35: ...uata pu com promettere le prestazioni della carrozzina Se la pressione troppo bassa sar necessario applicare una forza maggiore per muovere la carrozzina poich la resistenza al rotolamento maggiore An...

Page 36: ...mm 2 2 50 0 2 24 4 6 140 mm 2 2 47 6 3 24 1 8 200 mm 2 0 47 3 1 24 2 8 200 mm 2 0 47 0 2 24 3 8 200 mm 2 0 50 6 3 24 2 8 200 mm 2 1 50 3 1 24 3 8 200 mm 2 1 50 0 2 24 4 8 200 mm 2 1 52 6 3 24 3 8 200...

Page 37: ...della durata di 5 anni su tutte le parti del telaio e della crociera Decliniamo qualsiasi responsabilit in caso di danni provocati da montaggio e o riparazione non appropriati o non eseguiti a regola...

Page 38: ...38 CLASSIC 100 160 160XL 1009 3 ST 000690634 EMS 2 Rev D...

Page 39: ...ekregen een bewijs van de kwaliteit van onze producten in elk stadium vanaf het onderzoek en de ontwikkeling tot de productie Hebt u vragen over het gebruik het onderhoud of de veiligheid van uw rolst...

Page 40: ...n de velcrostrips op de zitting en de rug de banden de bandendruk en de wielvergrendelingen De wielvergrendelingen zullen niet goed werken als de druk van de banden te laag is of als de afstand tussen...

Page 41: ...eling tot de productie Dit product voldoet aan de normen uit de EU richtlijnen Optionele uitrusting en accessoires zijn te verkrijgen tegen bijbetaling 1 Duwhandvatten 2 Spanbanden rug 3 Armsteunen 4...

Page 42: ...ban den en de wielvergrendelingen vol doet aan de vermelde specificaties Fig 2 Om die afstand aan te passen draait u schroef 1 los en stelt u de juiste afstand in Draai de schroef weer vast zie de pa...

Page 43: ...en opnieuw in hun openingen en draai ze vast Zie de pagina over koppel Zorg ervoor dat de kleine plastic plaathou der zich op de juiste plaats bevindt onder de stel schroef Er moet altijd 2 5 centimet...

Page 44: ...aats de rug stang in de gewenste positie Maak de moer weer vast Optie Rugleuning Hoekverstelbare rugleuningen De rugleuning kan in 5 verschillen de posities worden bijgesteld 3 naar voor 0 5 10 en 15...

Page 45: ...en noch de opvulkussens mogen wor den gebruikt om de rolstoel te tillen of te dragen Fig 3 3 Optie Duwhandvatten In de hoogte verstelbare duwhandvatten Die duwhandvatten zijn in hun positie beveiligd...

Page 46: ...angedraaid zijn zie de pagina over koppelsleu tel LET OP Om veiligheidsredenen moet ten minste de helft van de velcro oppervlakken met elkaar in contact zijn Comfort Zit De comfort zit maakt lang zitt...

Page 47: ...rolstoel voort te bewegen bovendien maakt een lage bandendruk de rolstoel min der wendbaar Als de bandendruk te groot is kan de band sprin gen De juiste druk voor een bepaalde band staat vermeld op he...

Page 48: ...2 2 47 6 3 24 1 8 200 mm 2 0 47 3 1 24 2 8 200 mm 2 0 47 0 2 24 3 8 200 mm 2 0 50 6 3 24 2 8 200 mm 2 1 50 3 1 24 3 8 200 mm 2 1 50 0 2 24 4 8 200 mm 2 1 52 6 3 24 3 8 200 mm 2 2 52 3 1 24 4 8 200 mm...

Page 49: ...tie en of her stellingen verwaarlozing slijtage of uit veranderin gen aan rolstoelonderdelen vanwege de gebruiker of derden In dergelijke gevallen zal de garantie niet langer gelden Rolstoelen die spe...

Page 50: ...50 CLASSIC 100 160 160XL 1009 3 ST 000690634 EMS 2 Rev D...

Page 51: ...irma la calidad de los productos en todo momen to desde el inicio del proceso de desarrollo hasta su posterior pro ducci n Por favor contacte con su distribuidor local autorizado si tiene alguna pregu...

Page 52: ...la en marcha Utilice siempre ascensores y rampas Si no hay disponibles puede alcanzar su destino con la ayuda de dos personas Ellos deber an agarrar la silla por las partes fijas de la misma Si su sil...

Page 53: ...posterior producci n Este producto cumple con todos los requisitos exigidos en la directiva europea para el marcado CE Sillas de ruedas 1 Asas de empuje 2 Tela del respaldo 3 Reposabrazos 4 Tela del...

Page 54: ...mente el tornillo vea la p gina de presiones PRECAUCION Despu s de cada ajuste de las ruedas traseras compruebe la distancia entre la rueda y el freno y reaj stelo si es necesario Utilizaci n Opciones...

Page 55: ...enclavador El reposapi s puede girarse y ple garse hacia el interior o hacia fuera Colocar el reposapi s insert ndolo con la plataforma del reposapi s dirigida hacia fuera dentro Luego girar el reposa...

Page 56: ...ciones diferentes 38 48 cm Abrir y retirar el eje 1 y mover el tubo posterior a la posi ci n deseada Luego colocar el eje nuevamente Opciones Respaldo Respaldo ajustable en ngulo El respaldo puede ser...

Page 57: ...n Cintur n El cintur n proporciona seguridad a la silla El cintur n se sujeta al armaz n tal y como muestra la foto 2 1 1 1 3 2 PRECAUCI N Para evitar cualquier reducci n en la funci n del cable deber...

Page 58: ...ndo acabe compruebe que todos los tornillos est n correctamente apretados vea la p gina de Presi n ATENCION Como medida de seguridad al menos el 50 de la super ficie de los Velcros tiene que estar sie...

Page 59: ...que todas las cone xiones est n fijadas correcta mente Cubiertas y montaje Cubiertas y montaje Aseg rese siempre de que las cubiertas tengan la presi n correcta ya que esto puede influir en la uti li...

Page 60: ...24 2 8 200 mm 2 1 50 3 1 24 3 8 200 mm 2 1 50 0 2 24 4 8 200 mm 2 1 52 6 3 24 3 8 200 mm 2 2 52 3 1 24 4 8 200 mm 2 2 47 6 3 24 1 7 180 mm 2 0 47 3 1 24 2 7 180 mm 2 0 47 0 2 24 3 7 180 mm 2 0 50 6 3...

Page 61: ...as del armaz n y en la cruceta Sunrise Medical no aceptar reclamaciones en garant a por los da os resultantes de un montaje y o reparaciones inadecuadas o no profesionales de la negligencia y el desga...

Page 62: ...62 CLASSIC 100 160 160XL 1009 3 ST 000690634 EMS 2 Rev D...

Page 63: ......

Page 64: ...Via Riva 20 Montale 29100 Piacenza PC Italy Tel 39 05 23 57 31 11 Fax 39 05 23 5 70 60 www sunrisemedical com Sunrise Medical A G L ckhalde 14 3074 Muri bei Bern Schweiz Tel 41 0 31 958 38 38 Fax 41...

Reviews: