ENGLISH
XENON 2 FF 21
Rev.2.0
6.4 Seating
Seat Sling
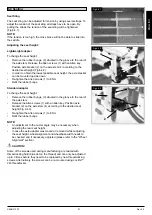
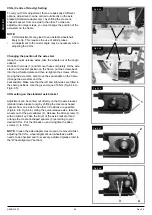
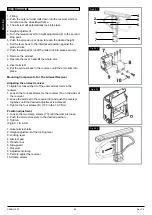
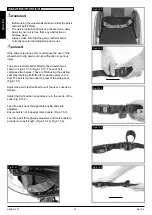
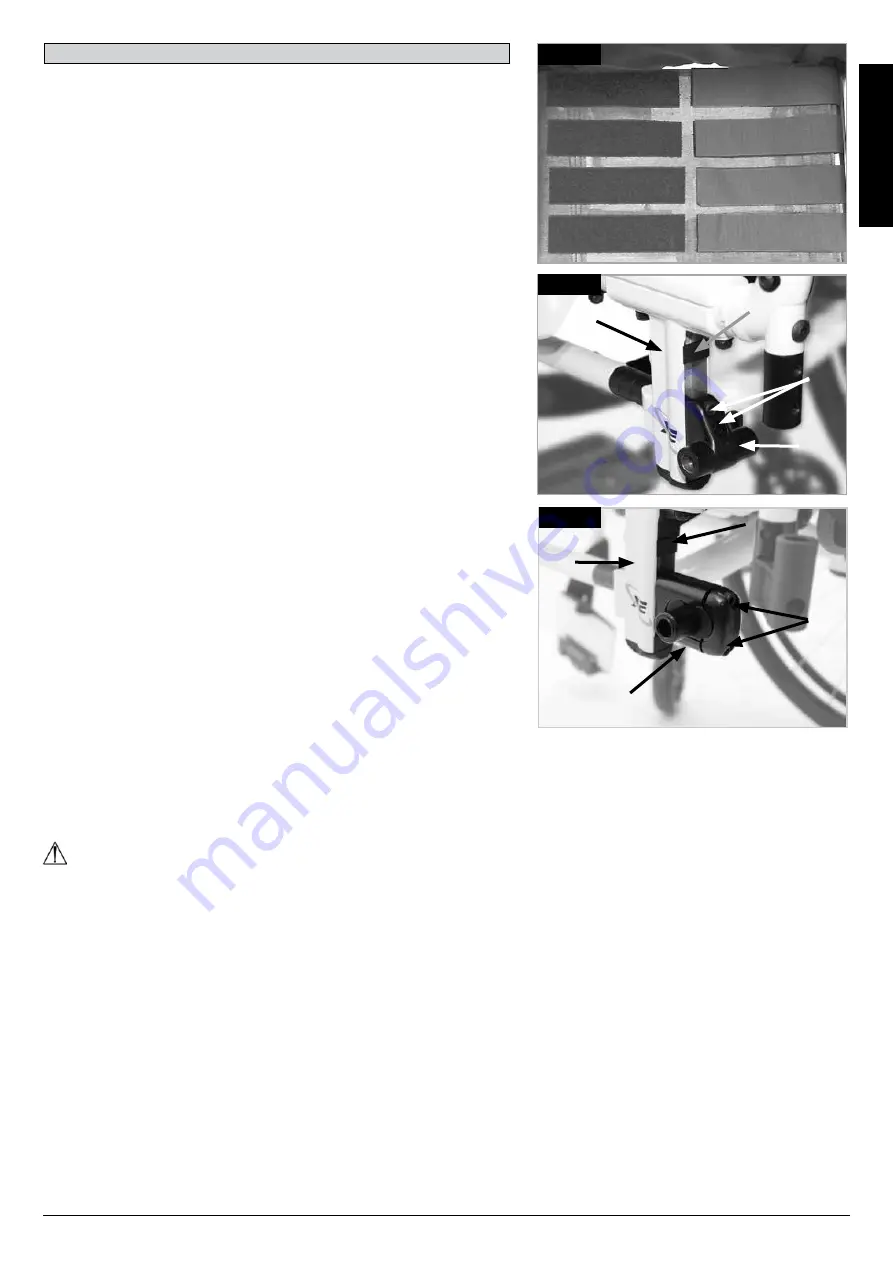
The seat sling can be adjusted for tension by using several straps. To
adjust the tension of the seat sling all straps have to be open. By
pulling the straps the tension of the seat sling will be tightened,
(Fig.6.4.1).
NOTE:
If the tension is too high, the cross brace will not be able to slide into
the saddle.
Adjusting the seat height:
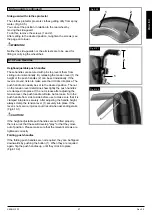
Lightweight adapter
To change the seat height;
•
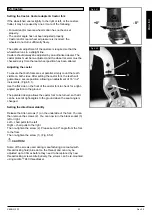
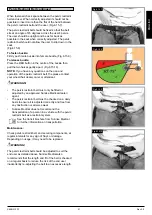
Remove the rubber bungs, (3) situated in the groove to the rear of
the axle stem. Release the Allen screws (1) with an Allen key.
Position axle bracket (2) on the axle stem (4) according to the
desired seat height (Fig.6.4.2).
•
In order to obtain the lowest possible seat height, the axle bracket
can be mounted upside down.
•
Re-tighten the Allen screws (1) to 8 Nm.
•
Refit the rubber bungs.
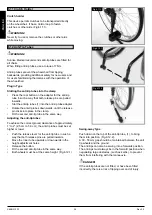
Standard adapter
To change the seat height:
•
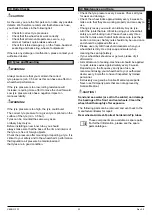
Remove the rubber bungs, (3) situated in the groove to the rear of
the axle stem.
•
Release the Allen screws (1) with an Allen key. Position axle
bracket (2) on the axle stem (4) according to the desired seat
height (Fig.6.4.3).
•
Re-tighten the Allen screws (1) to 8 Nm.
•
Refit the rubber bungs.
NOTE:
•
An adjustment to the castor angle may be necessary when
adjusting the rear seat height.
•
In case the axle adapter was moved or removed whilst adjusting
the seat height, wheel alignment and wheelbase width needs to
be checked and if necessary, adjusted (please refer to the "Wheel
Alignment" section).
CAUTION!
Some of the screws used during manufacturing are coated with
thread-locking fluid (blue dot on the thread) and can only be adjusted
up to 3 times before they need to be replaced by new thread-locking
screws. Alternatively, the screws can be re-mounted using Loctite™
243 threadlocker.
Fig.6.4.1
Fig.6.4.3
2
3
1
4
Fig.6.4.2
3
1
2
4

