Page 16 of 69
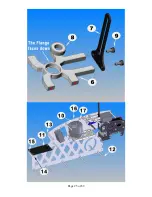
1-3 REAR FRAME INSTALLATION
No. Bag# Description
Qty No. Bag# Description
Qty
1 Step 1-2
1
5
HB
M3x35 Cap Head Bolt
4
2 Frame Rear
Frame
1 6 HB
M3x8 Cap Head Bolt
8
3
Step 1-1
1
7
HB
M3 Locknut
4
4
1
Boom Holder
2
8
HB
M3x7 Flat Washer
8
Do not tighten four nuts
at Tail Boom Holder
Halves too tight since
you are going to install
the Tail later.
Note: If the holes on the Bearing Blocks do not line up to the ones on the Rear Frame,
just grind the holes on the frames a little bit.
Summary of Contents for Little Sweetie 10 Pro
Page 1: ...Page 1 of 69...
Page 7: ...Page 7 of 69 REQUIRED TOOLS Dremel Tools and Sandpapers would be helpful for building...
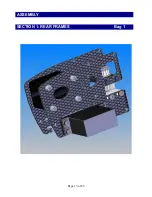
Page 13: ...Page 13 of 69 ASSEMBLY SECTION 1 REAR FRAMES Bag 1...
Page 17: ...Page 17 of 69 SECTION 2 MAIN FRAMES Bag 2...
Page 25: ...Page 25 of 69...
Page 27: ...Page 27 of 69...
Page 28: ...Page 28 of 69...
Page 37: ...Page 37 of 69...
Page 42: ...SECTION 5 A ROTOR HEAD for Little Quickie 10 Bag 5 Page 42 of 69...
Page 44: ...Page 44 of 69...
Page 53: ...Page 53 of 69...
Page 54: ...Page 54 of 69...
Page 55: ...Page 55 of 69...


