Page 48 of 69
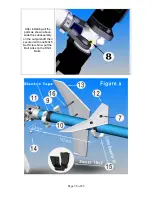
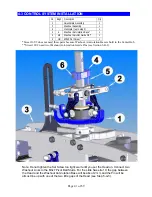
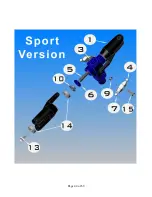
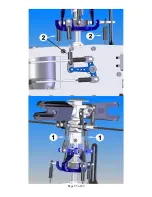
5-B-2 FLYBAR & SEESAW ASSEMBLY
No. Bag# Description
Qty No. Bag# Description
Qty
1 5 Seesaw
1
9
HB
M3x5 Set Screw
2
2
5
Seesaw Collar
2
10
5
4mm Fly-Bar Paddle
2
3 HB
M3x8 Cap Head Bolt
4
11
5
Short Ball End
4
4 HB
M3x7 Pivot Ball Stud
2
12
Main Rotor Hub Assembly
1
5 HB
M4x6x1 Spacer
4
13
HB
M3 Flat Washer
2
6
5
Fly-Bar Control Arm A
2
14
5
10 mm Linkage Rod
2
7
5
Fly-Bar Control Arm B
2
15
5
Washout Anti-rotation Pin
2
8
In box 4mm Standard Flybar
1
16
*****
Epoxy Glue/JP Weld
1
•
There are two holes in the paddles. For regular setup, use the hole that is further
from the letter “Quick” on the paddles.
•
Although the drawing does not show the other side of the head, you should
repeat the same assembly for that side.
•
Fly-bar should be balanced on the Seesaw.
•
Connect the Short Ball Ends to the cooperated ball of the Hiller Arms.
•
Make sure to apply Epoxy Glue/JP Weld to the thread on Flybar and the Flybar
Paddle (after you finish the Setup)
Note: The Center Hub and Flybar Control Arm shown may look differently from the ones in the kit
.
Summary of Contents for Little Sweetie 10 Pro
Page 1: ...Page 1 of 69...
Page 7: ...Page 7 of 69 REQUIRED TOOLS Dremel Tools and Sandpapers would be helpful for building...
Page 13: ...Page 13 of 69 ASSEMBLY SECTION 1 REAR FRAMES Bag 1...
Page 17: ...Page 17 of 69 SECTION 2 MAIN FRAMES Bag 2...
Page 25: ...Page 25 of 69...
Page 27: ...Page 27 of 69...
Page 28: ...Page 28 of 69...
Page 37: ...Page 37 of 69...
Page 42: ...SECTION 5 A ROTOR HEAD for Little Quickie 10 Bag 5 Page 42 of 69...
Page 44: ...Page 44 of 69...
Page 53: ...Page 53 of 69...
Page 54: ...Page 54 of 69...
Page 55: ...Page 55 of 69...


