background image

Installation Manual 
Quidway S5000 Series Ethernet Switches 

Chapter 4  Powering on Switch for the First Time


Huawei Technologies Proprietary 

4-6 

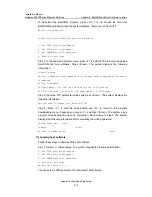
        The switch MAC is: 00E0-FC4B-6A8E     (8) 


Press Ctrl-B to enter Boot Menu...  5       (9) 


Lines (1) through (8) are system test information.  

Line (9), which will last for five seconds, is for users to choose whether or not to enter 
the BOOT menu.  

z


Press <Ctrl+B> within 5 seconds and enter the BOOT menu. 

z


If you perform no operation or press other keys other than <Ctrl+B> within the 5 
seconds of waiting, the system will enter the auto-booting state when the time 
prompt for instruction waiting becomes 0. 

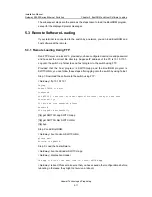
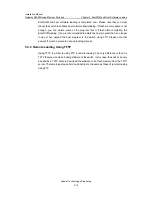
System auto-booting interface is as follow: 

Auto-booting... 


Starting ... 


User Interface Aux0/0 is available 


Press ENTER to get started. 

The above information indicates the automatic booting is done. 

Press <Enter> and the terminal will display: 

<Quidway> 

By this time, the user can start configuring the switch. 


  Note: 

Quidway series switches provide diverse command modes. For introduction of the 
configuration commands and command line interfaces in detail, refer to 

Quidway 

S5000 Series Ethernet Switches  Operation Manual.


Summary of Contents for S5012G-DC

Page 1: ...ons 1 9 Chapter 2 Installation Preparation 2 1 2 1 Safety Requirements 2 1 2 2 Examine Installation Location 2 1 2 2 1 Temperature Humidity Requirements 2 1 2 2 2 Cleanness Requirements 2 2 2 2 3 Anti...

Page 2: ...5 BootROM and Host Software Loading 5 1 5 1 Introduction to Loading Approaches 5 1 5 2 Local Software Loading 5 1 5 2 1 Boot Menu 5 2 5 2 2 Loading Software from Console Port Using XModem 5 3 5 2 3 Lo...

Page 3: ...l ports The following are the models that S5000 Series can provide by far S5012G It is powered by AC supply and provides 12 10 100 1000BASE T auto negotiation Ethernet ports RJ 45 connector and 4 Comb...

Page 4: ...data communication connector Note S5012G and S5012G DC switches share similar structures except for their power sockets Unless otherwise specified S5012G is introduced as a representative For the sam...

Page 5: ...nloading host program Steady ON means the switch is powered on but not loading application program yet or the switch is in fault state RUN OFF The switch is powered off or in fault state ON The master...

Page 6: ...The port in conflict OFF The port runs at the rate of 10Mbps ON The port runs at the rate of 100Mbps Port status mode indicator SPD Speed Blinkin g 4Hz The port runs at the rate of 1000Mbps Note z st...

Page 7: ...ng screw Redundant power socket Figure 1 2 Rear panel of S5012G z AC input voltage Rated voltage range 100 240V a c 50 60Hz Maximum voltage range 90 264V a c 50 60Hz II Rear panel of S5012G DC z Rear...

Page 8: ...or mode control button MODE port status mode indicators L A D C and SPD four fixed GE electric ports RJ 45 connector with indicators below ten GBIC ports with indicators on the right and one Console p...

Page 9: ...t to right that is port 2 is above port 1 and port 4 is above port 3 and so on Their corresponding LEDs are below from left to right four GBIC ports with indicators below and one Console port located...

Page 10: ...ogram 1 6 Attributes of GBIC Ports The following GBIC port modules can be configured on S5000 Series Table 1 4 GBIC interface modules supported on S5000 Series GBIC port module Connector Port fiber Tr...

Page 11: ...alf duplex full duplex 1000M full duplex MDI MDI X auto sensing Port standard IEEE 802 3u Interface cable and transmission distance Category 5 twisted pairs 100m 1 8 S5000 Series Product Specification...

Page 12: ...z Rated voltage range 48 60V d c Maximu m voltage range 36 72V d c Rated voltage range 100 240 V a c 50 60Hz Maximu m voltage range 90 264V a c 50 60Hz Rated voltage range 48 60V d c Maxim um voltage...

Page 13: ...the switch 2 2 Examine Installation Location S5000 Series can only be used indoors The following conditions must be met regardless of whether you install the switch in 19 inch standard rack or direct...

Page 14: ...the switch but also cause communication failure The required specifications on dust content and particle diameter in an equipment room are shown in the following table Table 2 1 Limit on dust content...

Page 15: ...measure of electromagnetic shielding if necessary For example you can adopt shielded interface cable z Interface cable must be run indoors and outdoor cabling is not permitted in case that over voltag...

Page 16: ...g Mounting the Switch in 19 inch Rack The switch can be mounted in a 19 inch standard rack The installing procedure is described below Step 1 Check grounding and stability of the rack Fix the mounting...

Page 17: ...AC power socket Recommended A monophase 3 wire power socket with a neutral point or a multi functional power socket for the computer is recommended The neutral point of the power in a building must b...

Page 18: ...of the switch Ground the other end to the nearest connecting point Step 2 Connect the DC power terminals of the switch to the corresponding terminals of the 48V DC power system with power cord with N...

Page 19: ...dant power of S5000 Series AC power socket Grounding screw Redundant power socket Figure 3 4 Redundant power socket for S5000 Series II Connecting redundant power cord Step 1 Make sure the switch has...

Page 20: ...ion grounding wire to the grounding screw of the grounding strip and fasten the captive nuts Note that the fire main and lightning rod of a building are not suitable for grounding the switch The groun...

Page 21: ...PE wire of the AC power supply In this case make sure the PE wire of the AC power supply has been well grounded at the power distribution room or AC power supply transformer side AC power input with t...

Page 22: ...und Grounding wire DC power input Ethernet Switch Grounding screw RTN 48V AC DC power box 48V strip RTN strip PGND strip Ground Grounding wire Figure 3 8 Grounding through PGND of a power rack 3 3 Con...

Page 23: ...o not support hot swap meaning you cannot insert or remove a serial interface cable from a PC that is connected to a switch with power In connecting disconnecting a PC and a switch always plug unplug...

Page 24: ...or of Console cable to the serial port of the PC where the switch is to be configured Step 2 Connect the RJ 45 connector of Console cable to the Console port of the switch 4 3 Setting Terminal Paramet...

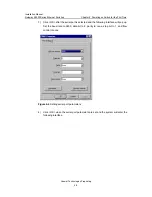
Page 25: ...prietary 4 2 Figure 4 2 Connection description interface of HyperTerminal 2 Key in the name of the new connection in the connection description interface and click OK the following interface will pop...

Page 26: ...ietary 4 3 3 Click OK after the serial port is selected and the following interface will pop up Set the baud rate to 9600 data bit to 8 parity to none stop bit to 1 and flow control to none Figure 4 4...

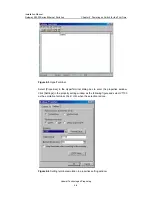
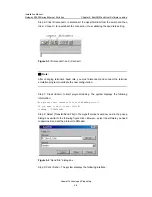
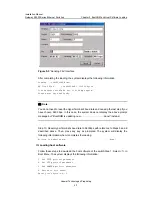
Page 27: ...ietary 4 4 Figure 4 5 HyperTerminal Select Properties in the HyperTerminal dialog box to enter the properties window Click Settings in the property setting window as the following figure and select VT...

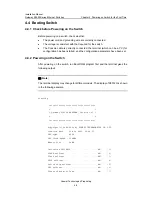
Page 28: ...ation has been started and the configuration parameters have been set 4 4 2 Powering on the Switch After powering on the switch run Boot ROM program first and the terminal gives the following output N...

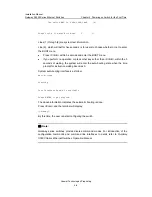
Page 29: ...r keys other than Ctrl B within the 5 seconds of waiting the system will enter the auto booting state when the time prompt for instruction waiting becomes 0 System auto booting interface is as follow...

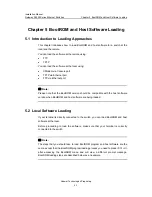
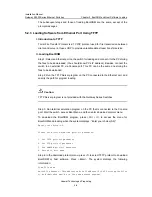
Page 30: ...Ethernet port Note Please note that the BootROM version should be compatible with the host software version when BootROM and host software are being loaded 5 2 Local Software Loading If your terminal...

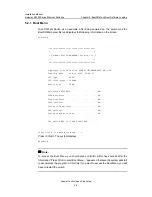
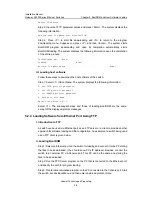
Page 31: ...date Jun 24 2005 10 08 37 CPU type MIPS CPU Clock Speed 150MHz Memory Size 64MB Initialize LS51GX12 OK SDRAM selftest OK Flash selftest OK CPLD selftest OK Switch chip selftest OK PHY selftest OK Ple...

Page 32: ...it supports checksum CRC and error packet retransmission mechanism Normally the maximum number of retransmission attempts is ten XModem transmission is completed by receiving program and sending progr...

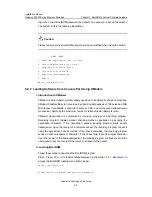
Page 33: ...baud rate of 115200bit s Press Enter The system displays the following information Are you sure to update your bootrom Y N Step 4 The system begins to download if you press Y it returns to download m...

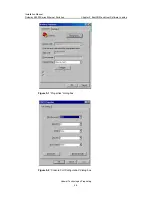
Page 34: ...on Manual Quidway S5000 Series Ethernet Switches Chapter 5 BootROM and Host Software Loading Huawei Technologies Proprietary 5 5 Figure 5 1 Properties dialog box Figure 5 2 Console Port Configuration...

Page 35: ...t disconnect and connect the terminal emulation program to validate the new configuration Step 7 Press Enter to start program loading The system displays the following information Now please start tra...

Page 36: ...ou have chosen 9600 bps In this case the system does not display the above prompt message but BootROM is updating now done instead Step 10 Reset HyperTerminal s baud rate to 9600bps with reference to...

Page 37: ...2 Run the TFTP Server program on the PC connected to the Ethernet port and specify the path for program loading Caution TFTP Server program is not provided with the Quidway Series Switches Step 3 Run...

Page 38: ...eter 2 Set FTP protocol parameter 3 Set XMODEM protocol parameter 0 Return to boot menu Enter your choice 0 3 1 Select 1 The subsequent steps and those of loading BootROM are the same except of the di...

Page 39: ...me It must be the same one set on FTP Server FTP User Password It must be the same one set on FTP Server Step 5 Input the FTP parameter values and press Enter The system displays the following informa...

Page 40: ...sing FTP Provided that the host program is SWITCH app and the BootROM program is SWITCH btm you can follow these steps after logging onto the switch by using Telnet Step 1 Download the software to the...

Page 41: ...loading You are recommended to delete the host program that is no longer in use Then upload the host program to the switch using FTP Please note that power off must be prevented during loading proces...

Page 42: ...z Correct path for TFTP Server to operate on program files 3 When using FTP check that you have provided z Correct server and switch IP addresses z Correct name of the software to be loaded z Correct...

Page 43: ...cable is connected correctly If no problems are found after the above mentioned items have been checked the cause may lie in the Console cable or the settings of the terminal such as HyperTerminal par...

Reviews: