background image

16

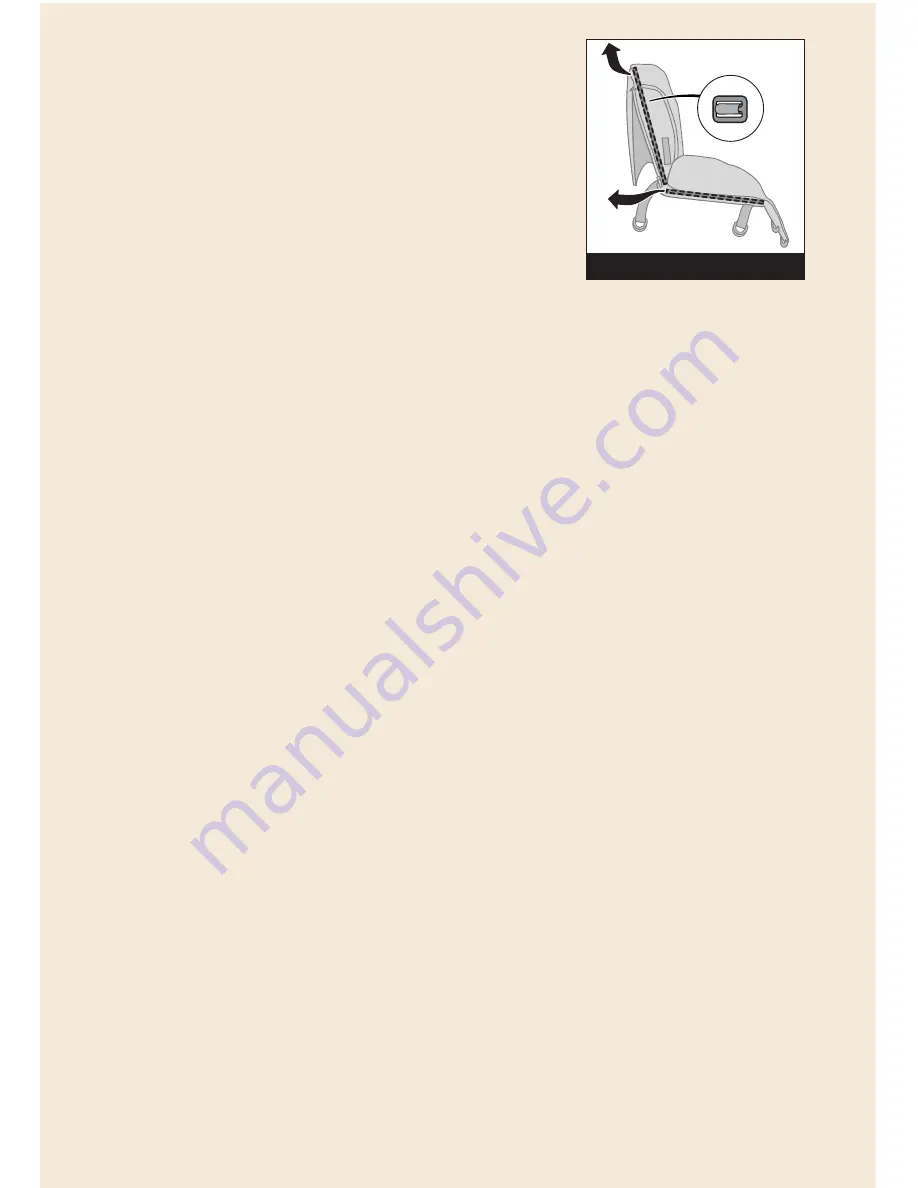
- Unfasten hook and loop closures on the seat back and bottom.

- Remove the shoulder belts by tilting the clasp and pushing them through

the board. 

Picture 32

- Remove the reinforcement boards from the back and the seat through the

opening.

- Détachez les crochets et les boucles au dos et au bas du siège.

- Enlevez les épaulières en inclinant l'agrafe et en les poussant par les

renforts. 

Illustration 32

- Enlevez les renforts du dossier et du siège en les passant par les

ouvertures.

Replace Seat Cover after Washing:

- Place back the reinforcing boards, making sure the belts are fastened

properly.

- Fasten the elastic straps to the metal frame.

- Zip up the zippers.

- Never use the seat without the reinforcement boards or seat belt.

Pour remettre la housse du siège après l'avoir lavée:

- Replacez les renforts, en vous assurant que les ceintures sont attachées

correctement.

- Attachez les courroies élastiques au châssis en métal.

- Remontez les fermetures-éclairs.

- Ne jamais utiliser le siège sans les renforts ou la ceinture de sécurité.

Wheel and Tire Maintenance:

- The tires can be inflated to a maximum pressure of 28 psi (193 kPa). The

tires are equipped with air valves and can be inflated using the pump
supplied or a bicycle pump with adapter.

Tire Pump Use:

Remove hose from inside pump handle. Reverse hose

and thread into end of tire pump. Thread hose onto tire valve stem. Pull
and push tire pump handle until tire fills with air and pressure is within
the tire manufacturer’s recommendation. Store hose inside pump handle
and keep pump in pouch at rear of basket when not in use.

- If the inner tube has a puncture, you can repair it as you would a bicycle

tire or have it repaired at a bicycle repair shop.

- Always deflate the tires when taking the Freestyle 4 on an aircraft, as the

tires could burst due to pressure difference.

- The stroller may be prone to rusting/tarnishing if used on a beach. Riding

through seawater is therefore not advised. Clean the wheels thoroughly
after visiting the beach.

- Clean the wheels and axles often and remove any sand or dirt before

assembling them.

- The tires may leave behind black marks on some surfaces (particularly

smooth floors like parquet, laminate and linoleum).

Entretien des roues et des pneus:

- Les pneus peuvent être gonflés à une pression maximum de 193 kPa 

(28 psi).  Les pneus sont équipés de soupapes à air et peuvent être
gonflés avec la pompe fournie ou une pompe à bicyclette avec un
adaptateur.

32

Summary of Contents for 01-936

Page 1: ...bus IN 47201 7494 Dorel Canada 12345 Albert Hudon suite 100 Montreal QC Canada H1G 3K9 01 05 2005 Dorel Juvenile Group Fabriqu en CHINE www djgusa com 800 544 1108 Les styles et les couleurs peuvent v...

Page 2: ...for use Warranty WARNING Keep for future reference Mode d emploi Garantie MISE EN GARDE Conservez pour r f rence future Model Mod le 01 936 Freestyle 4XL Travel System Syst me de transport Freestyle...

Page 3: ...he stroller may tip over or the canopy may collapse This product will become unstable if a parcel bag or rack is used when there is no provision for one This product may become unstable if a parcel ba...

Page 4: ...er ou suspendre de colis de sacs ou des accessoires sur la poign e ou l auvent La poussette pourrait renverser ou l auvent pourrait s effondrer Cette poussette sera instable si vous utilisez un panier...

Page 5: ...uvre harnais Auvent Roues arri res Roues avant Essieu avant Panier de rangement Dorel Canada Service la client le P O Box 2609 Columbus IN 47202 2609 1 800 544 1108 PARTS LIST LISTE DES PI CES ORDER R...

Page 6: ...t to Dorel Canada Consumer Relations Department at the address noted and all other freight or insurance costs associated with the return Dorel Canada will bear the cost of shipping the repaired or rep...

Page 7: ...u en tirant le verrou de s curit gauche de la poign e dans la direction de la fl che Illustration 1 Pull the handle upwards until it clicks into the handle safety lock Check this by pushing down on th...

Page 8: ...on ouverture jusqu ce que la roue s enclenche en position Illustration 6 Assurez vous que la roue est bien fix e en tirant dessus V rifiez la pression des pneus et gonflez les si n cessaire voir la se...

Page 9: ...e s enclenche en position Illustrations 8 et 9 Assurez vous que la roue est bien fix e en tirant dessus V rifiez la pression des pneus et gonflez les si n cessaire voir la section sur l entretien pour...

Page 10: ...auvent d tachez les agrafes et retirez l auvent Install Comfort bar Place the two ends of the comfort bar into the openings on the adapter connections with the comfort bar facing upward Picture 13 IMP...

Page 11: ...d Ceinture de s curit Appliquez les freins sur le Freestyle 4 Assurez vous que la ceinture de s curit est desserr e avant de placer votre enfant d licatement dans le si ge Bouclez les ceintures abdomi...

Page 12: ...ion 16 The shoulder belts are height adjustable To adjust the height unzip the zippers on each side of the stroller on the seat back Separate the seat back cover from the seat back frame Open the cove...

Page 13: ...estyle 4 also when at a standstill Step on the pedal on the rear axle to lock the wheels Picture 20 Release the parking brake by pulling the pedal upward The handbrake is for slowing down and should n...

Page 14: ...fournis et n exc dez pas l allocation de poids maximum Adjusting the Handle To adjust the height of the handle push the release buttons at the same time 1 and rotate the handle into the desired posit...

Page 15: ...k of the seat in the recline position see Recline Seat Back Place the footrest in the highest position see Adjust Footrest Tilt up lock above the right handle safety lock Picture 26 Pour plier Pliez l...

Page 16: ...enclenche dans le verrou de s curit de transport Illustration 28 Enlevez les roues et le si ge pour rendre la poussette encore plus compacte To disassemble the wheels press the button on the hubcap a...

Page 17: ...Pour des raisons de s curit veuillez toujours utiliser des pi ces d origine Pour vous assurer d utiliser le Freestyle 4 longtemps essuyez le avec un chiffon doux apr s une sortie par temps pluvieux Ne...

Page 18: ...a The tires are equipped with air valves and can be inflated using the pump supplied or a bicycle pump with adapter Tire Pump Use Remove hose from inside pump handle Reverse hose and thread into end o...

Page 19: ...situ sur le ch ssis de la poussette Illustration 34 Pousser le bout l int rieur et ins rer le bout rigide dans le support situ sur le c t oppos du ch ssis de la poussette Illustration 35 Assurez vous...

Page 20: ...autour de la barre confort Illustration 38 Serrer solidement Tirer sur le si ge d auto pour vous assurer qu il est solidement en place Pour enlever le si ge d auto d tacher la ceinture de s curit et...

Reviews: