


6
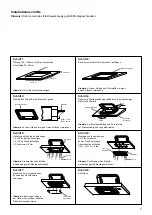
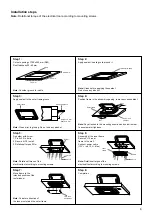
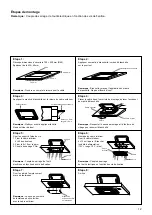
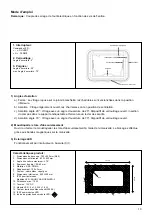
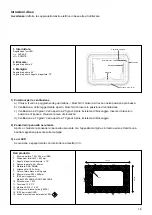
Installation steps
Note:
Rotational torque of the electrical tool according to mounting screws.
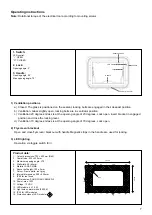
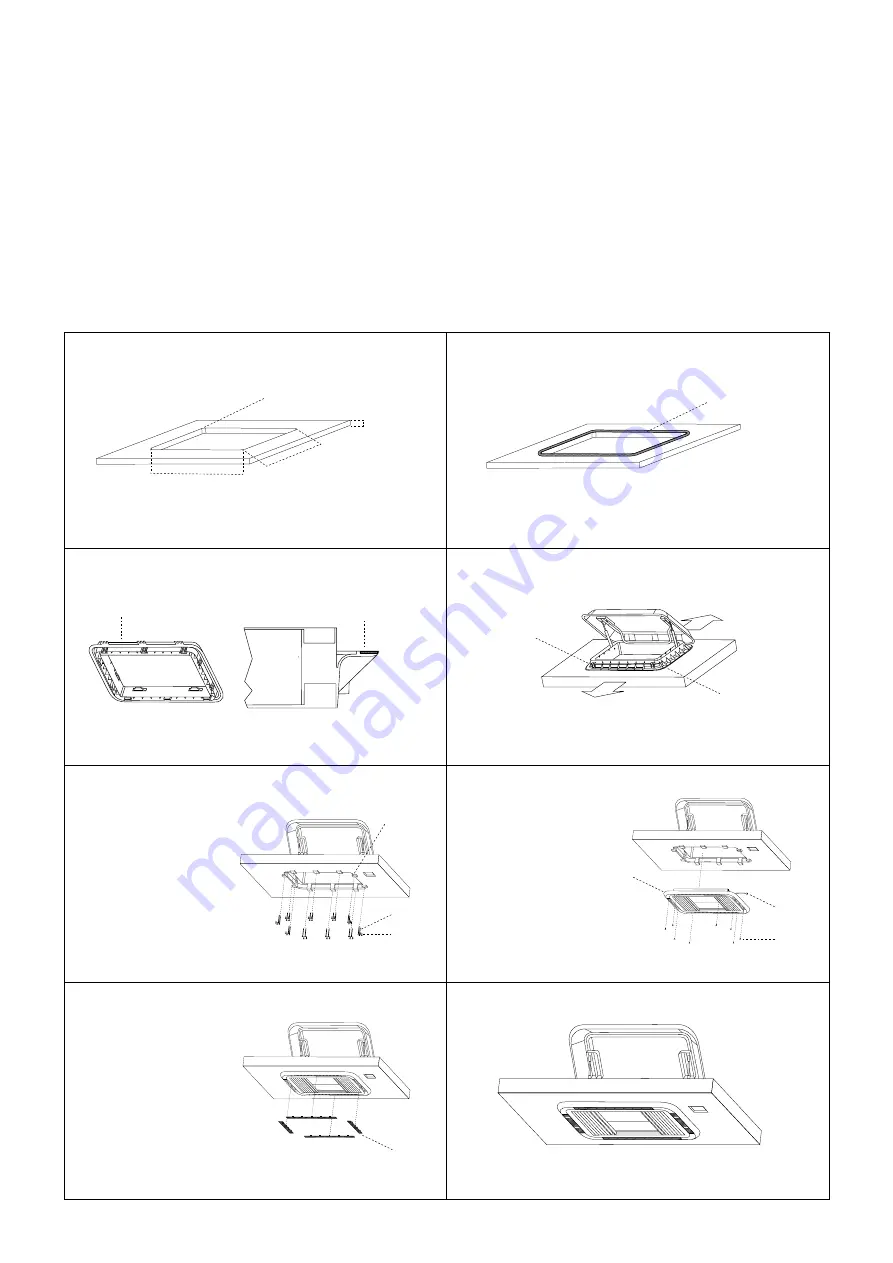
Step 8:
Completion
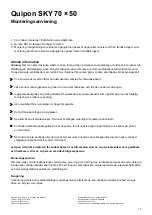
Step 2:
Apply sealant / sealing cord around it.
Note:
Clean before applying the sealant.
Do not use any alcohol.
Clean with soap.
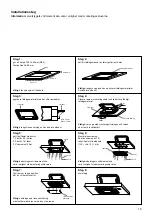
Step 4:
Position frame in the assembly opening, remove excess sealant.
Note:
Pay attention to the mounting direction and seam in order
to ensure water tightness.
Outer frame
Seam and
sealant
rear
front
Step 1:
Cut out opening of 700 x 500 mm (R60).
Roof thickness 25–60 mm
Note:
Consider groove for cable.
R60
25–60 mm
502 mm
702 mm
Step 3:
Apply sealant to the outer frame groove.
Note:
Clean prior to glueing. Do not use any alcohol.
Outer frame
Adhesive groove
Height: 1.5 mm
Width: 18 mm
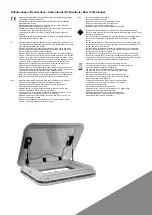
Step 6:
Assembly of the inner frame.
Secure 4 ×12 inner
frame to the wall.
Connect power cable
(12 V + red, 12 V − blue).
Note:
Rotational torque of the
electrical tool according to mounting screws.
Inner
frame
Cable
4 ×12
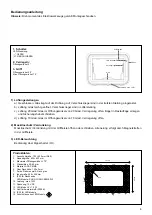
Step 7:
Move frame to the
intended position of the
roof window.
Note:
Curvature direction of
the lens must match the outer frame.
LED lens
equipment
Step 5:
Fix holder with screw.
1. Fix 4 × 45 to bolts
2. Secure 4 ×18 to wall
3. Rotational torque 3 Nm
Note:
Rotational torque of the
electrical tool according to mounting screws.
Holder
4 × 45
4 ×18


