


Fig. 12
Fig. 13
1.
Make sure the wiring is safely inside
the outlet box as instructed in Step 7 -
Electrical Connections. To install the
canopy, partially unscrew the 2 screws
in the hanger bracket. Align the slotted
holes in the canopy with the screws in
hanger bracket. Push up the canopy so
the screws slip into the slot. Turn the
canopy so it locks in place. Make sure the
canopy is not quite touching the ceiling.
2.
NOTE:
If using a 4" downrod
proceed to step 3. (Fig. 8) Lift the hang-
ing bar hooks up the downrod and using
the allen wrench supplied, secure with
the set screws. Hang each of the decora-
tive hanging bars from the hanging bar
hooks down to the hooks on the motor
body.
3.
Blade Assembly
Using the supplied blade arm screws,
attach the blades to the blade arms.
(Fig. 9). In some cases the metal washer
is permanently fixed to the screw head.
Ensure all screws are used for each
blade.
4.
Blade Installation
You can provide easy access to the blade
screw holes on the motor housing by
centering them in the access hole of the
flange. Attach the blades to the motor
housing using the supplied screws. Turn
the housing to expose the next set of
blade screw holes. Continue with each
blade.
DO NOT bend the blade arms
when installing the blades.
5.
Attaching the Decorative Cup
(Fig. 10) Attach the decorative cup plate
to the flange of the motor by using the
three (3) screws provided that are pre-
installed on the flange. (Fig. 11) Join the
two ends of the square cannon plugs (lin-
ing up the colors) and attach the decora-
tive cup to the decorative cup plate with
the three (3) screws provided.
A certain amount of wobble may be
considered normal, especially if the fan
is on a downrod longer than 12".
Fig. 11
Decorative Cup
Plate
Bulb
Fig. 9
Flange
Blade
Blade
Arm
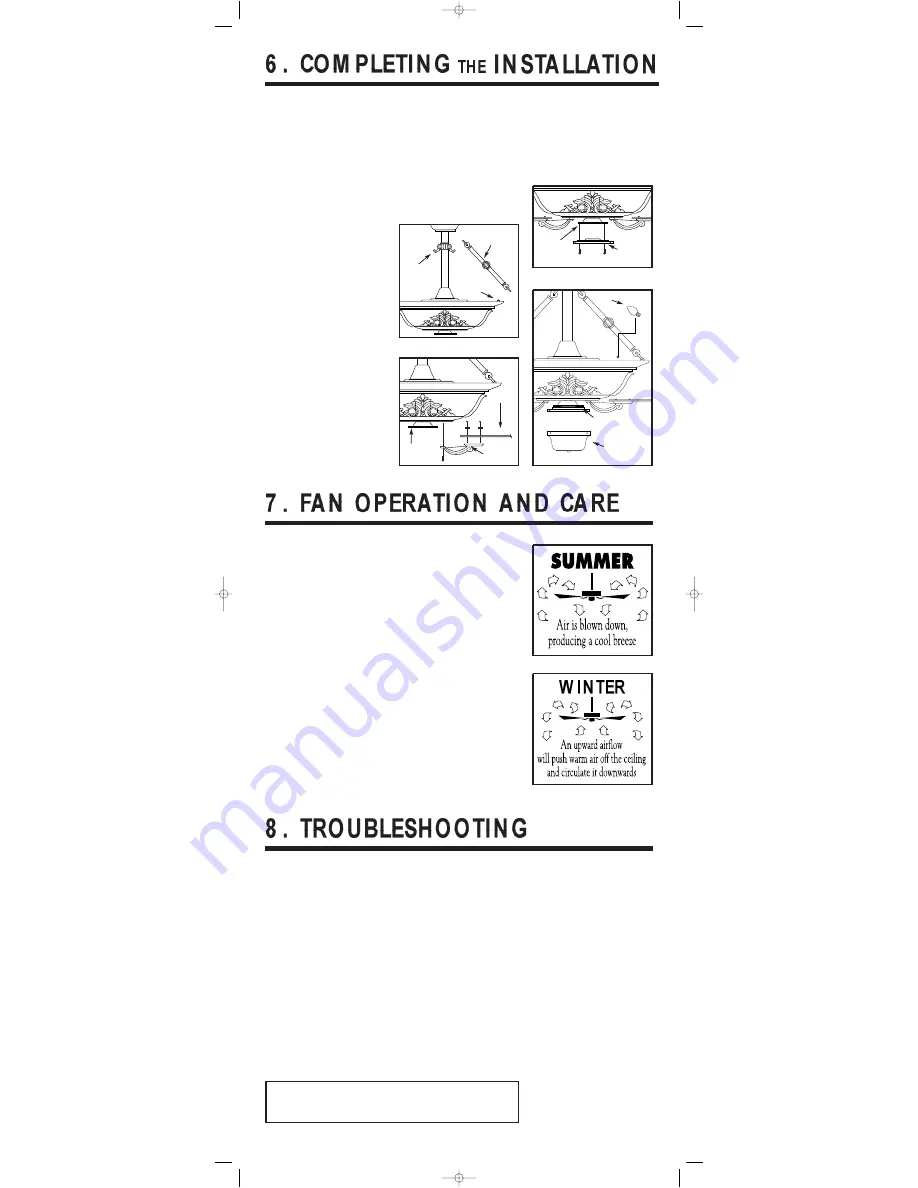
1.
A ceiling fan is an environmentally
smart choice to cool as well as help to
warm your home or office. You should
see a reduction in both heating and
cooling costs by regular use of your fan.
Do not hesitate to use your fan
during summer and winter months. In
summer, using the reverse switch, adjust
the fan’s direction so cool air is blown
down, producing a cooling breeze.
(Fig, 12) In winter, reverse the fan so
that an upward airflow will push warm
air off the ceiling and circulate it down
into the living area (Fig. 13). In winter
months, use the fan at a lower speed
than summer.
2.
Periodically check tightness of all
screws securing the blades to the blade
arm attachment points. A clicking or
rattling noise is a sure indication of
loosening screws. Since screws will
invariably work loose over time, at least
once a year, tighten all the screws attach-
ing blades to blade arms.
Do not bend
blade arms when cleaning or servicing
the fan.
3.
Clean your fan periodically using
only a cloth dampened with a mild deter-
gent solution for all hardware - never use
solvents. The finish plating is lacquered
to prevent tarnishing. Use a lint-free cloth
with clean water to clean blades.
4.
You will never need to oil or
lubricate your fan. Its permanently
sealed bearings will provide trouble-
free, silent operation for many years.
5.
If repairs or servicing are ever
required, to avoid possible electric
shock,
turn off the electricity
at the
main fuse or circuit panel before you
begin.
FA N W I LL N O T START
1.
Check that the electricity has been
turned on at the circuit breaker which
had probably been turned off during
installation.
2.
Turn off the electricity. Check all
connections in the wiring of the fan at the
ceiling and make sure it follows the wiring
instructions outlined in this manual.
N O I SE
Note:
Always allow a day or two “run-in”
time for any new fan at medium or high
speed. When attempting to diagnose
noise, listen carefully from several sides
to try and isolate the location of the noise
(blades, upper end, motor, light kit, etc.).
1.
Tighten all screws attaching blades to
blade arms. Remember to tighten these
screws at least once a year because they
may loosen slowly over time and cause a
clicking noise.
2.
Turn off the power. Loosen the
canopy and check that the wiring and/or
wire nut connectors are not resting against
the canopy, possibly vibrating while the
fan is on.
3.
Use of a standard light rheostat or an
unapproved fan wall control to control the
fan speed will always cause an annoying
“hum”. Many fan motors do not work
quietly with solid state variable speed
controls.
4.
Check that the rubber gasket on the
mounting bracket has been installed if
called for in the installation instructions.
5.
Check that the canopy is not touching
the ceiling.
6.
Check that all screws on the motor
housing and the bottom housing are tight.
FAN TURN S, BUT D O ES N O T
M O V E M UCH A I R
1.
The fan may be running in reverse.
2.
The distance from the ceiling to the
blades may be too small. At least 8" are
recommended.
3.
The room may contain items which
obstruct the air flow.
4.
The fan may be too small for the size
of the room.
EX CESSI V E W O BBLE
Note: A small amount of wobble is
considered acceptable and should not be
considered a defect.
1.
Make certain all blades are tightly
attached to each blades' respective blade
arm.
REPLACEM EN T PARTS AVAI LABLE
A full range of genuine replacement spare parts are available at reasonable cost directly from
Quorum International. Please call us at (817) 626-5483, Monday through Friday from 8:00 A.M.
to 5:00 P.M. CST.
Fig. 8
Decorative
Hanging Bar
Hanging
Bar Hooks
Motor
Body Hook
Decorative
Cup Plate
Fig. 10
Flange
6.
Install the 4 - 60 watt candelabra
base bulbs (not included) in the sockets
located on the top of the motor housing.
7.
Turn on the fan and check the 4
position speed switch - 3 speeds and
stop. Check the reverse position.
Decorative Cup
Salon Inst -10_03-ok 6/9/2005 2:33 PM Page 4


