background image

These instructions are to be used in 

the installation of the following 

QUORUM INTERNATIONAL fans...


Proxima Patio 60"

 & 72"

P.O. Box 961008 • Fort Worth, TX 76161 • (817) 626-5483 • FAX (817) 626-5540

I0228-07/15

© 2015 Quorum International. All Rights Reserved.

Please read and save these instructions

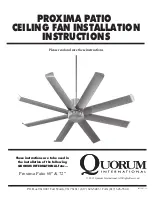
PROXIMA PATIO 

CEILING FAN


INSTALLATION 

INSTRUCTIONS

Summary of Contents for PROXIMA PATIO

Page 1: ...wing QUORUM INTERNATIONAL fans Proxima Patio 60 72 P O Box 961008 Fort Worth TX 76161 817 626 5483 FAX 817 626 5540 I0228 07 15 2015 Quorum International All Rights Reserved Please read and save these...

Page 2: ...stions regarding the warranty or the procedures for obtaining service please call us at 817 626 5483 Monday thru Friday 8 00 a m 5 00 p m CST technical skill competence or experience of the user 8 Lig...

Page 3: ...lation or before servicing the fan or installing accessories 2 Read all instructions and safety information carefully before installing your fan and save these instructions 3 Make sure all electrical...

Page 4: ...blade clearance 5 To hang the fan in locations where no ceiling joist is available a hanger support bar may be required Figure 4 Quorum distributes approved hanger support bars and outlet boxes 3 MOU...

Page 5: ...er Slide the yoke cover onto the downrod Fig 5 Feed the wires from the fan motor through the downrod assembly 3 Fig 6 Attach the downrod assembly downrod yoke cover canopy and canopy cover to the moto...

Page 6: ...Y from the transmitter to the remaining BLACK wire from the wall A C supply source If your junction box has a ground wire green or bare copper connect the transmitter s ground wire to it Otherwise con...

Page 7: ...the blade and motor and secure with screws and blade support plate Repeat process with the other blades Fig 10 DO NOT bend the blade arms when installing the blades 3 Attaching the Motor Bottom Housin...

Page 8: ...ep 3 The fan will start to run and begin the control setting process The fan will run in both directions for a total of approximately 5 minutes Step 4 When the fan stops after approximately 5 minutes...

Page 9: ...Periodically check tightness of all screws securing the blades to the blade arm attachment points A clicking or a rattling noise is a sure indication of loosening screws Since screws will invariably w...

Page 10: ...trol to control the fan speed will always cause an annoying hum Many fan motors do not work quietly with solid state variable speed controls 4 Check that the rubber gasket on the mounting bracket has...

Reviews: