


25
Poussez le bras supérieur
4
vers le bas tout en serrant l’anneau.
Dessous du bras
Dessous de la tête
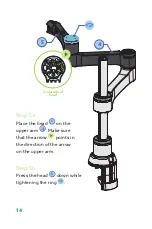
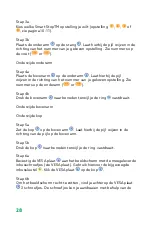
Étape 5a
Placez la tête
5
sur le haut du bras
4
. Laissez la flèche pointer dans
la direction de la flèche du bras.
Étape 5b
Appuyez sur la tête
5
tout en serrant l’anneau.
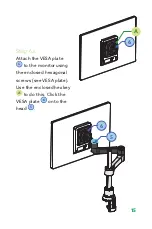
Étape 6a
Fixez la plaque VESA
6
au moniteur à l’aide des vis hexagonales
fournies (voir plaque VESA). Utilisez pour cela la clé Allen
A
fournie.
Cliquez la plaque VESA
6
sur la tête
5
.
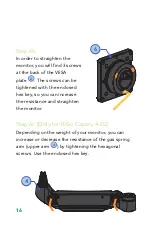
Étape 6b
Afin de redresser le moniteur, vous trouverez 3 vis à l’arrière de
la plaque VESA
6
. Les vis peuvent être serrées à l’aide de la clé
hexagonale fournie, ce qui vous permet d’augmenter la résistance et
de redresser le moniteur.
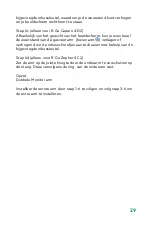
Étape 6c (uniquement pour R-Go Caparo 4 D2)
Selon le poids du moniteur, vous pouvez augmenter ou diminuer la
résistance du bras du ressort à gaz (bras supérieur
4
) en serrant les
vis hexagonales avec la clé hexagonale fournie.
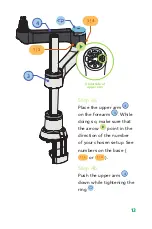
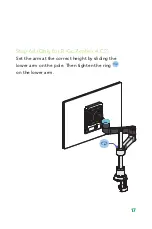
Étape 6d (uniquement pour R-Go Zepher 4 C2)
Réglez le bras à la bonne hauteur en faisant glisser le bras inférieur
sur la tige. Ensuite, serrez la bague sur l’avant-bras.
Configuration
Un double bras de moniteur
R-Go Caparo 4 D2 double bras de contrôle
R-Go Zepher C2 Double bras de surveillance
Summary of Contents for Caparo D2
Page 1: ...Monitorarms Manual R Go Caparo D2 Twin R Go Zepher C2 Twin...
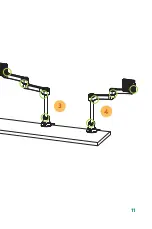
Page 11: ...11 3 4...
Page 30: ......


