


Summary of Contents for Caparo D2
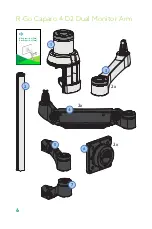
Page 1: ...Monitorarms Manual R Go Caparo D2 Twin R Go Zepher C2 Twin...
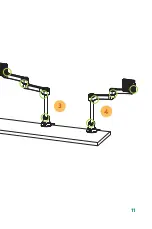
Page 11: ...11 3 4...
Page 30: ......
The R-Go Caparo D2 is a revolutionary ergonomic mouse designed to reduce wrist strain and increase comfort during extended computer use. To get the most out of your device, make sure to download the free manual from 88.208.23.73:8080 for step-by-step instructions and troubleshooting tips.
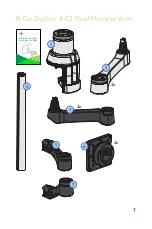
Page 1: ...Monitorarms Manual R Go Caparo D2 Twin R Go Zepher C2 Twin...
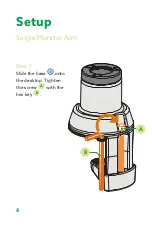
Page 11: ...11 3 4...
Page 30: ......


