background image


ENGLISH 

Introduction 


We would start by thanking you for having chosen our product and hope that you will be happy with 
your choise. 
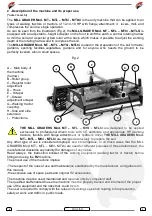
In order that your MILL GRADER Mod. MT – MTL – MThi - MTLhi  can offer the maximum 
efficiency  for many years, we ask you to pay attention to the instructions for use and maintenance 
which you will find in this manual. Observance of these regulations will prevent breakdowns and 
accidents for which our company will not accept responsability. 
This use and maintenance manual is to be considered an integral part of the machine and therefore 
it must always accompany the machine when it is sold, even in the event of its sale to third parties. 
If you keep this manual in a safe place and in good condition, you - and whoever must use the 
machine - will be able to have a complete, legible reference on hand at all times. 


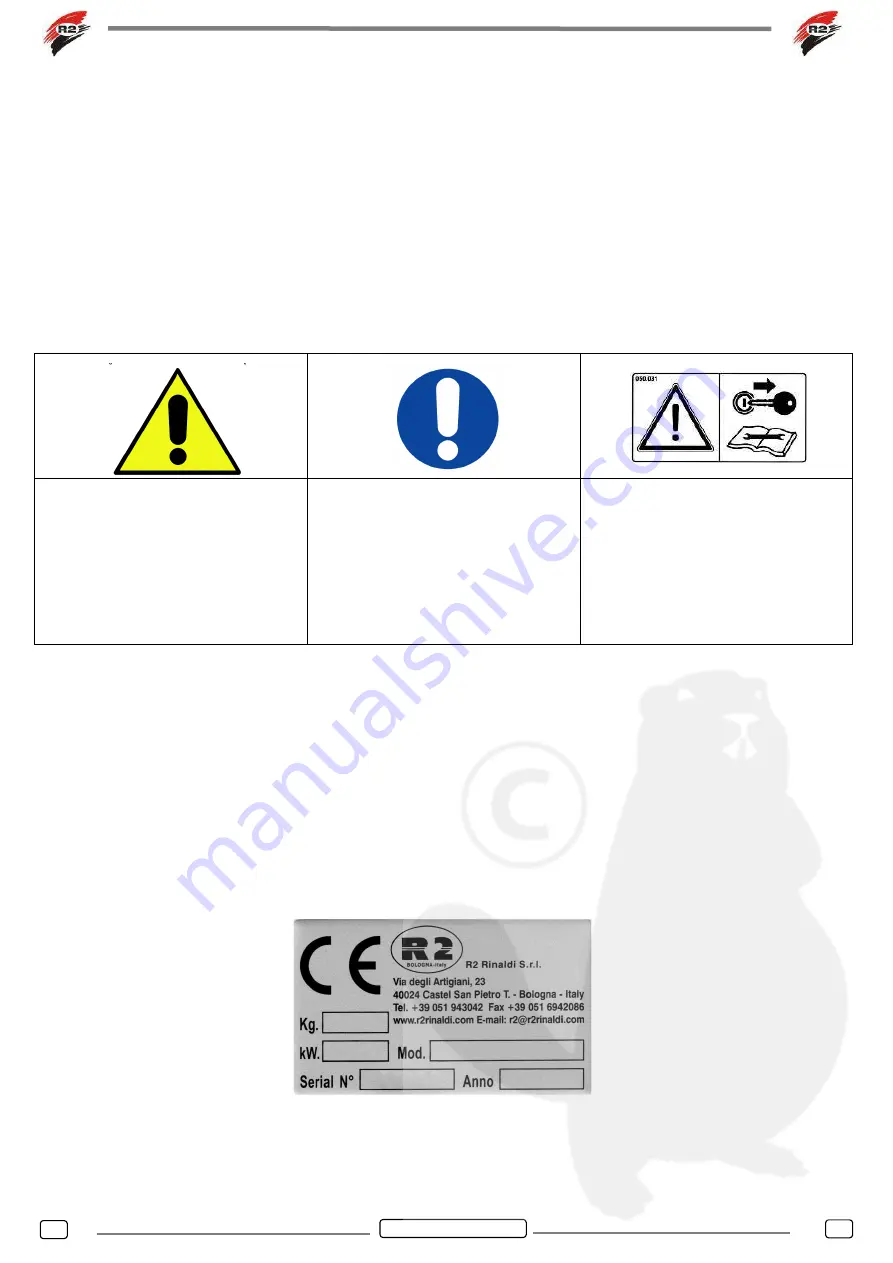
Description of the symbols used in the manual


This  symbol  will  be  used  in  the 
manual to indicate actions 
( misuse ) elements, behaviours 
and  situations  that  could  risk 
your  security  and  the  one  of 
other people. 

 
The  rounded  symbols  with 
white pictograms will be used in 
the  manual  to  indicate  the 
Individual  Protective  Devices 
necessary 

while 

using 

the 

machine  or  while  making  any 
adjustments. 

This symbol will be used in this 
manual  to  indicate  that  the 
described  operation  must  be 
done with the walking tractor or 
tractor  turned  off  and  the  key 
disconnected. 


NOTE:  This  manual  concerns  the  use  and  maintenance  description  of  the  mecchanic  mill  graders 
MT-MTL,  which  corrisponds  largely  to  the  hydraulic  models  MTLhi  and  MThi;  the  differences 
between the two models will be indicated with a caption 

(*note mod. hi)   (n indicates  the note number) 


and examined in an specific section of the manual


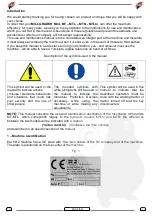
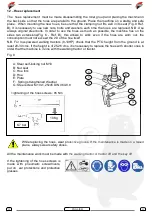
1 – Machine  identification  


Each  R2  machine  has  a  CE  plate  with    the  main  details  of  the  R2  company  and  of  the machines. 
The plate is positioned on the top center of the machine.  


Fig. 1 


Summary of Contents for MT Series

Page 1: ...ENGLISH Mill Grader Mod MT MTL MThi MTLhi Instructions and maintenance manual Translation of the original instructions Rev 27 04 2016...

Page 2: ...9 Maintenance 10 Hoes replacement 11 End of work and storage of the machine 12 Scrapping and disposal of the components and packaging 12 Specific references for the hydraulic machines 13 Guarantee and...

Page 3: ...of the symbols used in the manual This symbol will be used in the manual to indicate actions misuse elements behaviours and situations that could risk your security and the one of other people The rou...

Page 4: ...ILL GRADERS Mod MT MTL Mthi MTLhi are designed to be applied exclusively to professional driven tools with CE certificate and appropriate HP walking tractors tractors with flange atttachment or hydrau...

Page 5: ...cessary equipment Fig 3 Fig 4 4 Handling and transportation of the machine note 3 mod hi The machine must be handled with lifting equipment Make sure that such equipment including the straps and the s...

Page 6: ...en working alongside roads pathways or sloping ground 8 Do not leave the machine working without supervision 9 While checking or repairing the machine be sure that nobody can start it up accidentally...

Page 7: ...g the adjustment 6 2 Flange assembly and coupling of the machine to the walking tractor or tractor Before fitting the machine flange Fig 5 Ref F which varies according to the model of the walking trac...

Page 8: ...l function as a wheel In order to prevent the hoes from remaining exposed and to avoid any dangerous situation during the milling it is important the the extension sides Fig 6 Ref B are adjusted in su...

Page 9: ...ng parts wear safety shoes If while working there is a lot of dust which will depend on the type of soil wear a dust mask Do not use the machine in reverse do not use the machine on steep slopes verif...

Page 10: ...ge using the appropriate greaser Fig 7 Ref A 2 Check the grease level in the tank using the specially provided cap Fig 7 Ref B this must be made when the machine has worked for several minutes During...

Page 11: ...e 2 3 of the hoe itself N B For low powered walking tractors 8 10HP check that the PTO height from the ground is at least 28 30 cms If the height is of 25 26 cms it is necessary to replace the hoes wi...

Page 12: ...o people or animals in the working area and wear protective glasses and if necessary a dust mask Do not direct the jet of compressed air or water to people or animals 14 Scrapping and disposal of the...

Page 13: ...motor NOTE the following data which concerns to the engine specifications are given by the manufacturer of the hydaulic motor for the specifications of the engine application to the R2 machine look at...

Page 14: ...place the protective taps on the pipe fittings When the Mill Grader R2 is connected to the tractor the caps remain attached through a ring to the hoses so that they can be repositioned next time Check...

Page 15: ...e Mill Grader R2 Tractor Fig 10 Hydraulic circuit connection A G1 2 main ports thread depth 15 mm B G1 4 drain port thread depth 15 mm Screw the hoses to the engine and fit them through the quick coup...

Page 16: ...cSt it should also have an adeguate viscosity index Under no circumsances should oil viscosity be outside the range of 22 cSt to 75 cSt Before starting the hydraulic system check oil level and firm m...

Page 17: ...tructions When the equipment has been used incorrectly The R2 Company reserves the right to modify the data in this manual whenever this is considered necessary for technical or commercial improvement...

Page 18: ...18 18 NOTE...

Page 19: ......

Page 20: ...R2 Rinaldi S r l Via degli Artigiani 23 40024 Castel San Pietro Terme Bologna ITALY Tel 0039 051 94 30 42 Fax 0039 051 69 42 086 www R2RINALDI com R2 R2RINALDI com...

Reviews: