21
21
ENGLISH
9 – Preparing for use
Before using the implement, always perform the following checks with the
tractor turned off and the key removed.
1. Perform a general visual inspection of the implement. Verify the correct mounting of the
components (mechanical parts and guards). Do not use the implement if you experience an oil
leak and/or if you see that parts of the implement are damaged, missing or not properly secured.
2. Check the correct coupling of the milling machine to the loader (see paragraph 7 on page 18);
3. Check that the hoes are intact.
4. Check that the safety signs are in place and legible.
10 – Adjusting the working depth
The provided roller adjuster screw sets the working depth.
In reference to the driving position of the operator:
- turning the roller adjuster clockwise, the roller rises and the hoes penetrate further into the soil
(major working depth) (Fig. 18).
- turning the adjuster counter-clockwise, the roller sinks and the hoes rise referring to the ground
(minor working depth) (Fig. 19).
To increase working depth, or in case the length of the hoes is reduced due to wear, you can modify
the height of the side panel extensions in three different positions (Fig. 20).
To avoid hoes protruding from the soil and therefore creating dangerous
situations during the milling, the side panels and the grader blade,
during the setting of the various working depths, must constantly stay
in contact with the soil (Fig. 22).
11 – Adjusting levelling
First follow the safety routine as indicated in point 1 of paragraph 5 page 12, then proceed
with the grader blade adjustment.
Make sure that during the operation nobody can start the loader.
Wear protective gloves.
Levelling the soil is carried out by the front grader blade. The blade can be adjusted on the basis of
the selected working depth by manually using the two dowels provided (Fig.21). Unscrew the dowels,
select the height of the blade and then retighten the dowels so that they engage in the correct
recesses on the blade supports.
For good levelling, make sure that while working there is always soil in front of the grader blade.
To avoid hoes protruding from the ground and therefore creating dangerous
situations during the milling, the side panel extensions and the grader blade, in
the different working depths, must be adjusted so that they constantly stay in
contact with the soil (Fig. 22).
For adjustments and use of the seeder unit (optional) see paragraph 12 on page 23.
Summary of Contents for MTZ HI
Page 2: ......
Page 9: ...9 9 ENGLISH Fig 3a Fig 3b Fig 4a Fig 4b Fig 5 a b c B A C A A A D B...
Page 11: ...11 11 ENGLISH Fig 6 Fig 6a Fig 7 SM 135 150 170 Fig 7a SM 100 120 Fig 8 22...
Page 15: ...15 15 ENGLISH Fig 9...
Page 16: ...16 16 ENGLISH Fig 10a Mod MTZ HI 135 150 170 Fig 10b A B...
Page 17: ...17 17 ENGLISH Fig 11 Mod MTZ HI 100 120 Fig 12...
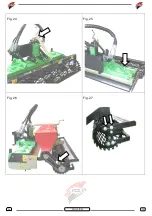
Page 22: ...22 22 ENGLISH Fig 18 Fig 19 Fig 20 Fig 21 Fig 22...
Page 26: ...26 26 ENGLISH Fig 24 Fig 25 Fig 26 Fig 27...
Page 31: ...31 31...


