background image

13

Troubleshooting

Before calling for repair, please review the list below.  The problem may not be due to unit malfunction.

Symptom

Solution

Unit does not operate.

Check if power plug is loose.

Press the main unit control button or any buttons on the remote 

The remote control does 

not work.

Check if the battery has been depleted. (Refer to P.5)

Check if the battery is inserted correctly. (Refer to P.5)

Point the remote control directly towards the main unit display.

Fluorescent lighting flickering in the room may affect the signal of the remote control. Please service the 
fluorescent lights.

Odors and smoke are not 

removed.

Clean the filters if they appear to be heavily soiled. (Refer to P.9)

Check if all the plastic bags that wrap the filters are being removed. (Refer to P.5)

The unit does not operate 

when cigarette smoke is 

in the air or when the air is 

highly polluted.

Check if the unit is installed in a location that is difficult for the sensors to detect the smoke or the air quality.

Check if the odor or dust sensor openings are blocked or clogged.  Clean the sensors (Refer to P.9)

The unit may not work properly in auto mode because the baseline or reference point is too high.  To reset 
the air quality baseline, unplug the unit and re-insert it in a well-ventilated area.

In auto mode, the unit 

operates at high speed 

even when the air is 

clean.

The sensitivity of the sensor becomes unstable when the sensor opening is blocked or clogged.  Clean the 
sensors (Refer to P.9).

Reset the air quality baseline, unplug the unit and re-insert it.

The filter replacement 

indicator light remains 

activated even after 

replacing filter.

After replacing filters, connect the power cord to an outlet and press the filter reset button on the main unit.

With the power on, press and hold the filter reset button for 3-5 seconds, or until the "red" filter cleaning or 
replacement indicator clears itself (Refer to P.10).

The negative ion mode 

indicator light is flashing.

Clean the negative ion generator inside the discharge outlet with a vacuum cleaner.

Summary of Contents for BioGP SPA-421A

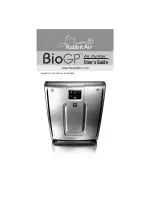
Page 1: ...User s Guide Model No SPA 421A and SPA 582A www RabbitAir com RabbitAir TM...

Page 2: ...reverse the plug If it still does not fit contact qualified personnel to install the proper outlet Do not alter the plug in any way TM To reduce the risk of electric shock do not touch the BioGP air p...

Page 3: ...ansporting the unit always hold the handle on the back of the unit Remote Control Limitations Do not use the remote control near inverter lighting equipment or electronic light fixtures Avoid leaving...

Page 4: ...usts smoke pollen animal dander and etc Washable charcoal based activated carbon filter Absorbs and removes common household odors VOCs chemical smells cigarette odor TM BioGP HEPA Filter Next Generat...

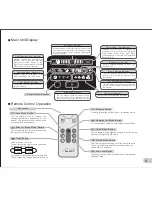
Page 5: ...ion when this indicator is on Filter Cleaning Indicator The filter cleaning indicator will illuminate when it is time to clean the filters and reset the indicator Filter Replacement Indicator The filt...

Page 6: ...dles should be facing the front panel Re insert the front panel back to the unit Press in the hooks on the bottom of the front panel into the unit You should hear a click sound if installed properly I...

Page 7: ...es will not be available by using just the unit control button Unit can operate by using either The remote control or main unit control button can activate the following modes Automatic mode Silent mo...

Page 8: ...lity is in normal condition The unit will operate at silent fan speed when the air quality level is normal or is below the baseline level Turbo Mode The air purifier operates at turbo fan speed for 10...

Page 9: ...button Negative Ion Mode Mode of Operation ATTENTION TM The BioGP Air Purifier produces millions of healthy negative ions to improve the air you breathe and freshen your indoor environment through the...

Page 10: ...y of the room Use a clean dry cloth to wipe the external surfaces of the air purifier Use a damp cloth to remove stubborn stains and dirt build up if necessary Do not use commercial cleaning agent as...

Page 11: ...night When the filter is completely dry place back into the air purifier If your pre filter appears to have dirt that has not been removed by vacuuming please follow the steps below to wash the pre fi...

Page 12: ...nformation on the BioGP HEPA filter replacement or to buy replacement filter please contact Rabbit Air Replacing the washable activated carbon filter Replacement indicator light will come on every 18...

Page 13: ...LL NOT BE LIABLE FOR INCIDENTAL OR CONSEQUENTIAL DAMAGES RESULTING FROM THE USE OF THIS PRODUCT OR ARISING OUT OF ANY BREACH OF THIS WARRANTY ALL EXPRESS AND IMPLIED WARRANTIES INCLUDING THE WARRANTIE...

Page 14: ...that is difficult for the sensors to detect the smoke or the air quality Check if the odor or dust sensor openings are blocked or clogged Clean the sensors Refer to P 9 The unit may not work properly...

Page 15: ...ors 8 Other 12 Where do you plan to use this Rabbit Air product Check all that apply 1 Living Room 2 Bedroom 3 Child s Room 4 Family Room 5 Kitchen 6 Office 7 Hallway 8 Bathroom 9 Home workshop area 1...

Page 16: ...old and seal with tape before mailing Do not staple With the information you provide we can confirm the date of purchase of your product This confirmation is of benefit to you especially if your origi...

Reviews: