background image


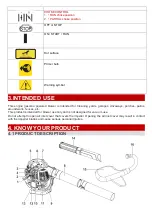
1)  Fuel cap  
2)  Primer bulb 
3)  Choke level  
4)  Air cleaner 
5)  Handle  
6)  Throttle trigger 

7)  ON/OFF switch  
8)  Air tube 
9)  Muffler  
10)  Spark plug 
11)  Lubricating oil cap  
12)  Starter rope grip 

13)  Lower handle  
14)  Vacuum tube 
15)  Bag  
16)  Curved tube 

 
4.2 TECHNICAL DATA                                                                              


Engine Type 

Air-Cooled, 4-STROKE 

Engine displacement                      

31cm³


Maximum engine capacity             

0.8 kW


Engine max speed 

7000/min 

Engine min speed                                 

3200+/-300 min

-1


Air speed 

205 km/h  

Air volume  

720 m

3

/h 

Fuel tank capacity                 

280 cm³ / 0.28 L 

Lubricating tank capacity     

60 cm³ / 0.06L 

Net weight (without fuel)                                       

5.7 kg 

Sound pressure level LpA                

90 dB(A), K=3.0dB(A) 

Guaranteed sound power level LwA   

105 dB(A) 

Measured sound power level LwA          

102,1 dB(A), K=3.0dB(A) 

Main handle ah                 

12,35 m/s

2


Aux. handle: ah                    

6,97m/s

2


Uncertainty K                                          

1.5 m/s² 


5. ASSEMBLY                                                                  


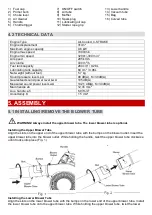
5.1 INSTALLING/REMOVE THE BLOWER TUBE 


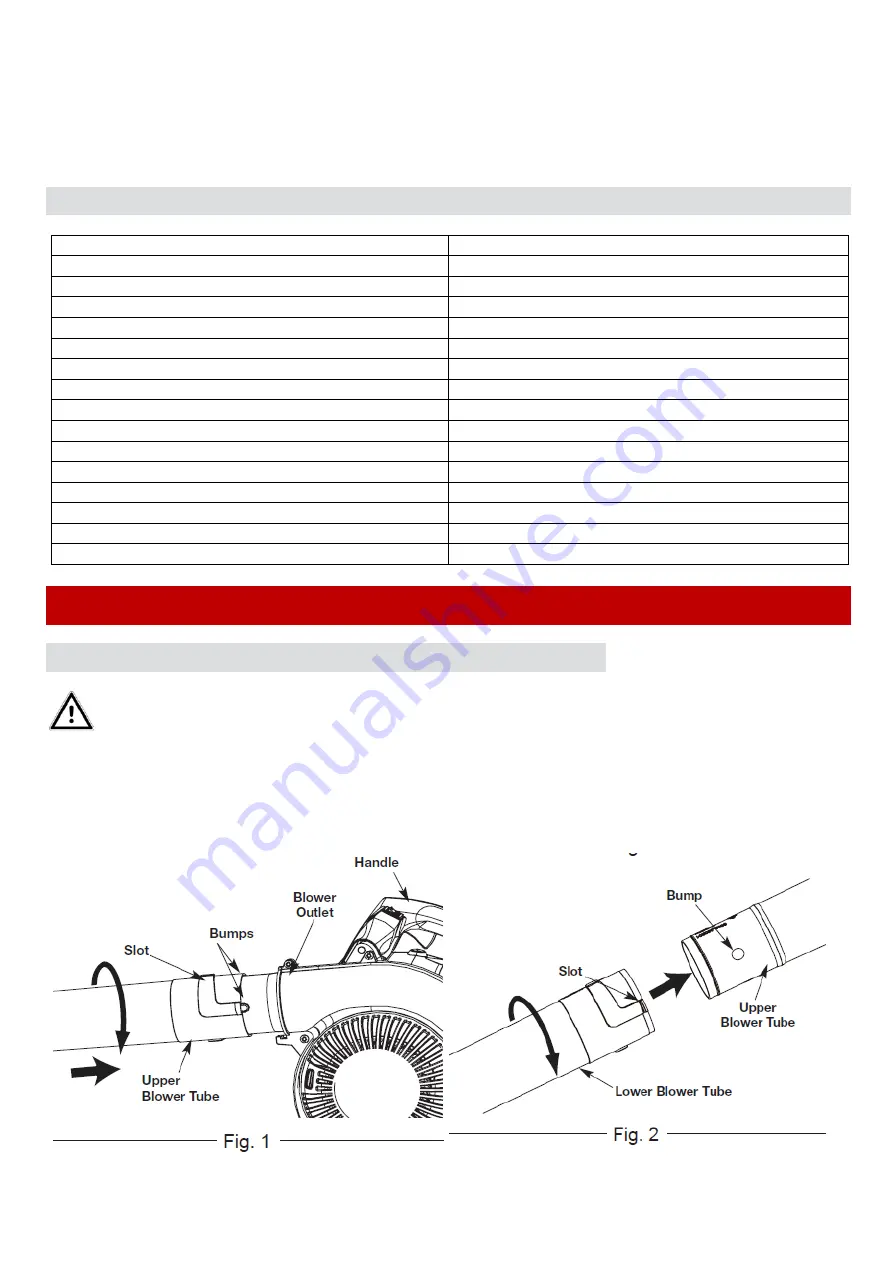
 WARNING! Always install the upper blower tube. The lower blower tube is optional.


Installing the Upper Blower Tube 

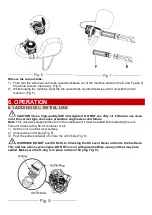
Align the slots on the upper end of the upper blower tube with the bumps on the blower outlet .Insert the 
upper blower tube into the blower outlet. While holding the handle, twist the upper blower tube clockwise 
until it locks into place (Fig. 1) 


Installing the Lower Blower Tube 

Align the slots on the lower blower tube with the bumps on the lower end of the upper blower tube. Install 
the lower blower tube onto the upper blower tube. While holding the upper blower tube, twist the lower 

Summary of Contents for RACASBT314T

Page 1: ...ORIGINAL INSTRUCTIONS EN 4 STROKE PETROL BLOWER VACUUM SHREDDER RACASBT314T USER GUIDE CAUTION Read the instructions before using the machine...

Page 2: ...S 3 2 EXPLANATION OF SYMBOLS 5 3 INTENDED USE 6 4 KNOW YOUR PRODUCT 6 5 ASSEMBLY 7 6 OPERATION 9 7 MAINTENANCE 11 8 TROUBLESHOOTING 12 9 DECLARATION OF CONFORMITY 13 10 WARRANTY 14 11 PRODUCT FAILURE...

Page 3: ...s away from the refuelling area before starting the machine Switch off the machine before any preparation installation or maintenance All machine screws should be properly seated and tightened securel...

Page 4: ...cool before refuelling Do not smoke Never refuel inside a room Never store the tool and the fuel tray indoors where there is a naked flame such as near a water heater If fuel has spilled do not attemp...

Page 5: ...read and understand operator s manual before using this product Keep all bystanders at least 15 m away Wear protective goggles Wear hearing protection Wear safety shoes Wear protective gloves Rotatin...

Page 6: ...ended for Cleaning yards garages driveways porches patios around walls fences etc This product is intended for blower use only and is not designed for vacuum use Do not attempt to open air inlet cover...

Page 7: ...nd power level LwA 105 dB A Measured sound power level LwA 102 1 dB A K 3 0dB A Main handle ah 12 35 m s2 Aux handle ah 6 97m s2 Uncertainty K 1 5 m s 5 ASSEMBLY 5 1 INSTALLING REMOVE THE BLOWER TUBE...

Page 8: ...Slotted end of tube B goes first through area A of bag See complete assembly picture in FIG 4 for the proper look Once the tube is in place tighten the Velcro strap 2 Align the slots in the curved tub...

Page 9: ...l of the correct type can cause premature engine wear and failure Note This unit was shipped without oil in the crankcase Oil must be added before starting the unit This unit comes with a 60 ml contai...

Page 10: ...he Full Choke position Fig 10 5 DO NOT squeeze the throttle control Crouch in the starting position Fig 11 6 DO NOT squeeze the throttle control Pull the starter rope with a controlled and steady moti...

Page 11: ...close to the ground After using blowers and other equipment CLEAN UP Dispose of debris in trash receptacles 6 4 HOLDING THE UNIT CAUTION Stand in the operating position Fig 12 Stand up straight Do not...

Page 12: ...isposal site See your local retailer for more information STORING THE PRODUCT Clean all foreign material from the product Store idle unit indoors in a dry well ventilated area that is inaccessible to...

Page 13: ...ational transposing it Also complies with the following European directives EMC Directive 2014 30 EU Emission directive EU 2016 1628 2017 656 EU Noise emission Directive 2000 14 EC and Directive 2005...

Page 14: ...ed in the user manual Due to our policy of continuous product improvement we reserve the right to alter or change specifications without notice Consequently the product may be different from the infor...

Page 15: ...is available before dropping off the machine Go to the repair station with the complete machine packed accompanied by the purchase invoice and the station support sheet downloadable after the service...

Page 16: ...uct during the time necessary for repairs and more generally the costs related to the immobilization of the product The costs of a second opinion established by a third party following an estimate by...

Page 17: ...BUILDER SAS 32 rue Aristide Berges Z I du Casque 31270 Cugnaux France MADE IN PRC 2022...

Page 18: ......

Reviews: