Note
The flash disc has to contain the FAT32 file system (the most common one at the time of
writting). Any other file system will be simply ignored by the RipEX. When in doubt, consult
your IT expert.
Once the RipEX recognizes a flash disc inserted into the USB interface, the status LED starts blinking
slowly, alternating red and green colors. That indicates the start of the upload/download of files. The
LED flashing may change during the process, the successful completion of the recording is indicated
by fast alternating green and red flashes (about 3 times per second). Note that it may take up to 10
minutes (when an FW upgrade is performed).
Warning
NEVER unplug the USB disc before the proper (fast) flashing of the status LED starts! You
may damage your disc otherwise.
Following a successful detection of a USB flash disc, the RipEX writes the tech-support package, log
files and the configuration text file to it. Then the README.txt file, which contains all the necessary
information on the structure and names of files and directories, is written into the root directory of the
disc. Please follow the detailed instructions in that file.
Note
Whenever an FW file (.cpio) is found in the root directory of the disc, the upgrade is executed
automatically, regardless of the version of the currently active FW. If more than one FW file
is found, the latest version is used. Remember to remove the FW files from the disk root
when you do not intend to perform an upgrade. The same principles apply to a configuration
update from the disc.
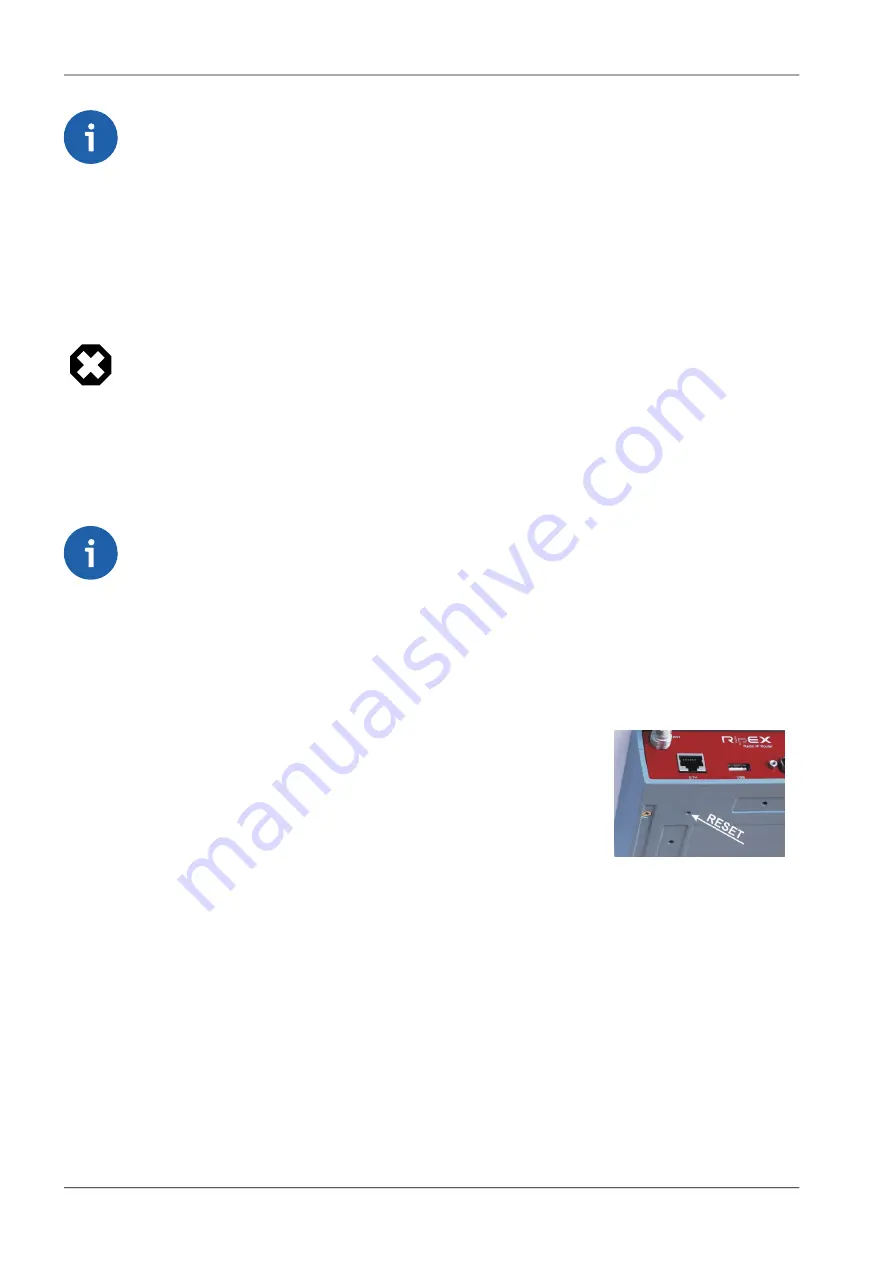
4.2.6. Reset button
Fig. 4.13: Reset button
RipEX’s bottom-side enclosure includes a reset button accessible through
an opening. When this button is pressed, the STATUS diode on the LED
panel goes dark (indicating that the button has been pressed). If you hold
the button for 5 seconds, the STATUS diode starts flashing slowly indicat-
ing that the reset is complete. If you continue to hold the button for 15 or
more seconds (the STATUS diode starts flashing quickly) and then release
it, you will reset the device’s access information to default:
192.168.169.169/24
ETH IP and Mask:
0.0.0.0
ETH Default GW:
Auto
ETH Speed:
Off
DHCP:
Off
ARP proxy & VLAN:
Off
Firewall:
Off
Hot Standby:
Deleted
Routing table:
Default (Web server=HTTP+HTTPS, CLI=SSH)
Management:
admin
Username:
RipEX Radio modem & Router – © RACOM s.r.o.
48
Product
Summary of Contents for RipEX 1.12.0
Page 2: ......
Page 172: ...RipEX Radio modem Router RACOM s r o 172 Safety environment licensing...
Page 173: ...173 RACOM s r o RipEX Radio modem Router Safety environment licensing...
Page 175: ...175 RACOM s r o RipEX Radio modem Router Safety environment licensing...
Page 176: ...RipEX Radio modem Router RACOM s r o 176 Safety environment licensing...
Page 186: ...186...
Page 187: ...Appendix C Revision History 187 RACOM s r o RipEX Radio modem Router Revision History...


