background image

 8 of 16   


     TC-1000 Radar Speed Sign Installation Manual MN0018 v21.01 


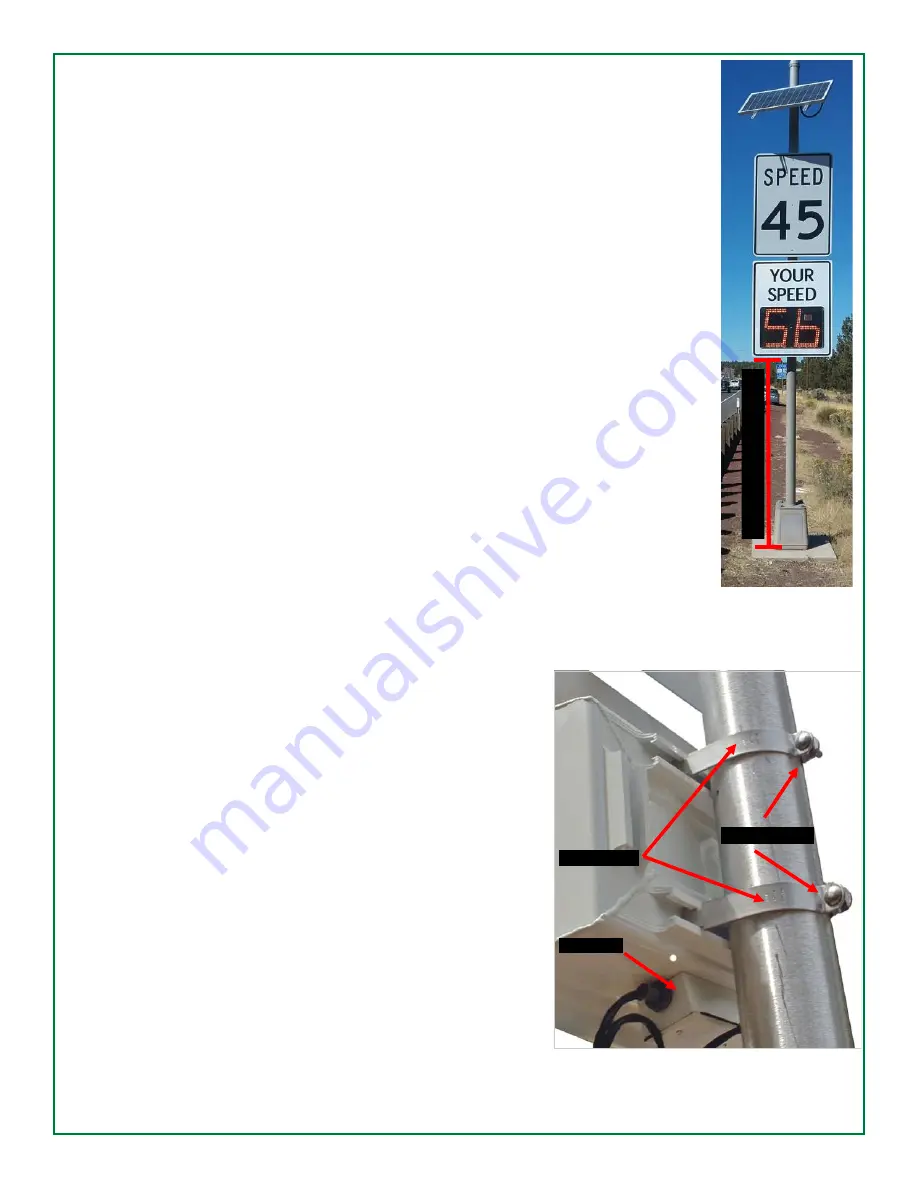
Installing and Positioning the Radar Speed Sign 

Once you have selected your pole, position the bottom of the sign at a height 7 to 10 feet 
from the ground.  Seven feet is a minimum for most city and county regulations for street signs. 
This will produce the most accurate readings from the radar in detecting on-coming vehicles.  


The sign and pole should always be placed on the same side of the road as on-coming traffic

.


Step 1:  Pole Installation 

Install the pole per manufacturer instructions.  


Step 2:  Mounting the Pole* onto the Base 


(*4.5”  round aluminum, purchased from Radarsign) 

• 

Place pole base on cement pad, aligned with bolts. 

• 

Use level to ensure pole base is level. 

• 

Add washers underneath base to level out if needed. 

• 

Attach pole cap to pole. 

• 

With two people, carefully screw pole into base. 

• 

Using pole grip, continue to tighten pole into base (usually 2-4 full rotations). 

• 

Optional pole grip available from Home Depot for about $25. 


Step 3A:  Mounting the Radar Speed Sign to a Round Pole 

• 

DO NOT attach the YOUR SPEED faceplate to the radar speed 
sign until it is mounted on the pole.  It will be much easier to mount 
the radar unit without the faceplate attached.   

• 

Mark pole with pencil or tape at the minimum height level for  
bottom of sign, usually 7 feet or 7.5 feet above street level.  With 
two people, attach the radar speed sign to the pole. This should be 
done at the 2-4 foot level first, or you may want to set the sign on 
top of a 4-foot or 6-foot ladder to help make the bracket mounting 
easier. 

• 

Slide the Unistrut pipe clamps into strut slots on the back of the  
housing.  One person should hold the sign while the second person 
slides the brackets into the strut slots on the rear of the sign and 
around the pole. 

• 

Loosely tighten clamps around the pole.  Slide the housing to the 
desired height on the pole.  

• 

Adjust the left/right direction of the sign on the pole, testing against 
oncoming vehicles in order to determine the optimum position prior 
to tightening the sign to the pole. This will be especially true on 
roads that are not relatively flat or straig

ht. 

Strut Slots 

7 f
t.–

 10 
ft.


Bell Box 

Nuts & Bolts 

Summary of Contents for TC-1000

Page 1: ...1 of 16 TC 1000 Radar Speed Sign Installation Manual MN0018 v21 01 TC 1000 Radar Speed Sign Installation Manual October 2020 2005 2021 Radarsign LLC All Rights Reserved...

Page 2: ...2 of 16 TC 1000 Radar Speed Sign Installation Manual MN0018 v21 01 THIS PAGE LEFT BLANK...

Page 3: ...Connections Solar Power Connections for the TC 1000S pg 12 13 A C Power Connections for the TC 1000A pg 14 Final Touches pg 15 Radar Speed Sign Settings pg 15 Customer Resource Center pg 15 Radarsign...

Page 4: ...ing and equipment To reduce the risk of burns or other acid related injury resulting from exploding batteries Always use the recommended charging systems with this product To reduce the risk associate...

Page 5: ...in a cool dry place Do not store the sign outside Do not store the sign in a horizontal position Storing the radar speed sign horizontally outside where it is exposed to the weather voids the warranty...

Page 6: ...solar panel is installed facing as close to South as possible solar models only The radar speed sign should be installed on the same side of the street as oncoming traffic If installed on the wrong s...

Page 7: ...support for the sign Please note that the solar models will need the larger stronger poles as there is nearly 4 square feet of surface on the sign itself plus an additional 4 square feet of surface fo...

Page 8: ...about 25 Step 3A Mounting the Radar Speed Sign to a Round Pole DO NOT attach the YOUR SPEED faceplate to the radar speed sign until it is mounted on the pole It will be much easier to mount the radar...

Page 9: ...Step 3B Mounting the Radar Speed Sign to a Square Pole or Post bolted method DO NOT attach the YOUR SPEED faceplate to the radar speed sign until it is mounted on the pole It will be much easier to mo...

Page 10: ...banding clamps Radarsign provides two banding clamps that will fit 3 4 diameter poles For larger or smaller poles customer must provide clamps Radarsign sells an Astro Bracket that will mount signs t...

Page 11: ...up pole to desired position with solar panel facing as close to south as possible and secure to pole The solar panel should be positioned to face south at a 45 angle Tighten all nuts on mounting brack...

Page 12: ...wer wires through conduit connector on the radar sign bell box 1 2 Twist conduit into junction box connector until secure 2 3 DO NOT CONNECT WIRING TO SIGN UNTIL STEP 7 4 Make conduit as straight as p...

Page 13: ...s If you do not do this your sign will operate only during the daytime using solar energy To Check Solar Panel Connection 1 Disconnect 4 prong loop connector a 2 Keep the 2 wire connector from the sol...

Page 14: ...onvenience 1 Locate the open outlet box at bottom of radar speed sign 2 Feed incoming AC power wires through conduit connection 3 Connect the exposed black black and green wires as shown below in Phot...

Page 15: ...The factory settings are Min Speed 20 Max Speed 55 Speed Limit 30 Using a Wi Fi browser set up sign with correct time and date then set initial parameters for sign operation See Operation Manual avai...

Page 16: ...tomer is responsible for inbound shipping Radarsign will pay for return shipping to the customer for the entire warranty period if customer is located within North America Customers from a country out...

Reviews: