background image

ATI Radeon™ HD 4800 Series User Manual 


38

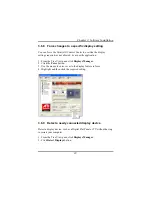
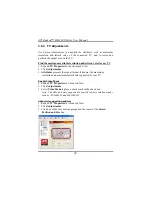
3.6.5  Change desktop size 

1.  Click 

Displays Manager

 in Advanced View. 

2.  Select a size from the 

Desktop Area

 drop-down menu. 


3.6.6  Change Color quality 

1.  Click 

Displays Manager

 in Advanced View. 

2.  Select the desired color setting from the 

Color Quality

 drop-down 

menu. 


3.6.7  Change display refresh rate 

1.  Click 

Displays Manager

 in Advanced View. 

2.  Choose a refresh rate from the

 Refresh Rate 

drop-down menu. 

Note: See your monitor manual for supported refresh rates. Setting a 
refresh rate higher than recommended by the monitor manufacturer 
could damage the monitor.  


Summary of Contents for HD 4800 CrossFire

Page 1: ...User Manual ...

Page 2: ......

Page 3: ......

Page 4: ...This Manual applies to the following VGAs HD485PG3 PCI Express XHD485XPG3 PCI Express HD487XTG5 PCI Express HD4870X2 PCI Express HD4870XG5 PCI Express HD 4800 Series CrossFire Edition ...

Page 5: ...nfigurations 22 CHAPTER 3 SOFTWARE INSTALLATION 23 3 1 Uninstall Old Graphics Drivers 24 3 2 Installing on Windows XP 25 3 3 Installing on Windows Vista 27 3 4 Displays Manager 32 3 5 Displays Manager Standard View 33 3 6 Displays Manager Advanced View 35 3 6 1 Enable Clone Mode 35 3 6 2 Enable Stretch Main Vertically 36 3 6 3 Enable Stretch Main Horizontally 36 3 6 4 Swap displays in Extended Mod...

Page 6: ...o set your TV output to PAL 50 3 9 Using the HDTV Features 51 3 9 1 Installing your ATI HDTV video cable 51 3 9 2 Using your ATI HDTV video cable 51 3 9 3 HDTV Support 52 3 9 4 Add an HDTV format 53 3 10 Color Desktop 56 3 11 ATI Overdrive optional 58 3 12 HDMI Video and Audio optional 61 APPENDIX A SPECIFICATIONS 62 A 1 Hardware Specifications 62 A 2 Programming Information 63 A 3 Resolution Tabl...

Page 7: ...y with more processing performance per watt and energy saving features to help save you money Features ATI Radeon HD 4850 HD 4870 GDDR3 GDDR5 memory 256 bit memory interface DirectX 10 1 24x custom filter anti aliasing CFAA and high performance anisotropic filtering ATI CrossFireX multi GPU support for highly scalable performance PCI Express 2 0 support Dynamic geometry acceleration Game physics p...

Page 8: ...ay movies or other HD content at full 1080p display resolution and beyond On chip HDCP On chip HDCP High Bandwidth Digital Content Protection makes life easier by allowing you to playback HDCP protected content HDMI Enjoy the latest audio technologies using HDMI with 7 1 digital surround sound support Also xvYCC support allows the user to enjoy a wider range of color when connected to a capable HD...

Page 9: ...y monitors or any other type of VGA monitor Digital flat panel DFP displays or digital CRT display ATI CrossFire Requirements To implement an ATI CrossFireX configuration using the ATI Radeon HD 4800 Series requires An ATI CrossFireX certified motherboard with two 2 PCI Express x16 slots and correct PCIe chipset driver A second ATI Radeon HD 4800 Series graphics card One ATI CrossFireX internal br...

Page 10: ... User Manual 4 Connections The following illustrates the connections on the ATI Radeon HD 4800 Series graphics card ATI Radeon HD 4800 Series Connections 1 DVI I Dual Link 2 S Video Connection 3 DVI I Dual Link HDMI compatible ...

Page 11: ...rocessor based or IBM 8514A type display cards the ATI Radeon HD 4800 series is 100 compatible with your DOS computer This means that all DOS software will run correctly with the ATI Radeon HD 4800 series VGA without modification The VGA compatibility includes backward compatibility with the EGA CGA and MDA standards All DOS software will include drivers for at least one of these display types and...

Page 12: ...K Hz 57K Hz or 64K Hz These correspond to a maximum resolution of 1024 x 768 60 Hz refresh 1024 x768 72 Hz refresh rate and 1280x1024 60 Hz refresh rate respectively By default the ATI Radeon HD 4800 series will drive your monitor at a screen refresh rate of 60 Hz In other words it repaints the screen 60 times per second If the screen is not displayed properly when you boot your system your monito...

Page 13: ...a monitor or printer Unplug the power cord Remove the cover 2 Remove the current graphics card If there is a graphics card currently in the computer use the following guidelines to remove it Detach any cables which are attached to the current graphics card and remove the bracket screw locking the card down Check and release any PCI Express retainer mechanism before removing the display adapter car...

Page 14: ... PCI Express socket on the motherboard and gently insert it into place Make sure that the card is pressed evenly and completely into the socket Fasten the card with the bracket screw Note Use the figure above to help locate the PCI Express PCIe socket on your motherboard The exact configuration of the components on your motherboard may differ from the figure Look for a single smaller socket betwee...

Page 15: ... 2 3 Board Layout HD485PG3 Note Specialized PCI Express 500 watt or greater power supply recommended A 550 watt or greater power supply is required for CrossFire Use power supply 6 pin cable note power supply cable is 6 wire not 3 wire ...

Page 16: ...r Manual 10 XHD485XPG3 Note Specialized PCI Express 500 watt or greater power supply recommended A 550 watt or greater power supply is required for CrossFire Use power supply 6 pin cable note power supply cable is 6 wire not 3 wire ...

Page 17: ... connector 2 should be connected to power supply unit simultaneously Specialized PCI Express 550 watt or greater power supply recommended A 600 watt or greater power supply is required for CrossFire Use power supply 6 pin cable note power supply cable is 6 wire not 3 wire ...

Page 18: ...P965 P35 X38 and X48 motherboard Note Power connector 1 and connector 2 should be connected to power supply unit simultaneously Specialized PCI Express 600 watt or greater power supply recommended A 900 watt or greater power supply is required for CrossFire Use power supply 6 pin cable note power supply cable is 6 wire not 3 wire ...

Page 19: ... HD4870X2 D13 and D14 Identify the EXT_12V connector for inserting Power cable D15 Identify the thermal FAN failure D5 and D7 VDDC of GPU 1 and GPU 2 core voltage failure When the graphic card works normally the five LED don t light up ...

Page 20: ...and connector 2 should be connected to power supply unit simultaneously Specialized PCI Express 550 watt or greater power supply recommended A 600 watt or greater power supply is required for CrossFire Use power supply 6 pin cable note power supply cable is 6 wire not 3 wire ...

Page 21: ...onnectors is recommended for single ATI Radeon HD 4870 series product ATI Radeon HD 4870 series CrossFire configuration dual graphics card system requires 600 Watt capacity power supply with 38A on 12V rail CrossFire requires a power supply with four 6 pin PCI Express power connectors HD4870X2 Power supplies with 600 Watt capacity 30A current on 12V rail and one 6 pin and one 8 pin PCI Express pow...

Page 22: ...ctionality CrossFire configurations require a CrossFire compliant motherboard which includes two physical x16 PCI Express slot interfaces 2 4 1 Additional Power Connection Requirements Note use power supply 6 pin cable note power supply cable is 6 wire not 3 wire 1 The ATI Radeon HD 4800 series must be connected to the computer s power supply ...

Page 23: ...to the power supply connector 5 After locating the PCI Express slot and if necessary removing the metal cover Align your ATI Graphics Accelerator card with the PCI Express slot Press it in firmly until the card is fully seated 6 Replace the screw to fasten the card in place and replace the computer cover 7 Plug the monitor cable into your card 8 Turn on the computer and monitor ...

Page 24: ...r the following Y Green Pb Blue Pr Red ATI HDTV Cable Optional n ATI HDTV Video Output Cable o Backplate of the ATI Graphics Card p Male RCA Patch Cable available from consumer electronics dealer q Typical HDTV Video Input Connections Note Input and output cables lengths should not exceed 50 feet 15m ...

Page 25: ...Chapter 2 Hardware Installation 19 Connecting your DVI to HDMI dongle optional ...

Page 26: ...your monitors The ATI Radeon HD 4800 series provides support for two DVI I monitors or two VGA monitors using the supplied DVI I to VGA adapter A television can also be used to expand your desktop by using the S Video connector Plug the monitor cable into your card if you are running multiple monitors connect their cables to the appropriate connectors then turn on the computer and monitor s To con...

Page 27: ...Chapter 2 Hardware Installation 21 ...

Page 28: ...he ATI Radeon HD 4800 Series supplies both audio and video signals to the bottom port on the HDMI DTV CRT display HDTV DVI I connector with DVI I to VGA adapter S Video out to HDTV YPrPb cable DFP display TV DVI I connector S Video out cable DFP display HDTV DVI I connector S Video Out to HDTV YPrPb cable CRT display DFP display DVI I connector with DVI I to VGA adapter DVI I connector CRT display...

Page 29: ...solutions for software applications The card supports resolutions up to 2048x1536 and color depths of up to 32 bits per pixel Higher graphics resolutions and higher color depths provide greater clarity and detail when using the supplied drivers for graphics programs Notes Please uninstall any existing video drivers that could possibly create a conflict before attempting to install this display car...

Page 30: ... graphics card has any additional software installed it may also need to be removed at this point For example DVD Player or Multimedia applications 4 Shutdown your system after the drivers have been removed Windows Vista Uninstall old graphics drivers 1 With your current graphics card still in your computer close all open applications 2 From the Windows desktop click Start then select Control Pane...

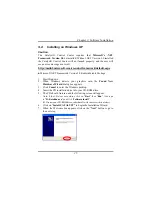
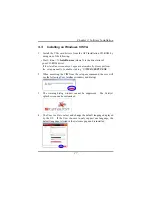
Page 31: ...butable Package 1 Start Windows 2 When Windows detects your graphics card the Found New Hardware Wizard dialog box appears 3 Click Cancel to enter the Windows desktop 4 Insert the CD installation disc into your CD ROM drive 5 The CD should Autorun and the following screen will appear Note if the CD does not autorun click on Start then Run then type in D AutoRun exe and click Software Install If D ...

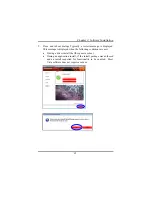
Page 32: ...ialog box appears Click on Yes button 9 The Select Components dialog box appears Click on Express button 10 When the Windows SETUP has completed copying the files to the computer Windows will prompt you to restart Click the Yes option and then click the Finish button ...

Page 33: ...ly please perform the setup manually by double clicking X VISTA SETUP EXE 2 When executing the CIM from the setup exe command the user will see the following User Interface windows and dialogs 3 The warning dialog window cannot be suppressed The Catalyst splash screen can be customized 4 The User is able to select and change the default language displayed by the UI If the User chooses to only supp...

Page 34: ...clean system the Installer welcome screens allow the user to select the install method Selecting Express and then next the UI and CIM will select and install the best set of software for the detected hardware Selecting Express the user will be prompted to select the software packages to install Once the install method is selected the Detection phase commences During this phase the CIM is gathering...

Page 35: ...nse Agreement EULA Once this has been approved the install will commence During an express install the user must first select the packages to install and potentially select the source location The install components progress window displays both the overall progress of the entire process and the install of each package lower progress bar ...

Page 36: ...rs system The CIM is required as it is the central software suite that manages the install uninstall and update of the package packages installed 8 Final status Once the install process is complete the Finished page will show the status of the install The page will display one of the following For a successful install there is a green checkmark in the actions window The Log file details informatio...

Page 37: ...s displayed This message is displayed when the following conditions are met During a driver install the OS request a reboot During an application install if the install package was authored and an install requested for functionality to be enabled Most Vista software does not require a reboot ...

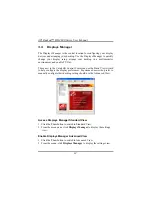
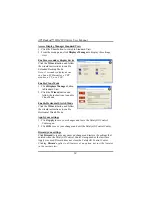
Page 38: ...he Catalyst Control Center can use the Basic View wizard to help configure the display preferences Experienced users who prefer to manually configure their desktop setting should use the Advanced View Access Displays Manager Standard View 1 Click the View button to switch to Standard View 2 From the menu pane click Displays Manager to display the settings view Enable Displays Manager Advanced View...

Page 39: ...for connected display devices you can Right click the Windows desktop and click ATI CATALYST Control Center The ATI CATALYST Control Center dialog box appears Use Displays Manager Standard View to set your desktop resolution arrange your displays or use the wizard to help you configure your display s ...

Page 40: ... the Wizard button and follow the instructions to enable Clone Mode Enable Horizontal Stretch Mode Click the Wizard button and follow the wizard instructions to enable Horizontal Stretch Mode Apply your settings 1 Click Apply to save your changes and leave the Catalyst Control Center open 2 Click OK to save your changes and exit the Catalyst Control Center Discard your settings Click Discard to ig...

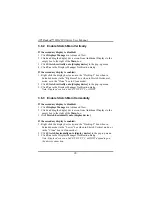
Page 41: ...k Displays Manager in Advanced View 2 Click and drag the display device icon in Additional Displays to the empty box to the right of the Main box 3 Click Clone Main with display device in the pop up menu If the secondary display is enabled 1 Right click the display device icon in the Desktop 2 box when in Extended mode in the Rightmost box when in Stretch Horizontal mode or in the Lower box in Str...

Page 42: ... onto display device in the pop up menu 3 Click Yes in the Displays Manager Notification dialog Note Display device can be CRT DFP TV or HDTV 3 6 3 Enable Stretch Main Horizontally If the secondary display is disabled 1 Click Displays Manager in Advanced View 2 Click and drag the display device icon from Additional Displays to the empty box to the right of the Main box 3 Click Stretch horizontally...

Page 43: ...ors 1 Click Displays Manager in Advanced View 2 Right click any Desktop icon 3 Select Swap displays 4 Click either Maintain per display mode settings or Swap displays order only Note Swap displays order only swaps displays while maintaining the existing display settings Maintain per display mode settings swaps displays and display settings ...

Page 44: ...isplays Manager in Advanced View 2 Select the desired color setting from the Color Quality drop down menu 3 6 7 Change display refresh rate 1 Click Displays Manager in Advanced View 2 Choose a refresh rate from the Refresh Rate drop down menu Note See your monitor manual for supported refresh rates Setting a refresh rate higher than recommended by the monitor manufacturer could damage the monitor ...

Page 45: ... 1 From the Tree View pane click Displays Manager 2 Click the Force button 3 Use the mouse to cursor over to the display feature to force 4 Highlight and then click the required setting 3 6 9 Detect a newly connected display device Detect a display device such as a Digital Flat Panel or TV without having to restart your computer 1 From the Tree View pane click Displays Manager 2 Click Detect Displ...

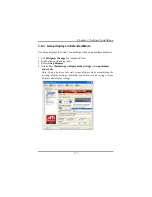
Page 46: ...he limitations of the monitor itself the resolution cannot be set above 1024x768 and the refresh rate cannot be set above 60 Hz However the PC monitor in such a configuration may have its refresh rate and resolution set much higher To configure settings for Display 1 or Display 2 on your Settings panel click the right mouse button on either of the monitor icons to display a list of Settings option...

Page 47: ...e has a default refresh rate that is lower than optimal Choose one of the Display Detection Options to prevent screen flicker when detecting a display If you are using an older TV or one that has non standard inputs that may not be automatically detected use Force TV Detection Such a TV once detected will appear in Displays Manager and can be configured as required However some features that rely ...

Page 48: ...Display Options in Advanced View 2 Select the desired refresh rate from the 3D Refresh Rate Override drop down menu Determine how display devices are detected Use this feature to determine how the Catalyst Control Center detects display devices connected to your computer You can set the Catalyst Control Center to automatically detect all connected display devices when it is opened or you can manua...

Page 49: ...uch as extended desktop will not be supported 1 Click Display Options in Advanced View 2 Click Force TV detection Note This option is not available if the installed graphics card does not support TV Out Set resolution modes for devices with limited resolution capabilities 1 Click Display Options in Advanced View 2 Select one of the following from the For displays of limited resolution capabilities...

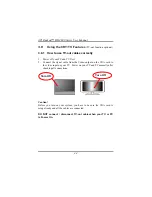
Page 50: ...t 2 Connect the signal cable from the Video output on the VGA card to the video input on your TV Power on your TV and PC normally after checking all connections Caution Before you turn on your system you have to be sure the VGA card is setup already and all the cables are connected DO NOT connect disconnect TV out cable when your TV or PC is Power On Turn Off Turn Off ...

Page 51: ...puter s display it is recommended that you disable TV display for optimal performance higher refresh rates You can re enable TV display at a later date Supported TV Display TV out resolutions are 640x480 60Hz 800x600 60Hz and 1024x768 60Hz for NTSC Supported TV Display TV out resolutions are 640x480 50Hz 800x600 50Hz and 1024x768 50Hz for PAL Low resolution modes are not selectable in Windows Thes...

Page 52: ... to the right of the Main box 3 Click Clone Main with TV in the pop up menu If the secondary display is enabled 1 Right click the display device icon in the Desktop 2 box when in Extended mode in the Rightmost box when in Stretch Horizontal mode or in the Lower box in Stretch Vertical mode 2 Click Clone Main with TV 3 Click Yes to the Displays Manager Notification dialog Note Display device can be...

Page 53: ... Color Adjustments Formats Use Image Quality to adjust the contrast saturation and flicker of your screen Use Color to adjust Hue Saturation and Temperature Note This feature is supported by specific high end ATI graphics cards only Use Screen Adjustment to set the video mode enable overscan and change the position and size of the screen Use Formats to determine how the TV signal is to be detected...

Page 54: ...Adjustments 3 Attributes presents the signal format if known the maximum resolution and maximum refresh rate supported by your TV Enable Video Mode 1 Expand TV Properties in Advanced View 2 Click Adjustments 3 Select Video Mode to place a check mark in the check box Note Video Mode is only supported in specific lower resolution modes such as 720x480x16 and 640x480x32 Adjust screen position and siz...

Page 55: ...determine how the TV signal is detected Select TV format determined by country or region 1 Expand TV Properties in Advanced View 2 Click Format 3 Click Select by country region 4 Select country or region from the Country Region drop down menu 5 Click OK or Apply to save the changes you have made ...

Page 56: ...ignal format 1 Expand TV Properties in Advanced View 2 Click Format 3 Click Select by signal format 4 Select a TV format from the Signal format drop down menu 6 For PAL TV systems please select Signal format then change the Format to PAL 7 Click OK or Apply to save the changes you have made ...

Page 57: ...DTV video cable 1 Turn on your component input device and set it to YPbPr input 2 Turn on your computer Note Your TV will not display anything until Windows starts This can take several minutes 3 9 2 Using Your ATI HDTV Video Cable Use the HDTV Video Cable to watch DVD movies and play video games on your High Definition Television For maximum performance when you watch DVD movies or play computer ...

Page 58: ...lete EDID Selecting one or both of the HDTV modes adds them to the Force button located in the Displays Manager when the associated display is selected If you have a CRT and DFP device and want both to support HDTV you must go to both HDTV Support pages and select both Add 720p and Add 1080i check boxes Note Forcing a display mode that exceeds its EDID limits may result in permanent damage to your...

Page 59: ...TV formats supported by the digital panel s EDID If the list is empty then no HDTV formats are natively supported 1 Expand Digital Panel Properties in Advanced View 2 Click HDTV Support 3 Select either 720p or 1080i in HDTV modes supported by this display 4 Click Apply 5 Select 1080i standard 1920x1080 30Hz click Apply Format button Over Scan occurs ...

Page 60: ...overlaid on the screen Use these arrows to increase or decrease the width and height of the rectangle until the blue background is just visible 8 Click Maintain aspect ratio to maintain the ratio between width and height while making adjustments 9 Click Accept button 10 Click OK in the HDTV Format warning message box ...

Page 61: ...ormat to the Predefined and custom HDTV Formats list and the Displays Manager mode list then close this windows Note The format to be added must be based on one of the standard timing formats 720p or 1080i 12 Restart CATALYST Control Center click Apply Format Over Scan diminished ...

Page 62: ...t control Adjust Color Gamma 1 Click Color in Advanced View 2 Click and drag the Control slider to your preferred setting To increase the Gamma move the slider to the right To decrease the Gamma move the slider to the left Optionally click the up and down arrow buttons of the adjustment box Note Click the Reset button to cancel any adjustments made Note The preview image automatically displays the...

Page 63: ...he Reset button to cancel any adjustments made Note The preview image automatically displays the adjustment you have made Adjust Color Contrast 1 Click Color in Advanced View 2 Click and drag the Control slider to your preferred setting To increase the Contrast move the slider to the right To decrease the Contrast move the slider to the left Optionally click the up and down arrow buttons in the ad...

Page 64: ...Overdrive will never reduce the graphics processor speed below the default clock speed Use the Automated clock configuration utility to obtain the ATI recommended the ATI Overdrive speeds for the graphics processor clock and video memory clock Alternatively manually set these speeds to meet your specific requirements Finally the ATI Overdrive can be configured to run when the computer is booted or...

Page 65: ... when the clock configuration utility has finished click the Apply button in the utility s confirmation dialog Change the graphics processor clock speed 1 From the menu pane click ATI Overdrive 2 Move the Graphics Processor Clock slider to the desired setting Note The upper limit is the highest speed that can be safely set for your specific graphics card The lower limit is the hardware default spe...

Page 66: ...ot the computer the clock speeds are returned to the factory default settings To save your new setting enable one of the Options available at the bottom right of the ATI Overdrive window Enable ATI Overdrive for 3D application ATI Overdrive can be enabled automatically whenever a 3D application is opened 1 From the menu pane click ATI Overdrive 2 Click Enable ATI Overdrive for 3D applications only...

Page 67: ... audio device So the HD audio device of ATI Radeon HD 4800 series will become the default audio device in the system To change the default audio device back to the original audio device please follow below steps 1 Please enter the Control Panel of Windows 2 Double click the Sounds and Audio Devices option of the Control Panel 3 Click the Audio tab in Sounds and Audio Devices Properties 4 Choose th...

Page 68: ...PCI Express bus HD4870XG5 x16 PCI Express bus Video Connector S video connector LCD standard 24 pin DVI Digital Video Interface Graphics Accelerator HD485PG3 for ATI Radeon HD 4850 XHD485XPG3 for ATI Radeon HD 4850 HD487XTG5 for ATI Radeon HD 4870 HD4870X2 for ATI Radeon HD 4870 HD4870XG5 for ATI Radeon HD 4870 Display Memory HD485PG3 use 512MB DDR3 DRAM XHD485XPG3 use 512MB 1GB 2GB DDR3 DRAM HD48...

Page 69: ...SIZE 640x480 8bpp 16bpp 32bpp 512MB 1GB 2GB 800x600 8bpp 16bpp 32bpp 512MB 1GB 2GB 1024x768 8bpp 16bpp 32bpp 512MB 1GB 2GB 1152x864 8bpp 16bpp 32bpp 512MB 1GB 2GB 1280x1024 8bpp 16bpp 32bpp 512MB 1GB 2GB 1600x1200 8bpp 16bpp 32bpp 512MB 1GB 2GB 1920x1080 8bpp 16bpp 32bpp 512MB 1GB 2GB 1920x1200 8bpp 16bpp 32bpp 512MB 1GB 2GB 1920x1440 8bpp 16bpp 32bpp 512MB 1GB 2GB 2048x1536 8bpp 16bpp 32bpp 512MB...

Page 70: ...MB 1GB 2GB 1280x1024 8bpp 16bpp 32bpp 512MB 1GB 2GB 1600x1200 8bpp 16bpp 32bpp 512MB 1GB 2GB 1792x1344 8bpp 16bpp 32bpp 512MB 1GB 2GB 1800x1440 8bpp 16bpp 32bpp 512MB 1GB 2GB 1856x1392 8bpp 16bpp 32bpp 512MB 1GB 2GB 1920x1080 8bpp 16bpp 32bpp 512MB 1GB 2GB 1920x1200 8bpp 16bpp 32bpp 512MB 1GB 2GB 1920x1440 8bpp 16bpp 32bpp 512MB 1GB 2GB 2048x1536 8bpp 16bpp 32bpp 512MB 1GB 2GB 2560x1600 8bpp 16bpp...

Page 71: ......

Page 72: ......

Page 73: ... drivers and software 74 6 4 Dual ATI Radeon HD 4800 CrossFireX setup 75 6 5 Connecting devices for ATI Radeon HD 4800 CrossFireX 76 6 6 Graphics cards with different amounts of memory 77 6 7 Card Reversal Recommend 77 CHAPTER 7 SOFTWARE INSTALLATION 78 7 1 Installing on Windows XP 78 7 2 Displays Manager Advanced View 79 7 3 Component Video Properties 80 7 4 Digital Panel Properties 82 7 5 CrossF...

Page 74: ......

Page 75: ...to meet the hard core demands of your alternate reality New ATI Radeon HD 4800 graphics cards are designed with an internal ATI CrossFireX Bridge Interconnect system to simplify installation Experience stunning visual realism in today s demanding 3D games with uncompromising image quality especially on HD displays ATI CrossFireX Multiply and Conquer A complete ATI CrossFireX system includes ATI Ra...

Page 76: ...ady Monitor High resolution MultiSync or multi frequency monitors or any other type of VGA monitor Digital flat panel DFP displays or digital CRT display ATI CrossFire Requirements To implement an ATI CrossFireX configuration using the ATI Radeon HD 4800 Series requires An ATI CrossFireX certified motherboard with two 2 PCI Express x16 slots and correct PCIe chipset driver A second ATI Radeon HD 4...

Page 77: ...llation 71 graphics card with a peak dissipation above 150 watts External Connections The following connection types are available on the baseplate of your ATI Radeon HD 4800 CrossFireX Edition DVI I CrossFireX Edge connectors ...

Page 78: ...ress power connectors is recommended for single ATI Radeon HD 4870 series product ATI Radeon HD 4870 series CrossFire configuration dual graphics card system requires 600 Watt capacity power supply with 38A on 12V rail CrossFire requires a power supply with four 6 pin PCI Express power connectors HD4870X2 Power supplies with 600 Watt capacity 30A current on 12V rail and one 6 pin and one 8 pin PCI...

Page 79: ...s slot interfaces 6 2 1 Additional Power Connection Requirements Note Use power supply 6 pin cable note power supply cable is 6 wire not 3 wire 1 The ATI Radeon HD 4870X2 series must be connected to the computer s power supply 2 Locate the power connections on the ATI Radeon HD 4870X2 Series graphics card as shown in the following illustration 3 Connect one 2x3 pin and one 2x4 pin PCIe power conne...

Page 80: ...l previous drivers With your current graphics card still in your computer 1 Close all applications that are currently running 2 Navigate to the Windows Control Panel and click or double click Add Remove Programs 3 If your old graphics card is an ATI product select the ATI Control Panel and click the Add Remove or Change Remove button Do this before removing the display drivers Note If your previou...

Page 81: ...ge interconnect flex cable that connects the two CrossFireX cards can enable CrossFireX In a multiple card configuration the two ATI Radeon HD 4800 cards will be identical Either card can operate as the Master or Slave card this will be set by the driver Note that in CrossFireX mode only one display is enabled ...

Page 82: ...reX The following illustration shows how to connect the ATI CrossFireX graphics cards With CrossFireX enabled the system will support two display device Other display devices will automatically be disabled in favor of the CrossFireX display LCD monitor should be connected to one of DVI ports of graphic card which is plugged in primary PCIe slot of motherboard ...

Page 83: ... OK to the memory mismatch error message will restart your computer Note When disabling CrossFireX you will be given the option to restart your computer to restore the original graphics memory size or continue with the reduced memory size 6 7 Card Reversal Recommend A recommendation message to reverse the graphics card positions may appear if the master graphics card is not installed into the prim...

Page 84: ... Click Cancel to enter the Windows desktop 4 Insert the CD installation disc into your CD ROM drive 5 The CD should Autorun and the following screen will appear Note if the CD does not autorun click on Start then Run then type in D AutoRun exe and click Software Install If D is not your CD ROM drive substitute D with the correct drive letter 6 Click on Install CATALYST to begin the Installation Wi...

Page 85: ...splays Manager in Advanced View 2 Click and drag the display device icon in Additional Displays to the empty box to the right of the Main box 3 Click Clone Main with display device in the pop up menu If the secondary display is enabled 1 Right click the display device icon in the Desktop 2 box when in Extended mode in the Rightmost box when in Stretch Horizontal mode or in the Lower box in Stretch...

Page 86: ...onent Video Properties aspect of the Catalyst Control Center adds further support when using the ATI HDTV Component Video Adapter Component Video Properties is made up of Formats Adjustments To access the Component Video Properties aspect Select Component Video Properties in Advanced View ...

Page 87: ...Chapter 7 Software Installation 81 Use the scaling values instead of the customized settings when the desktop resolution does not match your DFP resolution ...

Page 88: ...on containing information about the capabilities of the display about your connected HDTV display to the Force button in Displays Manager Note Catalyst Control Center loads aspects dynamically based on what device is attached to the graphics card If you have standard display device such as a CRT monitor or flat panel display Monitor Properties will appear instead of Digital Panel Properties The la...

Page 89: ... paired with any standard ATI Radeon HD 4800 based graphics card An interconnect cable supplied with the CrossFireX Edition graphics card connecting the two cards to a single monitor It is recommended that Catalyst A I be enabled in order to automatically select the preferred rendering mode for target applications For applications that are not identified in Catalyst A I or when Catalyst A I is dis...

Page 90: ...w Enable CrossFireX 1 Click CrossFireX in Advanced View 2 Click Enable CrossFireX When CrossFireX is successfully enabled all display devices except the one used by CrossFireX will be disabled Note CrossFireX Higher Quality anti aliasing can be adjusted in the Catalyst Control Center 3D settings aspect ...

Page 91: ...f the same brand family Thus a ATI Radeon HD 4800 CrossFire Edition can be used as the Master graphics card with any ATI Radeon HD 4800 product 3 What motherboard is required for a CrossFire system AMD 790FX AMD 790X Intel X48 Intel X38 Intel 975X Intel P965 and P35 based dual slot motherboards are supported platforms 4 When will CrossFire Ready motherboards be available CrossFire Xpress 3200 and ...

Page 92: ...red image from the Master graphics card The result is a complete frame rendered at up to twice the performance of a single graphics card 8 How are the graphics cards connected on a CrossFire system The two cards are connection by an external cable The cable is attached from the Slave graphics card s DVI I connection to the CrossFire Edition s VHDCI connection which is used to convey information fr...

Page 93: ...pears in Catalyst Control Center To access and enable CrossFire in Catalyst Control Center do the following Click CrossFire in Advanced View Then select Enable CrossFire When CrossFire is successfully enabled all display devices except the one used by CrossFire will be disabled Multiple monitors displays that are disabled when CrossFire is enabled reappear after CrossFire is disabled 11 Is a drive...

Page 94: ...ering mode to use based on the application or game being used The default rendering mode is dependant on both the hardware configuration and the application being run typically it will be either Scissor or SuperTiling mode If Catalyst A I is not enabled any Direct 3D applications that are running on a system based on graphics cards with 16 pipeline graphics processors will use SuperTiling Mode 14 ...

Reviews: