Tone Arm/Turntable Setup
Since Radial Audio does not manufacture a matching turntable for the Stealth One arm, these setup
examples present general approaches to the “unknown” partner.
It would be best to start the process on a quiet day, allocated for just this activity. This is an iterative
process, as the best alignment position of the tone arm on the turntable in try and retry.
Having done the setup and alignment on various turntables capable of hosting the Stealth One (but not
all), what follows are some techniques that you can evaluate and adapt to your turntable.
all), what follows are some techniques that you can evaluate and adapt to your turntable.
Since most turntable arm mounting boards are intended for a pivoted arm, there may already be a pre-
drilled hole where a pivoted arm would be fastened. Ignore the hole.
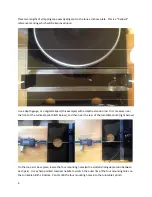
Review the turntable’s physical design to find a straight surface that can be used as a 90 degree
reference from the center spindle. The best reference would be a plinth cast with a straight body on the
turntable’s right-hand side. Failing that, then look for a straight surface on the exterior of the
turntable’s frame. Right side is best, but it’s possible to extrapolate a 90 degree line from a straight
front or rear turntable frame.
Turntables that are “organic” in design may still be conquered, but with more ingenuity required. If the
turntable resembles an unidentified flying object, it might be best to opt for a more standard design.
The only absolute requirement is that the mounting surface for the tone arm be flat, and parallel to the
turntable’s platter surface. The mounting surface should be continuous, not a ledge where the tone arm
turntable’s platter surface. The mounting surface should be continuous, not a ledge where the tone arm
would extend out without support below.
Setup Overview: (General Objectives 1 to 5):
1.
Setup tone arm base plate parallel to an imaginary line emanating from the turntable’s center
spindle outward to the edge of the turntable platter.
2.
Mount cartridge in wand and adjust stylus overhang.
3.
Setup tone arm and tone arm base at a vertical height where the wand and cartridge is parallel
to the platter surface.
4.
Setup tone arm displacement to the front of the platter so that cuing (dropping the stylus under
control of the lift/lower motor) results in the stylus making contact within the lead-in groove
area, safely inside the 12” vinyl record perimeter (lip).
5.
NOTE: Objectives 3 and 4 can be done together in multiple iterations, gradually achieving the
end result. They are explained separately for clarity.
3
end result. They are explained separately for clarity.


